
Complete Tutorial to Use VPNa to Fake GPS Location On Nokia C32 | Dr.fone
Complete Tutorial to Use VPNa to Fake GPS Location On Nokia C32
In the present day, there’s barely any webpage or app that may not require your Geological location. This has been a major strategy of the site/app owners to push only the content that is relevant to your needs or may interest you. Therefore, every other webpage or app first fetches your Geological location and then behave accordingly.
For instance, there are several apps that only work in the US and not outside of it. But there is workaround for it too. You can actually make the app “think” that your Geological location is somewhere in US currently, instead of where you actually are. You can achieve this with a powerful vpna fake gps location apk. You may now wonder, hot to set it up and make use of it. So, without much delay, let’s now understand step by step tutorial on vpna fake gps location.
Part 1. About VPNa
Before we move any further with the tutorial, it is vital to understand what vpna fake gps location apk is! Just a small halt, though. But it’s worth the time. Out of the several apps available for your mobile devices to spoof your GPS location, VPNa fake gps apk is certainly the safest bet.
It is a known fact that your simply cannot alter the actual GPS location of your device but yes there is little workaround (a function) in Android that is utilized to test the GPS locations settings. And it is how VPNa fake gps location apk spoofs your device location with any preferred location on the face of the Earth. It makes use of “Enable Mock Locations” feature in the “Developer Settings” of your Nokia C32. Be it London, New York, Paris or Rome or any other location. Eventually, hiding your identity and furnishing you with absolute anonymity and online privacy.
Here are some of the main highlights of the VPNa fake gps location apk:
- First and foremost, you do not actually need to root your device to make use of this app.
- You can play prank with your friends by spoofing your location and making them believe that you’re travelling out of the country.
- Extremely user friendly app. Simply, look up for the desired fake location and hit Start.
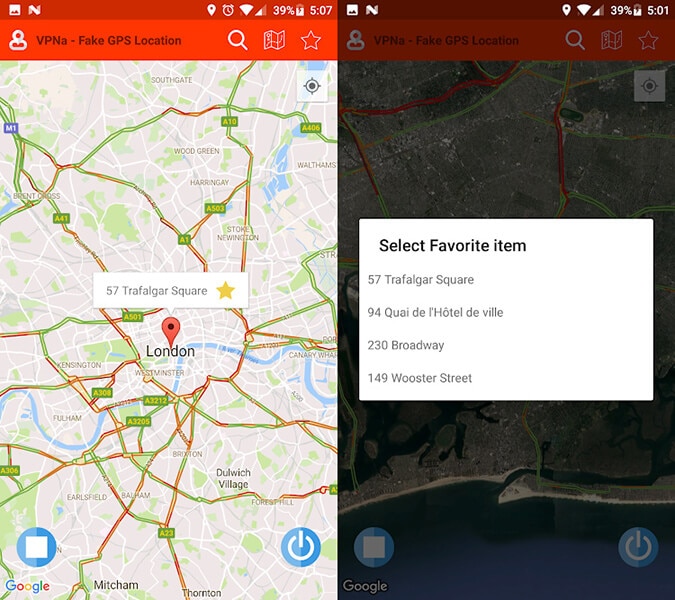
- What’s more? Well, you can even save locations to make use of them later like a one click thing.
Part 2. Where to Download VPNa?
When it comes to downloading VPNa, the process is a breeze as far as Android users are concerned. The app is available on the Google Play Store , and all the Android users need to do is search it and download it. Moreover, it lies on the lighter end when it comes to app size, meaning users don’t need to have large free space.
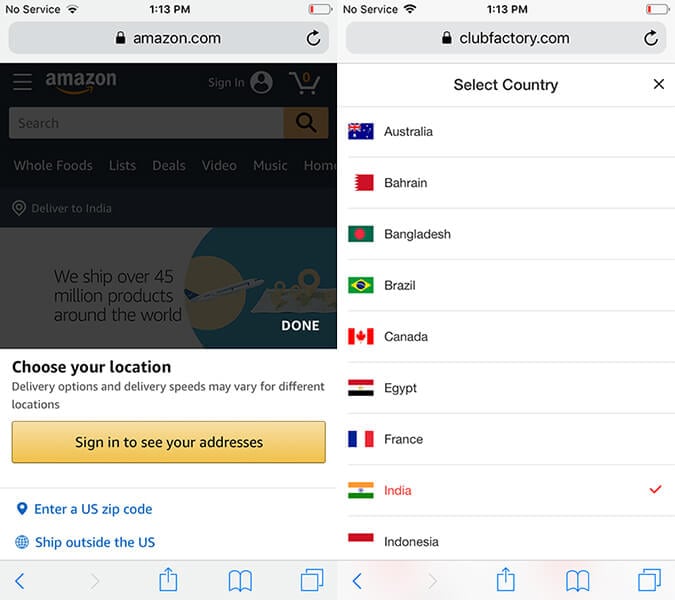
For iOS users, however, this app no longer exists. The app has discontinued its support for iOS devices and is no longer available on the Apps Store. However, there is no need to be disappointed as many better and well-reputed alternatives exist. Read the article till the end to discover the best location spoofer for iOS devices.
Part 3. Must-reads before using VPNa
Here in this section, we’re going to critically determine both the goods and bad of the vpna fake gps location apk. Let’s explore!
Pros of VPNa
- The app works at a lightning fast speed and is extremely useful to fake gps location for free.
- Functionality to save locations for further utilization in the near future makes it a one click solution.
- The best thing about vpna fake gps location apk is don’t actually have to Root your Nokia C32!
- Extremely simple process. Opt for the desired location and get started.
Cons of VPNa
- Reportedly, the newer version of the VPNa app is not able to spoof location in Pokemon Go, like the way it used to do.
- VPNa fake gps location free apkrequires the Google Play Service version 12.6.88. But upon installing the aforementioned version, reportedly, usersstarted to experience other issues like YouTube isn’t launching.
- Moreover, even if the newer version of the app does spoof the geological location properly. It is just not able to maintain it any longer than a few seconds. Implies, your spoofed location returns back to your actual location after a few seconds.
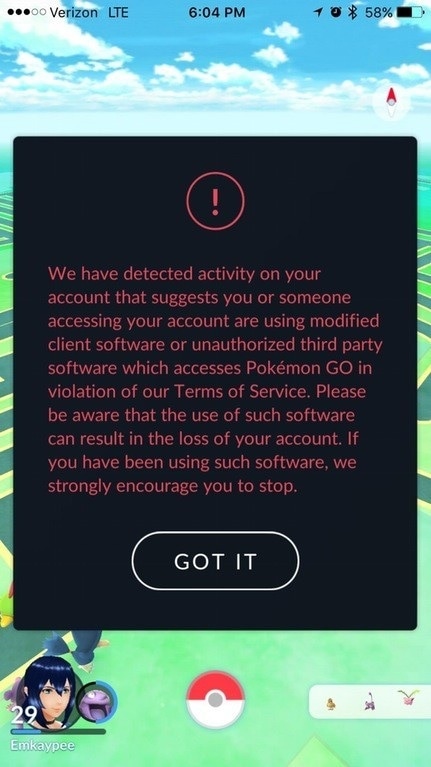
- You may get banned or suspended by some games or apps for spoofing your location. Making use of this app isn’t advised at all.
Part 4. How to set up VPNa on your Android to fake GPS
Ah! There we are. After acquiring all this valuable information, we’re now finally proceeding to learning about the step by step process on setting up and activating the vpna fake gps location free apk. Here’s all that you need to do on your Nokia C32 to fake GPS.
Step 1: Download the vpna fake gps location free apk
- Visit the Google Play Store and navigate to the “vpna fake gps location” app. The search results may get piled up with several similar options, both paid and free.
Note: If you get along with any other app, it may require your Nokia C32 to be rooted in the first place.
- Ensure to opt for the “vpna fake gps location” listing only as this app doesn’t require a rooted Android device. But your Nokia C32 must be running on the OS version 4.0 or higher.
- Install the app and launch it afterwards.
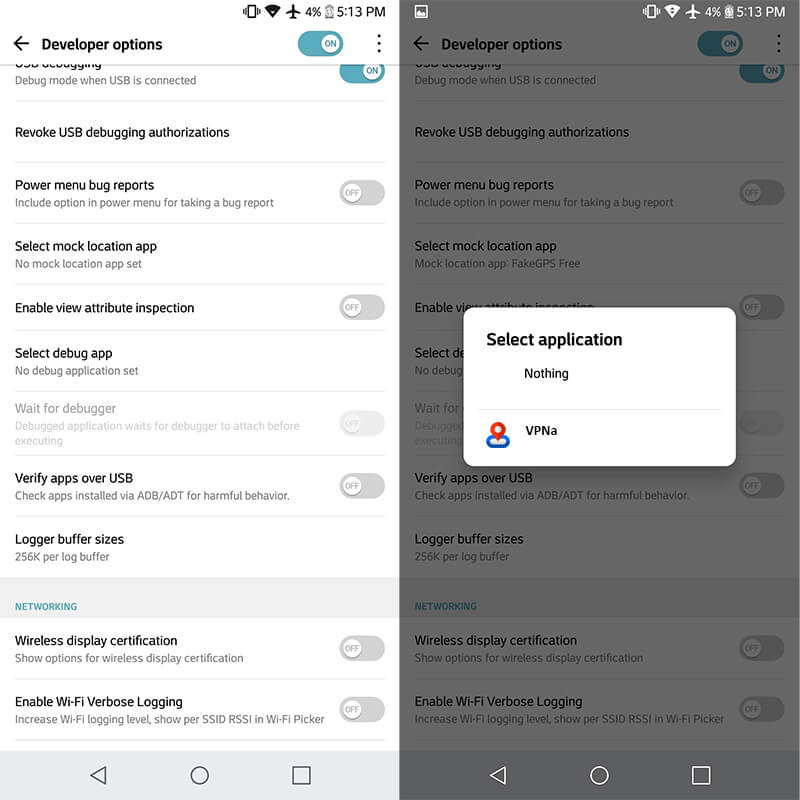
Step 2: Enable Mock Location on Android
- When you’re on the mainscreen of the app, you’ll be asked to “ENABLE MOCK LOCATIONS”. Tap on the pop up and then the “Developer options” screen will come up.
Note: The “Developer options” aren’t pre-enabled, you may require enable it manually first. For this, head to the “Settings” > “About Phone” > hit on “Build Number” – x7 times.
- Now, on “Developer Settings” opt in for “Select Mock location App” followed by selecting the “VPNa” app from the appearing options.
Step 3: Search for a fake location and get started
- As soon as the fundamentals are set in place, you’re all ready to get started. Simply, hit the back button while on Developer Settings screen to get back into the vpna fake gps location app.
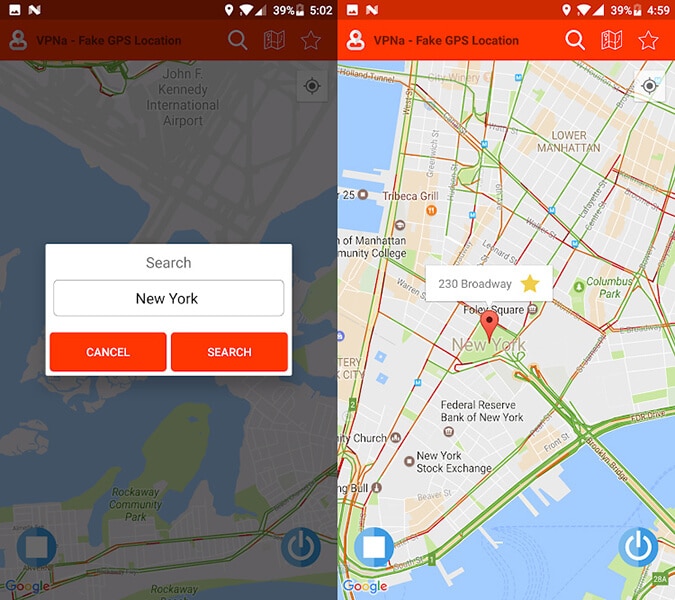
- Next, “Search” for the desired location using the search icon over the top. Lastly, push “Start/Power” button to activate the fake GPS location.
Note: You can also make use of the “Star” button on the “location marker”to pin the selected location over the map as your favorite.
Part 5. Example where VPNa does work
By faking GPS location with VPNa app, you can access desired content by bypass the Geo-restrictions. There are several instances where VPNa is successful solution for your GPS spoofing requirements. For instance, by spoofing location with VPNa you certainly:
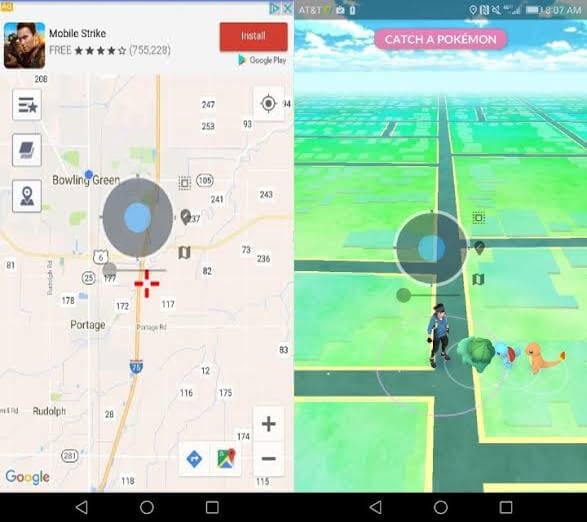
Can catch Pokemons of different variants in the Pokemon Go game. Without having to travel to several places.
Part 6: VPNa iOS version discontinued? How to fake GPS on iPhone?
Knowing that VPNa fake GPS location app no longer supports iOS can be a disappointment. However, we are at your rescue if you’re an iOS user. Wondershare has come up with a great tool named as Dr.Fone – Virtual Location (iOS&Android) that fulfills all your needs regarding faking location. In this section, we will learn about how you can fake location with this tool so that you don’t have to worry about the discontinuation of VPNa fake GPS apk’s iOS version. Here is how:
Mode 1: Teleport to Anywhere
Step 1: Download this VPNa fake GPS apk’s alternative on PC and install. Launch and hit “Virtual Location”.

Step 2: Establish connection between iPhone and PC. Click on “Get Started” right after that.

Step 3: You will be able to see the actual location on the map. Or you can hit “Center On” icon at the right side to get the accurate location displayed.

Step 4: Click on the “Teleport mode” which can be found as the first icon at the upper right corner. Put the place to teleport and hit on “Go” button.

Step 5: A pop up will appear once the system gets the place you want. From that pop-up, hit “Move Here” button.

Step 6: You are good to go now. The location will be changed as desired. You will see the chosen location fixed whenever you click the “Center On” icon. Also, the same location will be shown in the location-based apps. See, there is no need for any iOS version of VPNa fake GPS apk for the purpose when you have Dr.Fone - Virtual Location (iOS&Android).

Mode 2: Simulate Movement Between two Places
Step 1: You can choose the “One-stop route” i.e. the third icon in the upper right after launching the program.
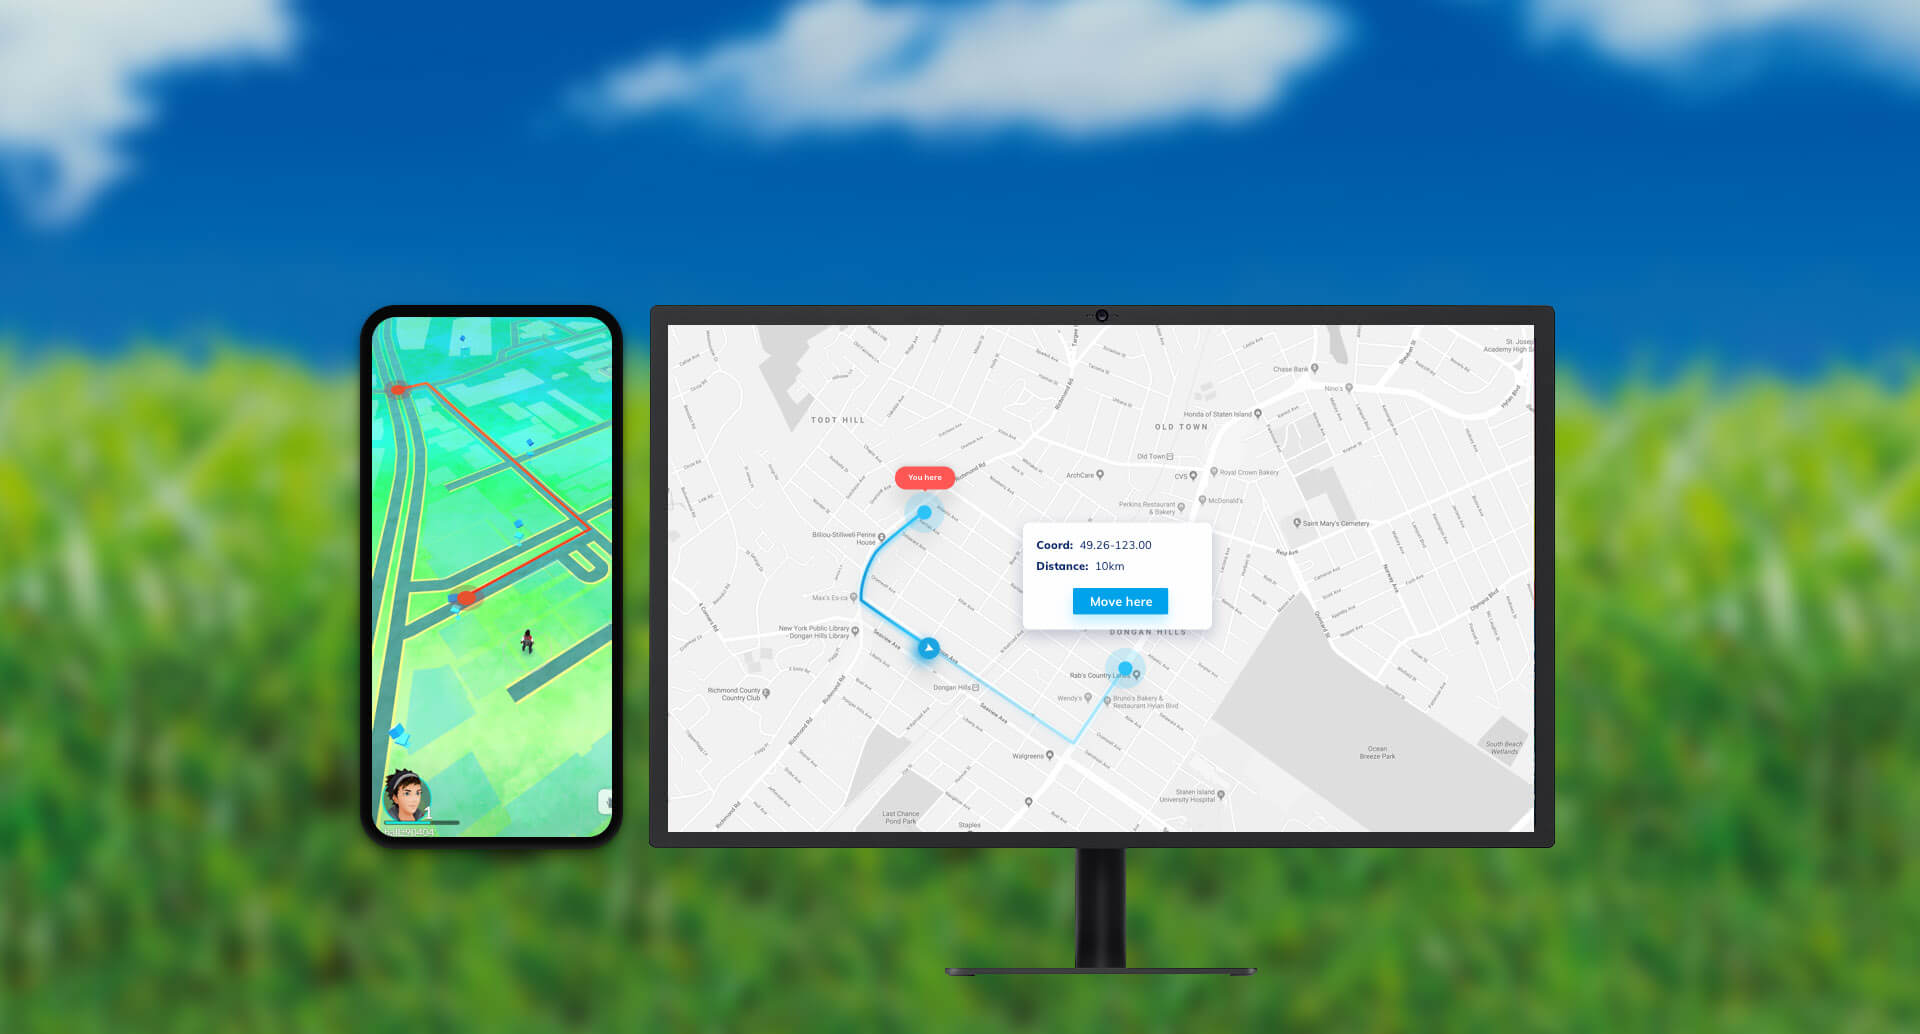
Step 2: Please opt for the place where you wish to move and you will get aware of that place’s distance.
Step 3: Now, you need to set the speed for how fast you wish to travel. You can choose walk, cycling speed or car speed by sliding the slider given at the bottom. Once done, hit on “Move Here” from the pop-up.

Step 4: In the next pop-up, you are supposed to enter the number defining the number of times you wish to move between the two places. Once this gets done, click “March”.

Step 5: The simulation of the movement will now begin and you can track the position being moved with the selected mode of speed.

Mode 3: Simulate Movement for Multiple Places
Step 1: In this case, select the fourth icon at the upper right side. This icon denotes the “Multi-stop route”. Subsequently, select the locations one by one from where you want to travel.
Step 2: Note the pop-up box that now comes. It will make you know how far you are going to travel. Choose the moving speed.

Step 3: The next pop-up will ask you to enter the number for how many times you wish to show back and forth movements. Click “Start Moving” once done.

Step 4: The movement simulation will begin and your location will be seen moving as per your selected route.
Final Words
That was a completed tutorial about the vpna fake gps location apk, starting from gaining the insights of the app to understanding both the goods and bad of it. And finally the detailed step by step tutorial will help you get along with faking gps location smoothly.
Will the iPogo Get You Banned and How to Solve It On Nokia C32
Pokemon Go has graced one of the most popular mobile games right from the day it was launched. It requires players to move around one place to the other in reality to capture Pokémon. But if you don’t want to go out of his way and search for Pokémon then iPogo is a tool for you. It is a location spoofer that can change the location of your device. It allows you to move from one place to another with just one-tap. As it is a cheat tool, you might want to know can iPogo get you banned? There are chances of getting an iPogo ban, but they are relatively high depending on how you use the tool.
Part 1: How does the iPogo work for pokemon
iPogo comes with tons of add-on features that can be used to boost your Pokémon collection 10 folds. But it does that by breaking many rules and regulations created by Niantic. Here are some features of iPogo for Pokemon Go that are not by the books:
- Play from anywhere, anytime:
iPogo allows users to play Pokemon go anytime from anywhere in the world. All you will require is a decent internet connection, and you are good to go. And this is something that Niantic strongly opposes.
- Spoofing:
Niantic has arranged several ban waves once a week for players who were found cheating. The humorous thing to note here is that most of such players were caught spoofing. And this app lets you do exactly that. This also had a stimulating effect on the iPogo ban rates.
- It works like a Go-Plus
This app works like a virtual go-plus, enabling your device to change its location via switching servers. But that doesn’t assure any safety from the likes of Niantic.
- Third-party software
This app also works as a third-party software as it runs in the background while you are playing the game. Sometimes Niantic can detect that as well, and you might have to face an iPogo ban.
Part 2: What’s the rate of iPogo ban

Players mostly use iPogo for location spoofing, which is very common in Pokémon go. Niantic releases various patch notes to stop players from spoofing and catch those who are doing it. In Pokémon Go players, are banned on a 3-Strike basis.
If you are using iPogo as a location spoofer, kindly note that it is perilous to do that. If you receive the 1st strike as an iPogo ban, I strongly suggest you never use iPogo again because Niantic will keep a close watch on you. So if your question is, can iPogo get me banned? Then yes, it definitely can.
Part 3: How to avoid getting banned by Pokemon Go while using a fake GPS tool?
Using a fake GPS tool in Pokemon Go is against the game’s terms of service and can result in a ban. However, if you want to avoid getting banned, here are some tips to help you avoid getting banned while faking Pokemon Go GPS :
Avoid suspicious behavior: Niantic monitors player activities for any unusual or suspicious behavior. Avoid sudden changes in your location, and jumping between distant places within a short period, as these actions can raise red flags and increase the risk of a ban.
Be aware of detection methods: Niantic employs various detection methods to identify players who are using fake GPS tools or engaging in spoofing activities. These methods can include analyzing movement patterns, comparing location data with known landmarks, or detecting inconsistencies in player behavior. It’s important to understand that detection methods can evolve, and it’s difficult to completely avoid detection.
Stay informed: Keep yourself updated with Pokémon Go’s terms of service and any changes or announcements made by Niantic. They may introduce new measures to combat cheating, and being aware of these updates can help you avoid unintentional violations.
Use a trusted tool: When using a fake GPS tool for Pokémon Go, it is crucial to choose a reliable and trusted app. Avoid using any random or unverified GPS spoofing apps. There is a reliable is recommended in the following part. Read on!
Part 4: Better safe tool to iPogo?
We have provided many answers to your question, “Can iPogo get you banned?”. But we know knowing it can get you banned is not enough. Because many players don’t even know which tool they should use, that will not lead to a ban. Don’t grieve, we are here to help with a brilliant virtual location changer for iOS, which is “Dr.Fone - Virtual Location (iOS/Android) .”
Using this tool, you can change the location of your iPhone with just one click. You can use it to trick Niantic or any other location-based app. This app uses a virtual GPS location that makes every location-based app think that you have moved from one place to another. That is not all; you even set the speed of mocking location.
Confusing? Let us clarify, so every location spoofer provides static location change, which means you will instantly pop-up at the place you chose. But, with Dr. Fone, you can choose between walking, cycling, or driving to that particular spot. This is a perfect option to make the game think you are moving at a normal speed.
This app offers many other features like Joystick & keyboard control, easy location changing, etc. This will also save you from avoiding the iPogo ban. You can use this tool with other apps as well. Below are some amazing uses of Dr. Fone Location Changer.
- You can use it to change location on dating apps or other location-based apps.
- WhatsApp location spoofing is also supported.
- Change GPS and play Pokemon Go without going out.
- Easy to use GPS fake, which can teleport you anywhere you want.
- It simulates a more authentic gaming experience with the help of realistic mode, fluctuation mode, and cooldown timer feature, decreasing the risk of detection.
Step-by-step guide for using Wondershare Dr. Fone to Teleport Anywhere
Dr. Fone’s virtual location is the best spoofing tool that you can use for playing Pokemon Go. It can quickly teleport your Pokemon trainer from one place to another. Below is a step-by-step guide you follow to perform that:
Step 1: Get the Program Installed and Launched
Download and install the tool on your computer. Once the installation is successful, run the program. From the option available click on “Virtual Location”.
Step 2: Connect iPhone to PC
Wait for a few seconds; in the meantime, connect your iPhone to the computer using the original lightening cord. Once it’s connected, click on “Get Started.”
Step 3: Check the Location
A new window will pop-up where you will see your current location. If the location is not accurate, click on “Center On” present in the lower-right corner.
Step 4: Activate Teleport Mode
Now click on the 1st icon on the upper right corner, which will enable you to teleport. After that, you will be compelled to enter the name of the location you want to move to.
Step 5: Confirm the Location
Confirm the exact location on the pop-up that appears now and click on “Move here.”
Step 6: Check Location on the deivce
After this, you have successfully changed your location. You can cross-check this by pressing the “Center on” icon.
To be certain, you can also check the location on your iPhone. Just open maps on your device, and you will see your selected location.

Conclusion
Can iPogo get you banned? Yes, it can, and it eventually will. It would help if you understood why can iPogo get you banned and why you should not use that application for location spoofing. We also provided you with a perfect solution to avoid iPogo ban using Wondershare’s Dr.Fone - Virtual Location . We also provided a step-by-step guide to use Dr. Fone for teleporting and changing your iPhone’s GPS location. That was all for this article; if you have any queries related to this article, you can comment below. We will make sure you get the necessary assistance for the same.
How to Change Google Play Location On Nokia C32
Google Account has unlimited advantages as it provides quick access to multiple platforms like Google Drive, Google Calendar, and Google Play Store. By accessing these platforms, users can increase their functionality to ease their daily tasks. For example, Google Play Store offers tons of apps and tools in every category that millions of people install on their devices.
However, some featured apps on the Play Store are restricted region-wise, and some users cannot download them. This article will guide you on how to change the country in Play Store to access all the apps.
Part 1: What Should We Know Before Changing Google Account Location?
By changing the country on Google Play Store, you can install some unavailable apps in your region. You can quickly enjoy the applications and services on your phone by simply changing the country’s location. Before knowing how to change location on Google, you should know some essential aspects.
Warnings About Changing your Location
- Often, users are deprived of some services and features apps if they are not available in the newly chosen region.
- Changing the Google Play Store location is easy, but you can only change the settings once a year. This depicts that you can change the location settings of your Google Account after 365 days.
- After changing the country’s location, you won’t be able to utilize the previous Google Play balance of the old country.
- Once you have changed your country’s server location in settings, the Google Play Store takes 48 hours to change the location.
Part 2: How to Change Google Account Location?
This section will offer easy ways to change play store country and location on Google in every circumstance. By doing so, you can easily install restricted applications in your region.
How to Change Location on Google on Android
Situation 1: How to Change Country in Google Play Store on Android
Through your Nokia C32s, you can change the location on both Google Play Store and Google Account easily. To know more details about how to change the country in Google Play Store, read the following guidelines:
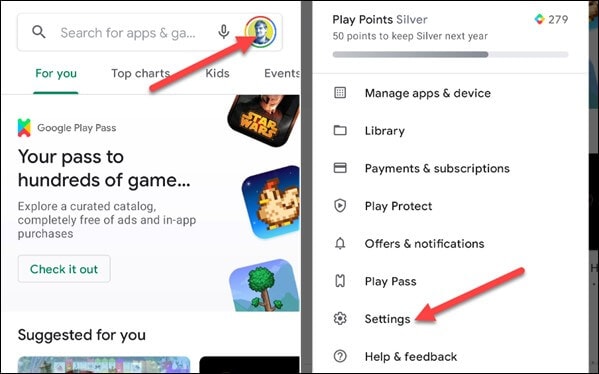
Step 1: Open your Google Play Store from your Nokia C32. Navigate to the profile icon from the corner and select “Settings” from the displayed menu.
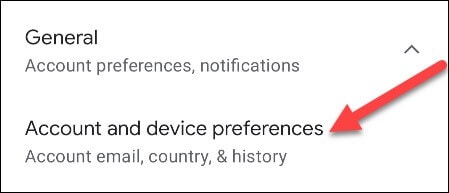
Step 2: Tap on the “General” section to locate the option of “Account and Device Preferences.” Afterward, find the “Country and Profiles” option by scrolling down. From there, you can see your current country location.
Step 3: Now click on “Switch to the Country Play Store” to change the location. For verification, click on “Continue” when a pop-up message appears on your screen asking if you want to change the location.

Step 4: Now, you will be automatically assisted in changing the payment methods of the new country. However, if you don’t come across the option to change the country, either you have already changed the country location within a year or your IP address is not synchronized with your new country.
Situation 2: How to Change Google Account Location on Android
In this particular situation, you don’t have to change the Play Store country; instead, you can only change the Google location on your Nokia C32. We will recommend the VPN Proxy Master Lite , which works effortlessly to change Google‘s location. This tool flawlessly hides your IP address so that you can easily use any country’s location to access all the applications and services. Moreover, it’s highly secured and well-protected so that no virus can harm your Nokia C32.
To use this powerful VPN tool, we have jotted down some basic steps through which you can change the location on your phone easily:
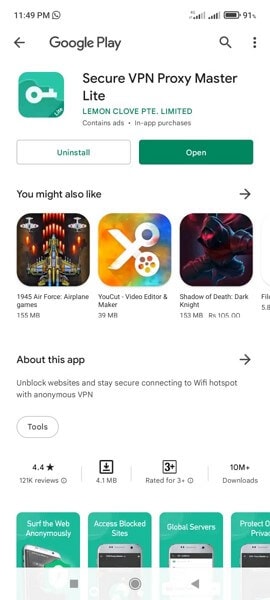
Step 1: Start installing VPN Proxy Master Lite on your Nokia C32 from your Google Play Store. Once this app is successfully installed, open this app to proceed.
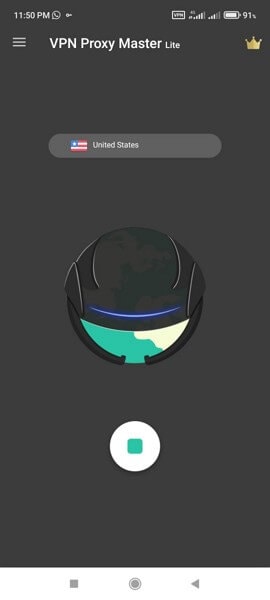
Step 2: After opening this app, tap on the country’s name list displayed above the picture of Earth. Tap on that list to view all the available countries.

Step 3: Select any country from the displayed list by tapping on it. Meanwhile, make sure that your phone is connected to a strong internet connection. This tool will automatically change your Google location by tapping on the country’s name.
How to Change Location on Computer
Situation 1: How to Change Country in Google Play Store on Computer
In this situation, we will help you change the country’s location on your Google Play Store through your computer. Just follow the below-given steps.
Step 1: Start by navigating to your PC’s browser and then open Google Play . Once done, click on the “Settings” displayed on top of your screen.
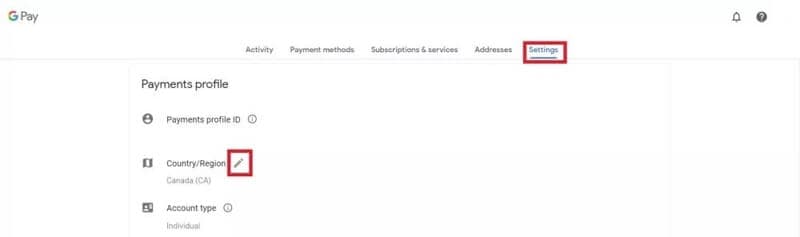
Step 2: After opening the settings menu, go to “Payments and Profile” and locate the option of “Country/Region.” Proceed by tapping the edit icon next to it.
Step 3: To connect with the new country’s location, tap on the option “Create a new profile.” Afterward, you can see the on-screen instructions on your computer, so follow them to complete the process. Once done, Google Play will change the location after 48 hours, and you can search for the applications you want to install.

Situation 2: How to Change Google Account Location on Computer
If you want to change Google location on your computer without changing country on Google Play Store, use ExpressVPN by downloading it. This tool is a well-trusted platform and offers an instant way to change Google location easily. In addition, you can rely on its platform to connect with more than 94 countries worldwide by changing the location anytime you want.
Moreover, the process is fast and fully secured to protect your computer from unwanted bugs. To change the location using ExpressVPN, the steps are:
Step 1: Begin launching ExpressVPN on your computer and open its interface. Once done, turn on the VPN button and tap on the “Location Bar” to change the location.
Step 2: You can explore regions by either navigating to the “Recommended” or “All Locations” tab. Select the location you want to change with from the displayed list.
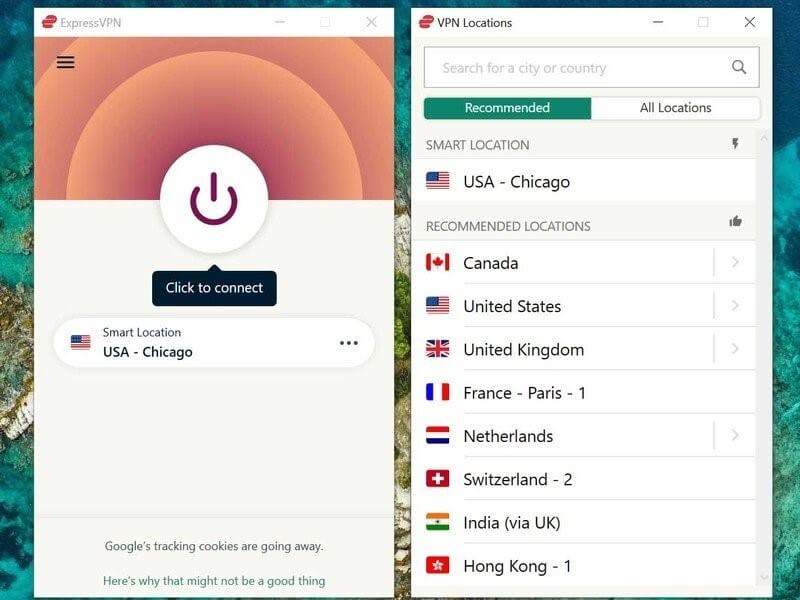
Step 3: After clicking on any country’s location, your computer’s Google Account location will be automatically changed.
Part 3: The Most Effective Way to Fake Location on iOS and Android
We have mentioned methods to change Play Store country manually and through VPN, but they still have a few limitations. Once you change the country’s location on Google Play manually, the Play Store requires 48 hours to accept this modification. Moreover, you can only change the country’s server location once a year. With VPN, many country servers are unreachable, and some servers can be reached only through a paid version. This makes the process expensive and time taking.
To avoid these hurdles and chaos, we recommend you to use Dr.Fone – Virtual Location to fake your location on both Android and iOS devices. This tool works in every situation and allows users to travel the globe through their phones free of cost. You can also travel with an exact GPS location just with a single click. Hence, this tool will work amazingly in faking your location without requiring you to change Google Play country’s location.
Dr.Fone - Virtual Location
1-Click Location Changer for both iOS and Android
- Teleport from one location to another across the world from the comfort of your home.
- Fake location on your phone with a few clicks.
- Support most mainstreaming apps and geo-based games, including Pokemon Go, Snapchat, Tinder, and so on.
- Compatible with both iOS and Android systems.
3981454 people have downloaded it
To change country Google Play using Dr.Fone - Virtual Location, here are the steps:
Step 1: Choose Virtual Location Feature
Begin with launching the tool of Dr.Fone on your computer. Open its interface and tap on the “Virtual Location” option from the home page.
Step 2: Connect your Phone
Now connect your smartphone to the phone with the help of a USB cable. Once done, click on “Get Started” to proceed further.
Step 3: Find your Current Location
After connecting your phone, you will be able to see your current location on the new window. If not, tap on the “Center On” icon displayed on the right side to find your current location.
Step 4: Enable Teleport Mode
Tap on the first icon displayed on the top right to enable the teleport mode. Now enter the location you want to navigate the search box and click on “Go” to continue.
Step 5: Change Location
A notification will pop up for confirmation once you have entered a new location. Tap on “Move here” to proceed. Once done, your new location will be set on your smartphone automatically. Now head back to Google Play Store and search for the applications you want to access.
 safe & secure
Conclusion
There are plenty of ways to execute Google One change location across various platforms to execute Google One change location. For example, people usually change Play Store country to access restricted applications in their region. This article will offer a detailed guide for changing Google location through manual and VPN means. However, to avoid any hassle, we recommend Dr.Fone - Virtual Location to change the location of your smartphone and Google Play instantly and conveniently.
Also read:
- [New] Top 5 PC Clipping Apps Essential Shortcuts for 2024
- 2024 Approved Upload Mastery Understanding and Using Correct Video Sizes on YouTube
- Additional Updates Available in Windows 11'S Latest Release
- Dose Life360 Notify Me When Someone Checks My Location On Nokia C12? | Dr.fone
- Get the Most Out of Your Apple Vision Pro Experience - Insider Tips on Landing Exclusive In-Store Demos | Tech Today
- How to Rescue Lost Videos from Oppo A59 5G
- How to share/fake gps on Uber for Tecno Spark 10C | Dr.fone
- In 2024, 11 Best Location Changers for Infinix Hot 40i | Dr.fone
- Life360 Learn How Everything Works On Vivo S17t | Dr.fone
- Navigating the Best Online Tools for VHS Photo Upgrading for 2024
- PC画面録画機能が使えない原因と解決策を知りたい
- The Buyer's Guide: Top Five Priorities When Shopping for a Fitness Gadget
- What are Location Permissions Life360 On Apple iPhone 6s Plus? | Dr.fone
- Which is the Best Fake GPS Joystick App On Apple iPhone 13 Pro Max? | Dr.fone
- Title: Complete Tutorial to Use VPNa to Fake GPS Location On Nokia C32 | Dr.fone
- Author: Ava
- Created at : 2024-12-23 16:16:39
- Updated at : 2024-12-29 16:23:44
- Link: https://fake-location.techidaily.com/complete-tutorial-to-use-vpna-to-fake-gps-location-on-nokia-c32-drfone-by-drfone-virtual-android/
- License: This work is licensed under CC BY-NC-SA 4.0.