
Fake the Location to Get Around the MLB Blackouts on Vivo X90S | Dr.fone
Fake the Location to Get Around the MLB Blackouts on Vivo X90S
MLB games are the most awaited event for game enthusiasts. The good news is that MLB has started on Thursday, April 7. Moreover, the final MLB match will be played on Sunday, October 2. Therefore, there will be around 162 games in the MLB season which is very exciting for the fans worldwide. Additionally, 30 MLB teams are playing this season.
However, unfortunately, there will be MLB TV blackouts during the games. It is frustrating for the fans that adore baseball a lot. Does it mean we should stay here and do nothing? Of course not. We are here to give you the solution to bypass MLB blackouts. In this article, we are about to recognize the following topics:
Part 1: Bypass MLB Blackouts Restrictions from Anywhere
The reason for the MLB blackout is not a complicated one. First, the cable providers want to broadcast MLB on their local networks exclusively, and the other reason for the blackout is MLB’s desire to have a maximum number of fans in the stadium to attend the match. However, not all fans want to come out of their homes to watch a match.
Use Dr.Fone Virtual Location to Bypass MLB Blackouts on Vivo X90S
Luckily, Dr.Fone provides a virtual location feature that encourages users to teleport the GPS location to anywhere they want with a single click. You can travel to any place without leaving your home. This will enable you to bypass MLB blackouts and assist you in watching the match easily.
With Dr.Fone - Virtual Location, you can now spoof your location on major applications, including Twitter, WhatsApp, Google Map, and Bumble.
Teleport Anywhere with Dr.Fone - Virtual Location:
To bypass the MLB blackout restrictions from your location, you can follow the given steps proposed by Dr.Fone - Virtual Location solution:
Step 1: Use Virtual Location Feature
The first step requires downloading and installing Dr.Fone – Virtual Location on your computer. After that, launch the program. Now, select the feature of “Virtual Location” from Dr.Fone’s main window.

Step 2: Connect your Device
Then connect your phone to the PC. If you are an iPhone user, you can connect it with Wi-Fi without a USB cable after being connected once. After that, tap on the “Get Started” button.

Step 3: Activate the Teleport Mode
You will now be able to see your current location on the map. If you cannot find it, tap on the “Center On” icon on the right side of the screen. Now, enable the “Teleport Mode” through the first icon on the upper right side.

Step 4: Set your Location
Enter the place you want to convert to, and press the “Go” button. Next, click on the “Move Here” icon in the popup dialogue. Your location is now changed to your desired place. Now, you can access MLB despite the blackouts at your original location.

Part 2: Use VPN to get Around MLB TV Blackouts
Another way to turn around the TV blackouts on MLB is to use VPN services. With a VPN, you can extend your private network across the public network and create privacy and anonymity. Here, we have introduced 3 top-notch VPN services that will bypass MLB blackouts:
1. ExpressVPN
ExpressVPN has a blazing-fast speed in providing a secure and private connection on your Windows and Mac devices. It has been rated the #1 VPN on TechRadar, TechTimes, and CNN. It enables people to break all the barriers and watch MLB peacefully while protecting their data and keeping a private activity.
With ExpressVPN, you can keep your IP address and location private while enjoying the broadcasting of MLB in another region.

Pros of ExpressVPN
- ExpressVPN has the fastest speed on all server locations. In addition, you will not face connectivity issues while using this VPN to watch the MLB match.
- The VPN has high-security standards, which creates a safe and secure space for users. Moreover, it also has an inspected zero-logs policy.
- It has an easy-to-use and stylish interface. Anyone can understand the functioning of the application and use it.
Cons of ExpressVPN
- It is not free of cost. ExpressVPN is more expensive than other premium VPNs available.
| Pricing | |
1 Month | $12.95 |
12 Months | $8.32/Month |
6 Months | $9.99/Month |
2. NordVPN
You can now enjoy a private and secure connection and watch MLB baseball matches without any restrictions with NordVPN. Because of NordVPN, we no longer have to choose between security and speed. There is no hassle in using NordVPN. You just need to download the application on your PC, log in, and connect to any network.
Moreover, NordVPN is equipped with Threat Protection Lite Technology, which saves users from visiting malicious websites and cyber threats.

Advantages of NordVPN
- NordVPN provides a Kill Switch feature. So, if your NordVPN server goes down, Kill Switch will help you stop all the internet activities and communications.
- NordVPN has excellent encryption standards providing 256-bit Advanced Encryption. It further uses PGP keys to protect customers’ account details.
- The Customer Service of NordVPN is beneficial. You can ask any queries or inform us about your problems, and the Support team will quickly help you.
Disadvantage of NordVPN
- The application of NordVPN is a little slow, and users face poor connection problems. It may bother customers who want to watch live MLB matches.
| Pricing | |
1 Month | $11.99 |
1 Year | $4.99/Month |
2 Year | $3.99/Month |
3 Year + 3 Months | $2.29/Month |
3. CyberGhost VPN
With CyberGhost VPN, you can enjoy the live broadcast of MLB on your Windows or Mac device. CyberGhost VPN relieves people who want to hide their identity and surf securely on the internet. Moreover, you can watch MLB matches from any location worldwide. CyberGhost VPN does not keep traces of any user activity.
You don’t have to instantly subscribe to their services, as you can avail of the free 7-day trial and experience the features.

Plus-Points of CyberGhost VPN
- It has a stable speed, and some servers comprehend potential. Of course, VPNs shave off some bandwidth, but CyberGhost VPN still works with a decent speed.
- It is very suitable for people that want to connect with CyberGhost VPN for a long time.
- With CyberGhost VPN, you also get the guarantee of receiving back your money in 45 days. After that, you can try the service and make a refund if you don’t want the service anymore.
Drawback of CyberGhost VPN
- The servers of CyberGhost VPN are overloaded, resulting in poor speed for all the users.
| Pricing | |
1 Month | $12.99 |
1 Year | $4.29/Month |
2 Year | $3.25/Month |
3 Year + 3 Months | $2.29/Month |
Part 3: FAQs
1. Is it legal to use VPN to stream MLB TV?
If you use a VPN to watch sports content, it is not an unlawful action, and you will not go to jail for this. However, you should consider avoiding doing this because it’s against the MLB rules, and you will be disobeying them if you do this.
2. Are there any alternatives to MLB TV?
You can watch the baseball matches on different streaming websites, including Peacock, YouTube TV, Hulu + Live TV, Sling TV, etc.
3. Can MLB TV detect VPN?
No, the MLB TV will not be able to detect the VPN because VPN masks your location and hides your real identity from everyone on the internet. The only condition is that the IP address provided by the VPN service should not be included in the MaxMind database.
4. Are regional blackouts grounded on billing address or the location?
Regional blackouts are based on the physical location of the user. Therefore, if you want to see the teams that are subjected to the blackout at your location, you should enter the ZIP code of your area on MLB.com.
Conclusion
The article concludes about great assistance in dealing with regional blackouts on MLB TV. If this is frustrating you, then don’t worry anymore. With the assistance of Dr.Fone Virtual Location, you can teleport your location to any region to bypass the baseball blackouts on your phone. With MLB TV VPN, you can also create a private connection and hide your IP address to bypass the MLB Tv blackouts on PC.
3uTools Virtual Location Not Working On Vivo X90S? Fix Now
The map frequently breaks or 3uTools is unable to retrieve it. This is because 3uTools is unable to establish a connection with the Google Maps API. Additionally, if your internet connection is unreliable, this may happen.
There isn’t much you can do if this is the reason why your 3uTools virtual location isn’t working this is a technical problem that can only be fixed by a technical expert. You could try restarting 3uTools and performing the spoofing process again to update it. You might also try switching to “Mapbox” and see if it solves the issue.
Let’s have a look at the possible working solutions for the 3utools Virtual Location Not Working problem.
Part 1: What is 3uTools VirtualLocation?
A program that can help someone manage their device is known as 3uTools. You can set a virtual location on your iPhone, iPad, or any other iDevice using the VirtualLocation option in the program. In addition, you can broadcast the location on social media and get around service and game area restrictions.
To set up 3uTools, there are only a few steps to take.
- Step 1: Set up 3uTools on your computer first.
- Step 2: Connect your iPhone to the PC on which you installed 3uTools in Step 2.
- Step 3: Launch 3uTools and choose the Toolbox option from the top menu in step 3.
- Step 4: Select the VirtualLocation icon from the toolbox.
- Step 5: A new window will open. You can enter the longitudes and latitudes of the location you want to set in the window.
- Step 6: Click the Modify virtual location button after entering the pertinent coordinates. You can notice the new location after a little period of time.

Tips: Is 3uTools Virtual Location not working? Don’t worry, we’ve got the solution! Dr.Fone - Virtual Location offers a seamless and reliable virtual location experience. Say goodbye to issues and hello to hassle-free location changes. Fix it right now with Dr.Fone - Virtual Location!
Part 2: Fix 3utools Virtual Location Not Working Issue [8 ways]
1. Solving the internet issues
Many times, 3uTools is unable to load the map, or the map crashes. The reason for this is that 3uTools is unable to connect to the Google Maps API. This can also occur if your internet connection is unstable.
If this is the cause of your 3uTools virtual location not working, there isn’t much you can do because this is a technical issue that can only be resolved by a technical expert. You might try relaunching 3uTools and repeating the spoofing procedure to refresh it. You may also try changing to “Mapbox” to see if it addresses the problem.
2. Restarting and Closing the Software
When all of the aforementioned options fail, a decent option is to close the software and restart it after a few minutes. This is because the software frequently encounters an error, which is resolved when you close the software, making this a viable choice. We would also advise you to go to the Task Manager after closing the software and End Task it.

3. 3uTools reinstallation
The most common cause of any software not working is poor installation. Some crucial files or components of the software are left behind as a result of faulty installation. As a result, reinstallation or the usage of a different location spoofing program is the only choice remaining.

4. Restarting Your Computer
Restarting your computer is another easy option that many 3uTools users have found useful. If your virtual location feature stops working, simply close the app and restart your computer. This would delete the software from the Random access memory, as well as any bugs or errors that were preventing it from working.
5. Verifying the network connection and that the phone is unlocked
When you encounter a ‘not working’ problem when using the 3uTools software, the first thing you should do is check to ensure that your internet is operational and that there are no interruptions in your connections. You can resolve this by troubleshooting your internet and ensuring that its wire is correctly hooked in, as well as ensuring that your phone is already unlocked.

6. Checking that all dependent components have been downloaded
Another major reason why many individuals experience problems with the 3uTools program is a lack of necessary components. While dependent components are normally downloaded along with the software, this is not always the case. As a result, it is critical to check that you have downloaded all necessary components to ensure that the software works properly.
7. Changing the Source Map
Users frequently report that the map is not loaded. The maps on the 3uTools software fail to load as soon as users activate the virtual location option. You can attempt “Load embedded maps” to solve this issue.

Alternatively, change the source map between Google Maps and Open Street Maps.
8. Uninstalling iTunes and rebooting your system
Many customers have reported encountering the “3uTools virtual location developer image load failed” problem, with the majority of them appearing to be iOS 17 users. 3uTools either does not load the location images or the screen becomes frozen.
Remove iTunes from your computer. Then, try restarting it. Install iTunes from the App Store once more. Restart your computer. After that, connect your iPhone to a PC and confirm that it is unlocked.
Part 3: Best 3uTools Virtual Location Alternative Program You Can Use in 2024
Stop fretting if you frequently encounter the 3uTools virtual location not working problem despite attempting various fixes. The Dr.Fone - Virtual Location is one of the best 3uTools alternatives that is still available.
The Dr.Fone - Virtual Location, a leader in the fake GPS market, is a well-reviewed and user-friendly location changer. You can easily modify your location by doing a simple drag and click. be it the adaptability, usability, or precision of the instrument. Dr.Fone is the best since it contains everything. The following are the steps to use Dr.Fone - Virtual Location to change location.
Dr.Fone - Virtual Location
The best 3uTools virtual location alternative!
- Teleport from one location to another across the world from the comfort of your home.
- With just a few selections on your computer, you can make members of your circle believe you’re anywhere you want.
- Stimulate and imitate movement and set the speed and stops you take along the way.
- Compatible with both iOS and Android systems.
- Work with location-based apps, like Pokemon Go , Snapchat , Instagram , Facebook , etc.
3981454 people have downloaded it
Step 1: Open the Dr.Fone - Virtual Location application
 safe & secure
To begin, you must download Dr.Fone - Virtual Location (iOS/Android). Install and execute the software after that.

Select “Virtual Location” from the drop-down option to connect your iPhone or Android phone to your PC. From the drop-down option, choose “Get Started” to begin the virtual location function.
If you’re playing Pokemon Go on your mobile, connect it to a computer system. When you open the Dr.Fone application, the terms and conditions will be displayed. Read them carefully, accept them, and then click ‘Get Started.’
Step 2: Teleport to any destination
You will be directed to a website that displays a global map as well as your current location on the globe. You may simply zoom in and out to get a better sense of the coordinates and location. ‘Teleport Mode’ should be selected in the upper right corner of the page.

Step 3: Practice moving between different locations
After that, you can change your current location to wherever you wish to go. This could be as close as a neighboring country or as far away as a different country. If you’re playing Pokemon Go, keep it nearby. Then choose ‘Move Here.’
Step 4: Observe the location change
Your location will immediately change, and the new location will be registered on all sites you visit within a few minutes. So you’re good to go!

You can watch the video below to fix 3uTools location issue with Dr.Fone - Virtual Location!
Conclusion
Now you have read about possible working solutions for 3uTools Virtual Location Not Working problem, you may not be able to implement each of them or find the reasons behind what’s happening. The simplest thing that you can do in this regard to get your problem solved immediately is to use Dr.Fone - Virtual Location which is a well-reviewed and user-friendly location changer.
safe & secure
How to Use Life360 on Windows PC For Vivo X90S?
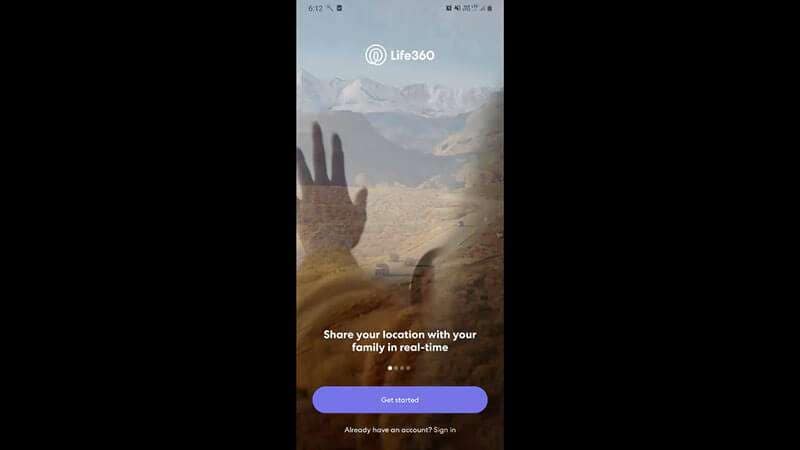
Life360 is an online platform that utilizes geo-location services to help users share their real-time location with friends and family. The app allows people to create a family group and stay connected to each other through features like chatting, sharing location, sending safety alerts, etc.
As of now, you cannot run Life360 on computer as it is only available for Android and iOS. Why? Because as opposed to a PC, one can easily carry their device everywhere! It means whether your kid is stuck in traffic and needs your help or your parents have lost their way back home, Life360 will instantly send you an alert on your device.
However, that doesn’t mean you cannot use Life360 on a PC. While it may seem a bit odd, there are a couple of methods that’ll allow you to get the Life360 app for Windows. In today’s guide, we are going to share some of these methods that’ll help you run the Life360 app on Windows.
So, without wasting another second, let’s dive straight into the guide.
Part 1: Why people seek to use Life360 on PC?
First things first; why would anyone want to use a family locator app like Life360 on their PC? Well, the truth is everyone has their own reason to get Life360 for PC. For instance, let’s say you are in the middle of an important project and don’t want to be bothered by alerts on your smartphone. However, you still don’t want to compromise with the safety of your family members.
In this situation, you can simply run the Life360 app on PC. This will allow you to directly keep track of the whereabouts of family members on your Windows system and you won’t have to constantly check your phone.
Life360 can also be used on a computer when your phone’s battery has completely drained and there’s no power outlet nearby. In this case, you can simply power-on your laptop, start the Life360 app and send your current whereabouts to family members.
Part 2: Is it possible to use Life360 on Windows PC?
Life360 is an extremely useful app for people who are always concerned about their closed ones. The app is basically designed with a vision to keep family members connected and safe. In addition to location sharing, the app also provides exclusive features like crash detection, place alerts, speed alerts, battery monitoring, etc.
The app also makes it easier for parents to monitor their child’s movement. Using the app, you can always know that your kids have safely reached school and back home. For any parent, knowing whether the kids are safe, is one less thing to worry about.
However, as we mentioned earlier, Life360 hasn’t been released for Windows yet. So, there’s no direct way to install and run the app on a Windows PC. While Life360 may release a dedicated Windows software in the future, as of now, you can only run it using the alternative methods.
These methods include:
Part 3: Use Life360 on Windows PC with Android emulator
The first and the most convenient way to run Life360 on computer is to use an Android Emulator. An emulator is basically a software that creates a virtual Android system on your computer. As a result, you’ll be able to run Android apps on your computer.
While there are dozens of Android emulators, Bluestacks seems to be the most popular and user-friendly option among all. Unlike other emulators, Bluestacks is easy to set up and use.
Here’s how you can run Life360 on a computer using Bluestacks Android emulator./
Step 1: Head over to Bluestacks official website and tap the download button.
Step 2: Open the installer and tap the “download” button. This will initiate the download process on your System.
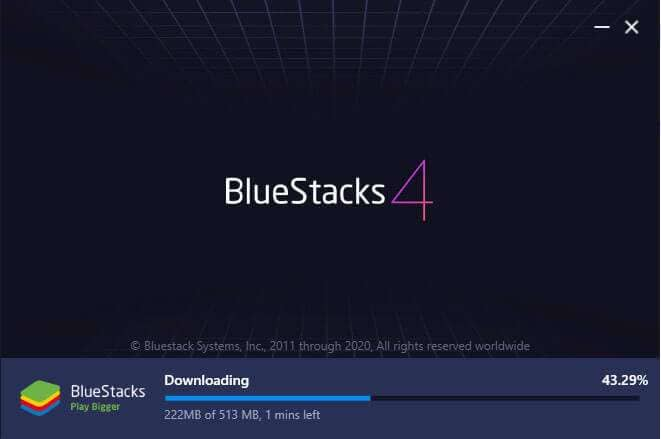
Step 3: Once the installation process completes, Bluestacks will start to boot. Keep in mind that the first boot may take some time, depending on your system configurations.

Step 4: In the home screen, tap the “Google Play Store” icon. You’ll be asked to sign-in with your Google account. Enter the right credentials and log-in to the Google Play Store.

Step 5: In the top search bar, type-in Life360 and tap the “install” button to download the app.

Step 6: Life360 is now installed on your computer. Open the app and enter your login details. You’ll now be able to run Life360 on your PC.

Part 4: Use Life360 by mirroring Android to Windows PC
While running an emulator is a great way to get Life360 on PC, it has its own set of challenges. For instance, running an Android emulator is not easy when you have a low-configuration PC. Emulators like Bluestacks requires high system configuration otherwise they take forever to load.
In this situation, we have another alternative for you to run Life360 on PC. You can simply mirror your Android to your Windows system. Mirroring the Android device will allow you to see its content on the PC itself.
Here’s how you can mirror the Android device on your PC.
Step 1: Make sure that Bluetooth is activated on both devices.
Step 2: On your Windows PC, open “Settings” and select the “Systems” tab.

Step 3: Choose the “Projecting to this PC” option in the left menu-bar and make sure that “Available Everywhere” is selected.

Step 4: If you’re running Android Pie or above on your device, scroll down to open notification drawer and select “Smart View” (or “Cast” in some devices). You’ll see your PC listed here. Tap the button to start Android mirroring.

Step 5: It may take some while for the connection to establish. Once it does, you’ll be able to cast your device screen onto your computer and you’ll be able to run life360 on your system.
Keep in mind that you’ll still require your device to navigate through the content on your computer. Any action that you perform on your device will be replicated on your computer screen as well.
Final Verdict
Life360 is probably among the top family locators for Android users. Apart from its extensive range of features, the app provides a user-friendly interface, which allows it easier for even elders to use the app without any issues. Even though there isn’t a dedicated Life360 software for Windows, you can follow the above-mentioned methods to run the Life360 on PC.
You Might Also Like
Location-based apps
GPS spoof for dating apps
GPS spoof for social apps
Pokemon Go on PC
AR game tricks

Change Phone GPS Location Easily
- ● Teleport GPS location to anywhere
- ● Play AR games without moving
- ● Spoof Location on the popular Apps
Also read:
- [Updated] Google Hangouts Recording Guide
- 2024 Approved Expert Tips Elevating Your Projects with Movie Maker in Win11
- 2024 Approved Music-Infused Content Sharing Strategies for Facebook
- Fixing Foneazy MockGo Not Working On Apple iPhone 11 | Dr.fone
- Green Screen Resources – No Price Tag
- How to Fix Life360 Shows Wrong Location On Samsung Galaxy F14 5G? | Dr.fone
- How to Share Location in Messenger On Xiaomi Redmi Note 13 Pro 5G? | Dr.fone
- How to share/fake gps on Uber for Vivo Y100 | Dr.fone
- In 2024, A Detailed Guide on Faking Your Location in Mozilla Firefox On Oppo F25 Pro 5G | Dr.fone
- In 2024, Can Life360 Track Or See Text Messages? What Can You Do with Life360 On Nokia C12 Pro? | Dr.fone
- In 2024, How Do You Unlock your Apple iPhone SE? Learn All 4 Methods
- In 2024, List of Pokémon Go Joysticks On ZTE Blade A73 5G | Dr.fone
- Select 6 Best iPhone Slide Show Creation Apps for 2024
- The Ultimate Checklist of 9 Queries Before Investing in an EV
- What is Fake GPS Location Pro and Is It Good On Poco C65? | Dr.fone
- Title: Fake the Location to Get Around the MLB Blackouts on Vivo X90S | Dr.fone
- Author: Ava
- Created at : 2024-11-24 16:29:11
- Updated at : 2024-11-30 16:01:00
- Link: https://fake-location.techidaily.com/fake-the-location-to-get-around-the-mlb-blackouts-on-vivo-x90s-drfone-by-drfone-virtual-android/
- License: This work is licensed under CC BY-NC-SA 4.0.