
How to Change Spotify Location After Moving to Another Country On Xiaomi Redmi 13C | Dr.fone
How to Change Spotify Location After Moving to Another Country On Xiaomi Redmi 13C
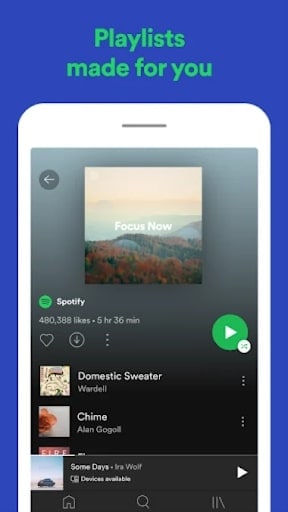
Spotify is one of the best apps to access quality music and podcasts. Be it in your car while you commute from the workplace to home or simply when you are home with your latte, the music is made for every mood. Spotify is easy to use, you can make your own playlist and you have access to a lot of musical content.

But this depends on the country you are staying in. And if you’ve recently shifted your base, it can be tricky to change spotify region. But if you opt for the manual methods, it is a breeze to update location spotify. We will teach you how that is done effectively using different resources available to you.
Part 1: Reasons for changing Location on Spotify
But why to Change Location Spotify in the first place? Is it important to change your location if you are changing countries? Will that affect the music on the streaming app? Yes! It certainly will. Before we discuss the different ways to change country on spotify, let us understand why we should do it at all.
Region specific Content
Everything is not available everywhere. If you are looking for a specific motivational podcast that is a hit in the US, it might not be available in your region. You like that new Arabic song, maybe it won’t stream in your Australian lanes. The content can be restricted to a specific region and if you don’t stay there, it is far away from your reach. You have to rely on Spotify Change Location to access that musical content.
Playlists and Recommendations
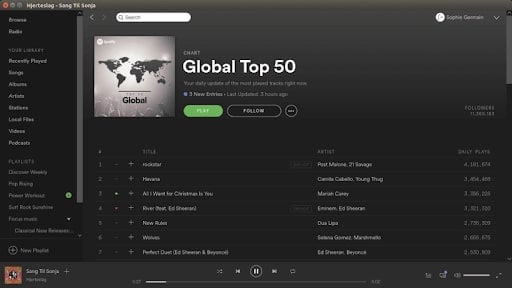
Spotify uses your coordinates to provide the right music content for you. There are people who jump up and down and say that the app suggests songs that are their absolute favorite! As if it has read their minds. This is possible because Spotify identifies the most played songs in the region, detects the language and delivers these suggestions to you.
So, the content that you receive depends on the place that you are staying in.
Payment Plans

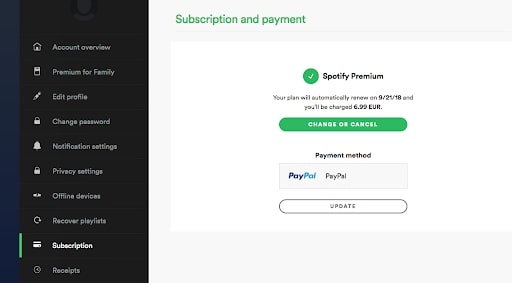
The Spotify premium account provides more benefits than the normal free version that people use. But what many of us are not aware of is that the premium version’s cost differs from place to place. If you can manage a spotify location update, you can save yourself some bucks.
Spotify Unavailable

Spotify did gain a lot of popularity in a very short period of time. People are making money, uploading their own content and even exploring newer genres of music. However, Spotify is not available world-wide. Currently, it is only accessible from 65 countries. If you hail from a region where Spotify hasn’t launched yet, you need to update spotify location to a place where it is fully functional.
Parental Control Software
## **Part 2: How To Edit Your Country on Spotify?**You can change region spotify manually by directly tweaking a few settings in the Account Overview section. If you are using a Free Spotify account, then you will have to manually change your location. But a person who has a Premium Spotify account can access all the content from all those countries where spotify is legally available. Here’s how you can change the location using the Spotify settings -
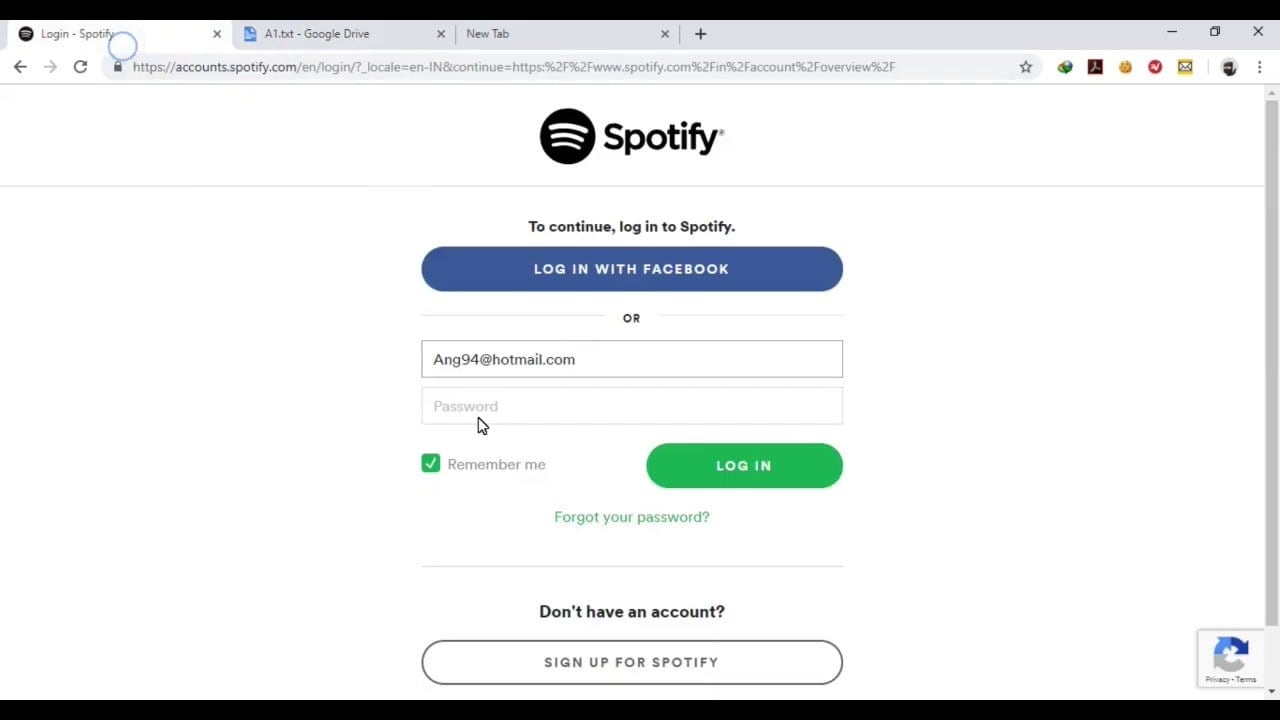
Step 1: Go to the Spotify Homepage on your desktop and Log into your account. This is how you do it if you happen to have a free account. Premium accounts don’t need it. After you Log in, go to the ‘Accounts’ section.
Step 2: From the sidebar, go to the ‘Account Overview’ option. When you click on it, you will find the ‘Edit Profile’ option on the screen. Go for it.
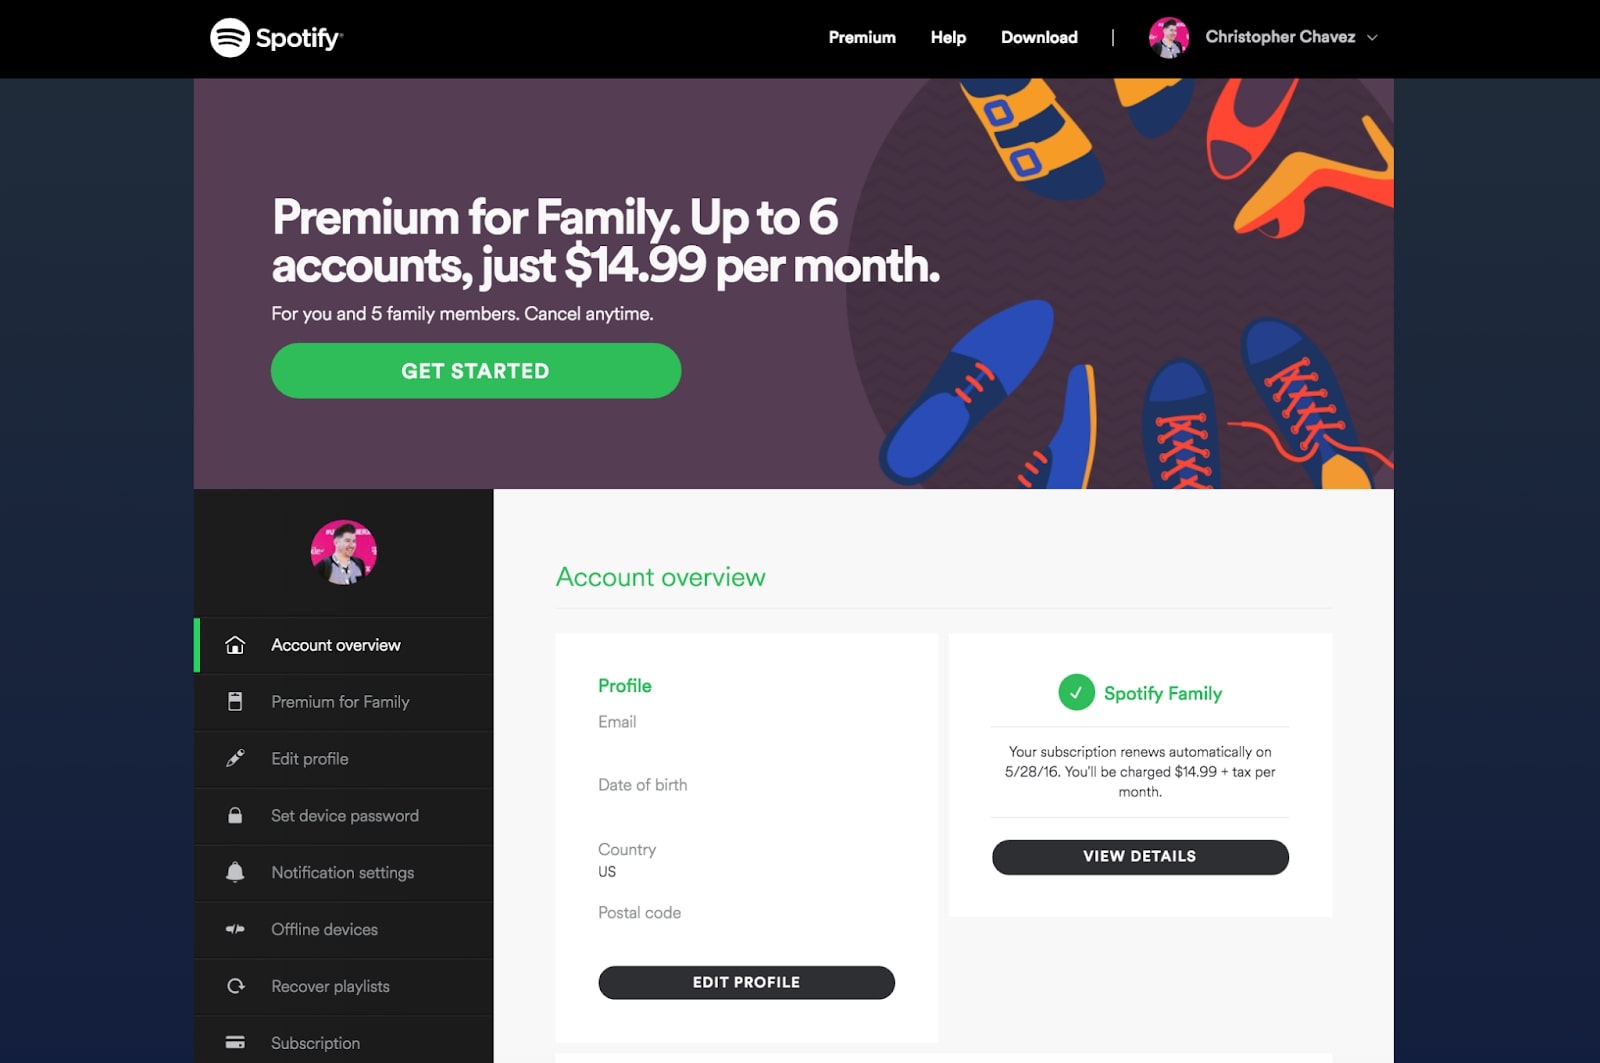
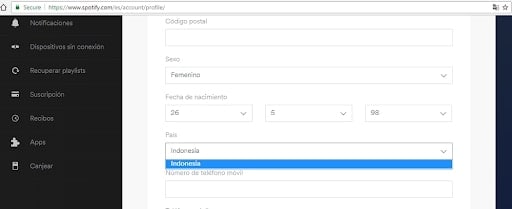
Step 3: Once you click on theEdit Profile option, there will be several categories that display your personal information. If you scroll down, you will find the ‘Country’ Option. Select the country of your choice there.
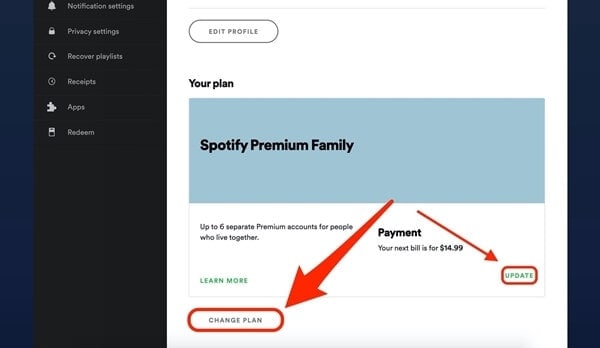
If you are a Spotify Free user, then you will have to go by the above mentioned method. But if you are a Spotify premium user, you don’t need to change location to access content. However, you can change it to update the Payment plans.
Step 4 (Premium): In the same Account Overview option, you can either ‘Update’ your new location and spotify works accordingly. Otherwise, you can completely Change your Plan as well.

Part 3: How to Use Apps to Fake Spotify Location?
Now you know that by Spotify Change Country, you can get more benefits and you can enjoy podcasts, music and other audio content that is otherwise unavailable in your region. So, it is understandable that you’d want to deliberately fake spotify location. This is possible when you use some of the best Location Spoofer softwares available on the internet. Our best suggestion would be Wondershare’s Dr.Fone. It is easy to use and your location will be changed within a few minutes in minimal steps.
Step 1: You need to download the executive file of the WondershareDr. Fone’s Virtual Location Spoofer. The android and even Windows compatible files are available on the website. Choose appropriately and download - and launch them.
Step 2: Once you launch the application, the homepage will open and several options will display on the screen. Choose the Virtual Location option that is usually at the end of the page.

Step 3: To Change Location on Spotify Mobile, connect your Xiaomi Redmi 13C to your computer - both Android and iPhones can detect the virtual location change. Then click on Get Started.

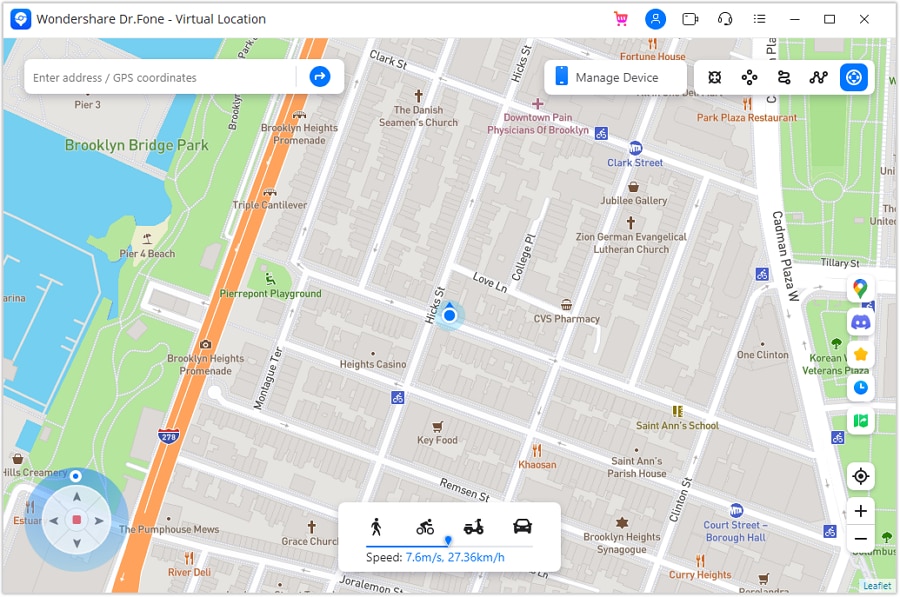
Step 4: A map will appear on the screen. You can change the pi to a new location or you can enter the new location into the search box displayed on top of the page. You can do this by going to the ‘Teleport Mode’ on the top right corner of the page.

Step 5: Once you are sure about the new virtual location, click on ‘Move Here’ option.


The New Location will now display on your iPhone/Android Device’s GPS system too. And Spotify will reflect it too. So, when you decide to change location on spotify using this method, the new location will reflect in all your apps. So, it’s hard to figure out that you’ve deliberately changed the location.

company, user or members of the same household. Action! - screen and game recorder</a>
Part 4: How to Use a VPN to change Spotify Location?
A Virtual Private Network App is also very useful for the Spotify change Region. But you need to keep two important points in mind - The Trial Versions do not provide complete protection and the features aren’t satisfactory. If you go for free VPNs available on the internet, you cannot be 100% sure that your data is safe. So, we have narrowed down the safest option for you. We suggest that you use Nord VPN if you cannot get your hands on a Location Spoofer.
Location Spoofers are much safer because they don’t maintain Log data like the VPNs. But if you have no other option left for Spotify update Location, then you can rely on NordVPN.
Step 1: Go to the AppStore or Google Play Store and choose NordVPN from the different VPN options available.
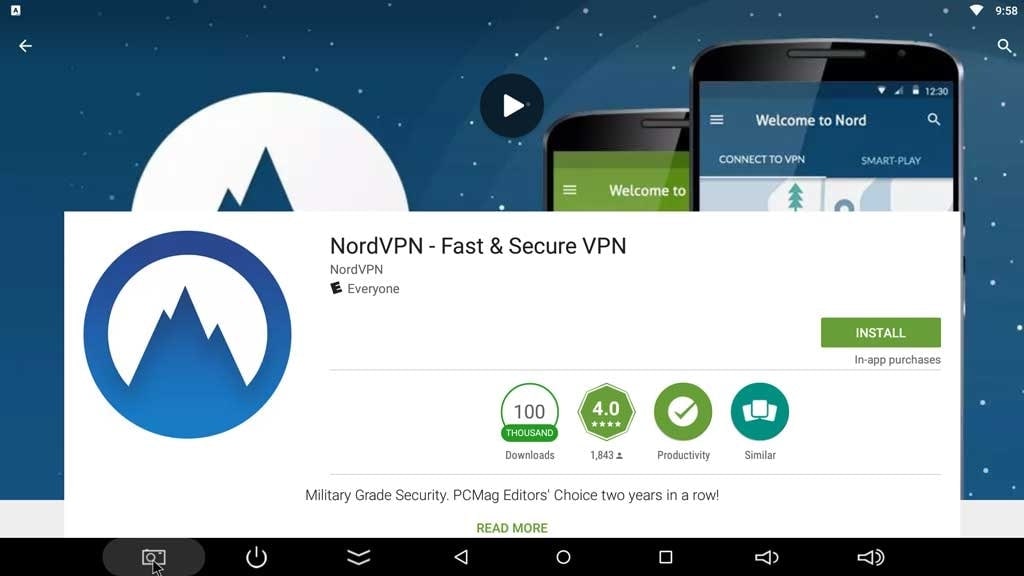
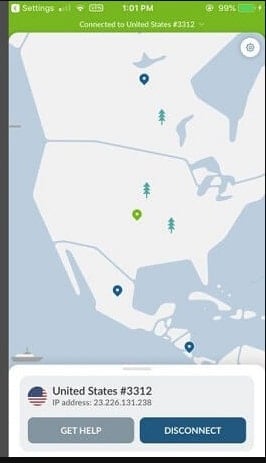
Step 2: Sign Up and create your account on the app. The main use of a VPN is to mask your IP and give you a new server for internet surfing. So, once you log in, NordVPN will find the closest server for you.
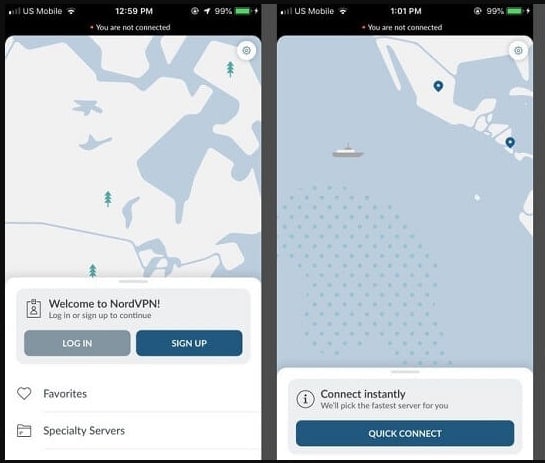
The automatic connect was made to United States - the closest server
 HD Video Converter Factory Pro
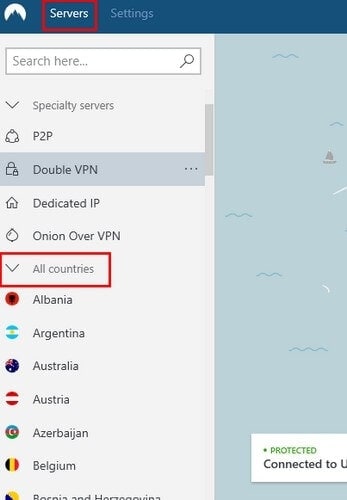
Step 3: In case you want to change to a specific country, You can go to ‘More Options’ and then choose Servers. Then go to All Countries and choose the country of your choice. Once you launch Spotify, the same will reflect there too.
The VPN works for all kinds of mobiles and it is very convenient to use. This is a good way to mask your IP address completely, so that no one can track your location change activity either. You can change servers several times a day to access content from across the world.
 Forex Robotron Gold Package
Conclusion
If you know the right way to do it, changing Spotify Location After Moving to Another Country is no big deal. You have several tools that will assist you in the job. Unless you are faking your location, you can change location directly from Spotify Account Overview too. But if you want to Change Location in Spotify for more benefits, then you can use the tools we have mentioned to get the job done. You can cut down the premium payment prices, listen to exotic music from across the world and also stay up to date with the podcast releases too.
How To Simulate GPS Movement With Location Spoofer On Xiaomi Redmi 13C?
When you are playing location-based games like Pokemon Go, you might need to simulate GPS movement to catch more Pokemon. To do this, you can use the GPS movement feature of Wondershare Dr.Fone - Virtual Location . This feature allows you to simulate GPS movement between two or multiple spots on the map. Here’s how you can do it:
 Glarysoft File Recovery Pro Annually - Helps to recover your lost file/data, even permanently deleted data.
Part 1: Simulate Movement Along a Route (One-Stop Route)
You can set up a one-stop route when mocking locations fake with Dr.Fone - Virtual Location. This particular feature helps users to set up looping or round trips within a specific location. To perform the steps for simulating movement, look ahead for a better understanding:
Step 1Access One-Stop Route Function
Once you launch Wondershare Dr.Fone - Virtual Location and connect your smartphone successfully, proceed to select the One-Stop Route function from the top-right section. The function is represented by the third icon from the left in the section. While you have already teleported to another location or are using your current location, you can tap anywhere on the map to set your destination location.

Step 2Define Simulation Parameters
Enter a number to define how many times you want to go back and forth, and select whether you want a Round trip or a Loop trip. Drag the slider on the speed option to set how fast you want to walk. Proceed to click Move Here on the bottom to start the movement simulation.


Step 3Start Simulation Movement
The respective simulation starts, and you can see your position is moving on the map with the speed you set. If you wish to hold the simulation, click Pause or tap Clear to revert to your original state.
 OtsAV TV Webcaster
Part 2: Simulate Movement Along a Route (Multi-Stop Route)
You can try the multi-stop mode if you want to pass by multiple places along a route on the map. Learn how it is done when you are trying to **spoof location on Android/**iOS:
Step 1Start Multi-Stop Route and Set Parameters
Activate the Multi-Stop Route mode from the top-right section next to the One-Stop Route mode. After activating the mode, set multiple spots on the map by clicking your required place. Define the number of trips and speed. Click Start Moving to initiate the process.
Note: Select the spots along a specific road to prevent the game developer from thinking you are cheating.

Step 2View Multi-Stop Route Movement
As the simulation starts, click Pause at any instance where you want to stop the simulation. You can also Clear all settings if required.
Part 3: Use Joystick for More Flexible GPS Control (Joystick Movement)
Dr.Fone has integrated the joystick feature into the Virtual Location program to spare 90% of the labor for GPS control. You can always find the joystick on the lower left part in teleport mode. And you can also click the joystick button in the upper right (the 5th one) to use the joystick feature.
The joystick, like one-stop route or multi-stop route modes, aims to facilitate GPS movement on the map. But what’s better? The joystick lets you move on the map by changing directions in real time. Here are the two main scenes where you will definitely love the joystick.
- Automatic GPS movement: Click the Start button in the middle, and the automatic movement starts. Then just change the directions as you like by 1) clicking the left or right arrows, 2) dragging the spot around the circle, 3) pressing keys A and D on the keyboard, or 4) pressing keys Left and Right on the keyboard.
- Manual GPS movement: Move forward by constantly clicking the Up arrow in the program and long-pressing the key W or Up on the keyboard. Reverse by constantly clicking the Down arrow, or long-pressing the key S or Down on the keyboard. You can also tweak the directions using the four ways above before moving forward or reverse.
Prevent Cross-Site Tracking on Xiaomi Redmi 13C and Browser
Have you ever wondered why you get the advertisements of the websites you visited a few minutes ago on your social media sites? Here comes to Cross-Site Tracking, also termed CST, and it is a process where third-party cookies and sites track your browser history.
![]()
The CST process is like invading your privacy by collecting your browser history and personal information. So, to prevent these services, there are several ways by which you can cross-site tracking on your system as well as Xiaomi Redmi 13C phone browsers. Keep reading to learn how to stop cross-site tracking on both Xiaomi Redmi 13C and browser.
Part 1: Why Do We Need to Stop Cross-site Tracking?
Cross-site Tracking is all about collecting your browsing data and other information for advertising purposes. Though the process can prove convenient for many as it provides additional information about the products and services you have searched for and offers tailor-made content, it is intrusive and about breaching your privacy.
Cross-site tracking collects information about your browsing history. The third-party cookies also monitor the content type you have visited and your personal information, which is risky.
Besides invading privacy, the CST also poses several other issues. Based on your browsing history, additional content you have not asked for is loaded on your visited sites, slows down the page loading process, and puts an extra burden on your battery. Moreover, too much-unwanted content can interfere with the basic information you are looking for.
So, it is always better to prevent cross-site tracking for all the above and more reasons.
Further reading: A detailed guide on faking location in Mozilla Firefox . Don’t worry about your location privacy anymore!

Part 2: Can Private Browsing be traced?
Yes, private browsing can be traced. When you work in private browsing mode, the web browser does not save the browsing history, which means that anyone who uses your system will not check your online activities. But websites and cookies can track your browsing history as well as other information.
 Any DRM Removal for Win:Remove DRM from Adobe, Kindle, Sony eReader, Kobo, etc, read your ebooks anywhere.
Part 3: How to Disable Cross-website Tracking on Safari for iOS Devices?
Safari is the most commonly used platform by iOS users. So, to prevent CST for Safari on your iOS devices and Mac systems, below is a complete guide.
Deactivate Safari cross-website tracking for iPhone & iPad
Safari cross-site tracking can be prevented using the below steps on your iPhone and iPad.
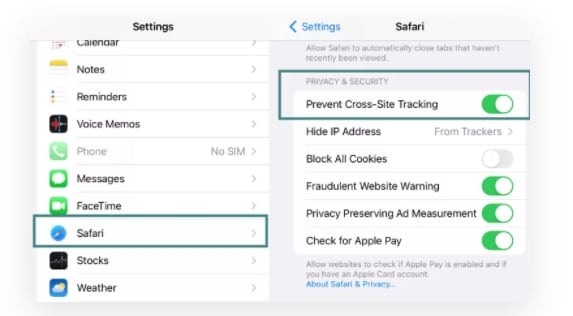
- Step 1. Launch the Settings app on your iOS device.
- Step 2. Find the Safari option by scrolling down the menu.
- Step 3. Move the slider to turn on “Prevent Cross-Site Tracking” under the PRIVACY & SECURITY option.
Deactivate Safari cross-website tracking for Mac
Use the steps below to turn off cross-site tracking on Safari on your Mac systems.
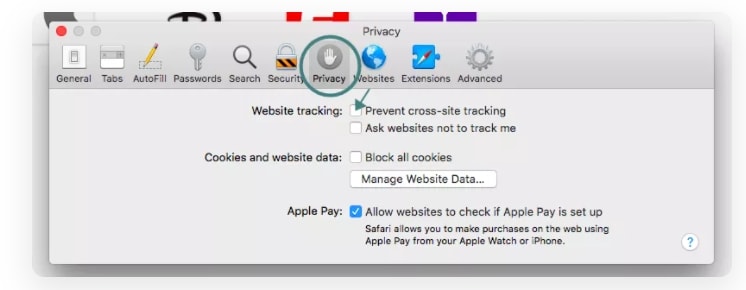
- Step 1. On your Mac system, open the Safari app.
- Step 2. Move to Safari > Preferences > Privacy
- Step 3. Enable the “Prevent cross tracking” option by clicking on the box next to it.
Part 4: How to Disable Cross-site Tracking on Google Chrome
Chrome is used widely on Windows systems and Android devices, and to prevent the CST from your browser, a detailed guide is given below.

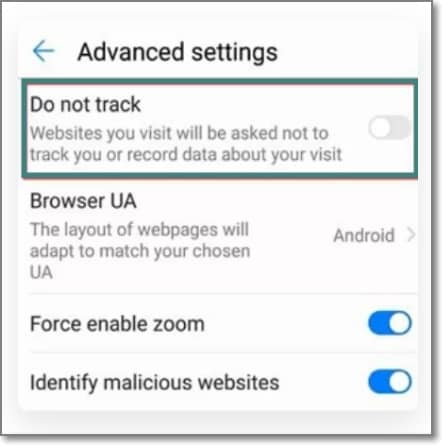
Enable “Do Not Track” on Google Chrome for Android
- Step 1. On your Xiaomi Redmi 13C, open the Chrome app.
- Step 2. At the right side of the address bar, click on the More option and choose Settings.
- Step 3. Choose the Privacy option from the Advanced tab.
- Step 4. Click on the “Do Not Track” option to turn on the feature.
 Nero Burning ROM:
The ultimate burning program for all your needs!
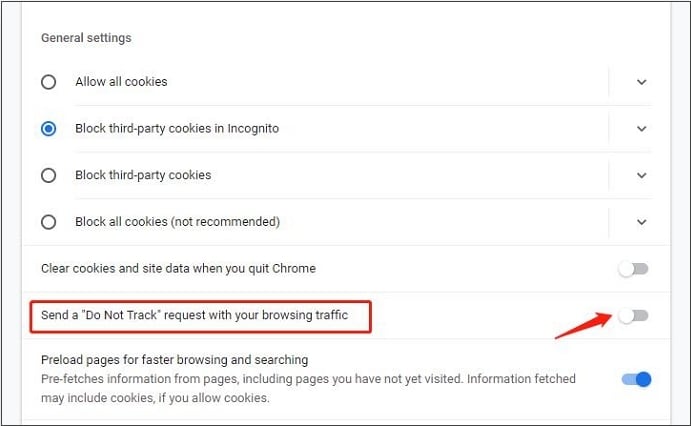
Enable “Do Not Track” on Google Chrome for Computer
- Step 1. Launch Chrome on your system, and from the menu at the upper-right corner, click on the Settings option.
- Step 2. From the “Privacy and Security” tab, choose the “Cookies and other site data” option.
- Step 3. Tap and enable the slider next to “Send a “Do not track” request with your browsing traffic.”


Part 5: Recommended Solution: Fake a Location to Stop Cross-Site Location Tracking Using Dr. Fone
What if you let the sites and cookies track your phone location without worrying about your privacy? Yes, it can be done by spoofing your location. So, if you set a fake location while browsing the internet, you will not have to worry about cross-site tracking, as anyways, the sites and cookies will get misled browsing information that cannot harm you in any manner.
Setting a fake location on your iOS devices, a professional tool is needed, for we recommend Wondershare Dr.Fone - Virtual Location as the best tool. Using this Android and iOS-based software, you can set any fake GPS location on your device. The tool is simple to use and does not require any mastery of technical know-how.
Key features
- Simple tool to teleport to any GPS location in a single click.
- Allows simulating GPS movement along the route.
- All popular models of Android and iOS devices are compatible.
- Compatible with all location-based apps on your phone.
- Compatible with Windows and Mac systems.
Here is a video tutorial for you to take an overview of how to use Dr.Fone - Virtual Location to fake location on your Android and iOS devices.
 safe & secure
Steps to set fake location on your Android and iOS devices using DrFone-Virtual Location
Step 1. Download, install and launch the software on your Windows or Mac systems. On the main software interface, choose the Virtual Location option.
Step 2. Connect your iPhone or Android device to your system using a USB cable and then tap on the Get Started option on your software interface.
Step 3. A new window on the software interface will open, showing your connected phone’s real and actual location. If the detected location is incorrect, click on the “Center On” icon to display the right device location.

Step 4. Next, you need to activate the “teleport mode” and click o the 3rd icon at the upper-right corner.
Step 5. Next, you have to enter now the fake location to which you wish to teleport to at the upper-left corner. Click on Go.
Step 6. Finally, tap on the Move Here button and the new fake location for your connected Android or iOS device at the pop-up box.
Check the new location of your phone from the app.

 NeoDownloader - Fast and fully automatic image/video/music downloader.
Wrap it up
Preventing Cross-site tracking can be done on different browsers and devices using the guides listed in the above parts of the article. Settings a fake location for your device using Dr. Fone-Virtual Location is another interesting way to prevent tracking your browsing history by spoofing the sites and cookies. Setting a fake place will not only avoid monitoring your browsing history but will also work with all location-based apps on your phone.
safe & secure
- Title: How to Change Spotify Location After Moving to Another Country On Xiaomi Redmi 13C | Dr.fone
- Author: Ava
- Created at : 2024-08-01 22:58:01
- Updated at : 2024-08-02 22:58:01
- Link: https://fake-location.techidaily.com/how-to-change-spotify-location-after-moving-to-another-country-on-xiaomi-redmi-13c-drfone-by-drfone-virtual-android/
- License: This work is licensed under CC BY-NC-SA 4.0.