
How To Fake GPS On Samsung Galaxy XCover 6 Pro Tactical Edition For Mobile Legends? | Dr.fone
How To Fake GPS On Samsung Galaxy XCover 6 Pro Tactical Edition For Mobile Legends?
People, generally boys, are often found playing games on their cell phones, and they are pretty much addicted to it. Many games are of their interest, but Mobile Legends has always been on the top of the list. Mobile Legends is a game that can be played by a few people simultaneously, and it is called MOBA.
Unlike other games, Mobile Legends allows its players to hide their actual location. Therefore, ML players have many reasons to fake GPS Mobile Legends, such as getting a higher rank and playing with their friends wherever they are. Let’s find how to fake GPS on ML in this article now!
Part 1: Why Do We Need to Fake Location on ML
Some players want to fake-locate Mobile Legends because it is highly competitive and it usually ranks globally or locally. Most players prefer local street rankings, which are specified according to the area. The GPS detects the location of the Samsung Galaxy XCover 6 Pro Tactical Edition devices in your area while you are in the game. Spoofing your location can bring you new requests and challenges that were practically unavailable in your area.


The most amazing thing this does to your game is bringing you different teammates from all over the world, which can’t be done the other way. Another thing that you can do while using fake GPS for ML is to earn a top badge in the less competitive areas. If you want to play the game with your friend, you or he can change the location to play together.
Some countries have very few players of ML. So, if you shift your location to those countries, you have a chance to become the top player. You can also earn a supreme title by using a fake GPS for ML**.** Here’s a list of countries that have a low MMR or power and are considered the best location for fake GPS ML:
- Kuwait
- Mexico
- Romania
- Ukraine
- Qatar
- Peru
- Egypt
- Russia
- Belarus
- Ireland
- Kazakhstan
- Greece
- Vietnamese
Part 2: How to Change GPS in ML on iOS Devices
Wondershare Dr.Fone has always amazed us with its incredible tools and features, one of which is Dr.Fone - Virtual Location. Dr.Fone - Virtual Location comes in handy if you’re playing Mobile League on an iOS device because it hides your current location. It will also allow you to change your location virtually, allowing you to be in any location without jailbreaking.
It is compatible with all the location-based apps and works seamlessly**,** so you don’t have to worry about the apps glitching. But if you are an Android user, then Dr.Fone doesn’t enable fake location on Android games, but it lets you change the location of your Samsung Galaxy XCover 6 Pro Tactical Edition. However, it fully supports all the games available such as fake GPS Mobile Legends on iOS devices.
Steps-by-Step Instructions for Faking ML Location Using Dr.Fone - Virtual Location
Here is the guide that even a beginner who is new to ML can follow to change location in ML using his iOS device:
Step 1: Get Started by Launching the Application
After downloading and launching Dr.Fone, click “Virtual Location” among all the other options and connect your iPhone to your computer. Later, click on “Get Started.”


Step 2: Locate Yourself on the Map
You will be able to find your actual location on the map as soon as the new window opens. If your location is misplaced, click on the “Center On” icon in the lower right part of the screen. This will show your actual location.

Step 3: Activate the Teleport Mode
Next, you will have to activate the “Teleport Mode” by clicking on its icon. After it’s activated, add the location you want to be teleported and click on the “Go” button to locate the new location. After that, tap on the “Move Here” option to move to your desired location.
 The BootIt Collection covers multi-booting, partitioning, and disk imaging on traditional PC’s using the standard BIOS and newer PC’s using UEFI. The collection includes BootIt Bare Metal (BIBM) for standard BIOS systems and BootIt UEFI (BIU) for UEFI system.
Step 4: Confirm your New Location
The location has changed now; you can check it by clicking “Center On.” The same location will be on your Mobile Legends game. Now, open your game and play it in your desired location with your friends and other people.


Dr.Fone - Virtual Location
1-Click Location Changer for both iOS and Android
- Teleport from one location to another across the world from the comfort of your home.
- With just a few selections on your computer, you can make members of your circle believe you’re anywhere you want.
- Stimulate and imitate movement and set the speed and stops you take along the way.
- Compatible with both iOS and Android systems.
- Work with location-based apps, like Pokemon Go , Snapchat , Instagram , Facebook , etc.
3981454 people have downloaded it

Part 3: How to Change Location in Mobile Legends on Android Devices
There could be many reasons to hide your location; one of them could be that you don’t like being checked or you’re a person who prefers his privacy over anything. However, hiding your location is not a difficult task today for Android users because many advanced apps do the job for you without any hassle. Here’s how you can hide your location on Android devices while playing Mobile Legends.
1. Use Fake GPS Location App
Fake GPS Location App is developed by Lexa that is free to use. An exceptional fake GPS for ML app provides an Android user with a great spoofing experience. This app comes with different features that allow the user to keep track of all the previous locations that can be used in the future.
It is capable of marking a location, and later you can start the program on boot; through this program, you can specify different locations. If you want to change location in ML because you don’t feel like being there virtually, it can be done through the Fake GPS Location App.

2. Hola VPN Service
Hola is a VPN service that is considered one of the best on the market, which provides safe and anonymous surfing on the internet. It preserves your privacy and works like a dream; you don’t have to wait for the screen to load because of its high-speed maintenance VPN. Furthermore, it works perfectly fine off barriers and blockages so that you can run any streaming service without restrictions.
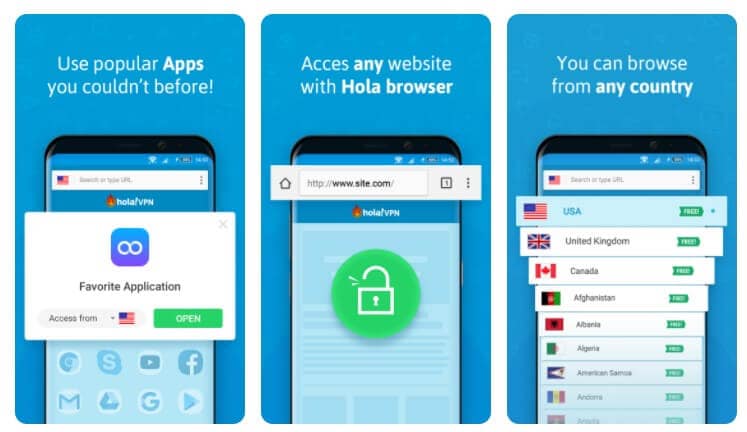
Hola Fake GPS Mobile Legends VPN Service is only available across Samsung Galaxy Store and Huawei App Gallery. Hola allows you to use apps that you couldn’t use before due for any reason on your Huawei/Samsung device. Through the Hola browser, you can access any website. Furthermore, it has no geographical limitations to use Hola VPN on Huawei/Samsung from anywhere in the world.

Part 4: A Comparison of the 3 Fake GPS Methods
Easy-to-Use | OS Supported | Specific Map Location | Route Movement | Keyboard GPS Movement | |
| Dr.Fone – Virtual Location | ✔ | Android/iOS | ✔ | ✔ | ✔ |
| Fake GPS Location App | ✖ | Only Android | ✔ | ✖ | ✖ |
| Hola VPN Service | ✔ | iOS/Samsung/Huawei | ✖ | ✖ | ✖ |
 dotConnect for Oracle is an ADO.NET data provider for Oracle with Entity Framework Support.
Conclusion
This article has discussed the Mobile Legends game and how you can fake GPS Mobile Legends. Usually, people like to hide their locations or fake them because they prefer their privacy and don’t want to be located by their friends or family. However, in the case of Mobile Legends, people spoof their location to increase their rank or get new challenges. Therefore, we have given you a clear idea of how you can fake your location using Dr.Fone - Virtual Location on both Android and iOS devices.
How to Find iSpoofer Pro Activation Key On Samsung Galaxy XCover 6 Pro Tactical Edition?
There are specific situations where it is necessary to fake your GPS location. By spoofing locations, you can teleport to anywhere in the world, hide your true location to prevent others from tracking you, have access to content that is restricted in your current location, and so on. Spoofing locations is also conducive in location-based games such as Pokémon GO.
There are specific applications that allow you to spoof the location of your device. However, there are no such apps for iPhones as Apple does not allow GPS spoofing apps in the App store. To change the location of your iPhone, you can connect it to your PC and use a spoofing application there to change its location. We are going to talk about iSpoofer, a professional location spoofing application; 3 ways to get the iSpoofer Pro Plan License Key for free; Wondershare Dr.Fone - Virtual Location (iOS), a better alternative to iSpoofer; and the steps to spoof your iPhone GPS location using Wondershare Dr.Fone - Virtual Location (iOS).
Part 1: Ways to Get the iSpoofer Pro Plane License Key Free 2022
iSpoofer is a professional GPS simulation desktop application that can be used to spoof the GPS location of an iOS device. It runs on Windows and Mac computers. To change the GPS location of your iOS device, you have to install and run this application on your PC, connect your iOS device to your PC, and then spoof its location by using the application on your PC.
iSpoofer has a free version and 2 subscription plans - Pro plan and Volume plan. For unlimited spoofing, you can use the Pro plan of iSpoofer, which is available at $4.95 per month. With this plan, you can change the location of up to 3 iOS devices at once. To activate iSpoofer Pro on your PC, you will have to enter a license key sent to you via email after you pay for its subscription. However, there are a few tricks with which you can get this license key without subscribing and activate iSpoofer Pro and use it for free. Below, we have mentioned 3 ways to get a free iSpoofer Pro Plan License Key.
- Check on Community Days: The game Pokémon GO sometimes offers free iSpoofer Pro PlanLicense Keys on Community Days. Community Day is a worldwide special event in Pokémon GO that occurs every month for a few hours. Various kinds of special bonuses and rewards are offered on Community Days. Among these offers, a free iSpoofer Pro Plan License Key might be available on a particular Community Day. Make assured you do not miss this offer because the key will be available only for a few hours before it gets expired.

- Check out websites: Certain websites throughout the internet occasionally offer free iSpoofer Pro Plan License Keys. Try to check them out from time to time, and someday you might be lucky to get a free iSpoofer Pro Plan License Key. One of such websites is http://www.spoofer.pro/.
- Subscribe to YouTube channels: Another way to get a free iSpoofer Pro PlanLicense Key is to subscribe to YouTube channels that offer giveaways of these license keys. There are specific YouTube channels that offer free iSpoofer Pro Plan License Keys to their lucky subscribers. Make sure you subscribe to such channels and keep checking their videos, especially around giveaway times, to see if you are the lucky subscriber to win the giveaway.
 Power Tools add-on for Google Sheets, 12-month subscription

Part 2: The safer way to Spoof on iPhone
A much better and safer way to spoof your iPhone location is to do it using Wondershare Dr.Fone - Virtual Location (iOS). It is a desktop application that can be used to instantly fake the GPS location of your iOS device with just a click of your mouse. It is compatible with both Windows and Mac computers. You can use this fantastic application to safely change your GPS location on several applications, including WhatsApp, Snapchat, Tinder, and Pokémon GO. It allows you to change the location of up to 5 iOS devices at once.
Key features:
- It comes with an integrated joystick feature for controlling GPS movement.
- GPS movement can also be controlled with a keyboard.
- Offers 3 modes - teleport your location, simulate movement between two spots, and simulate movement along a specified route.
- Offers; both automatic and manual GPS movements.
- Compatible with Windows XP and above, and Mac OS X 10.13 and above.
- Requires a minimum RAM of 256 MB and a minimum free hard disk space of 200 MB.
Steps to spoof your iPhone location using Wondershare Dr.Fone - Virtual Location (iOS):
- Download and install Wondershare Dr.Fone - Virtual Location (iOS) on your Windows or Mac PC. Launch the application.
- Once the application is launched, a window will appear with a variety of options. Click “Virtual Location” from those options.
- Connect your iPhone to your PC. via USB cord. Once your device is connected successfully, click on the “Get Started” button.

- A new window will appear where the actual GPS location of your iPhone will be shown. If it is not accurately displayed, click on the “Center On” icon in the lower right part of the window to show the accurate location.
- Click on the “teleport mode” icon in the upper-right part of the window (the 3rd one from the right). This will activate “teleport mode”.
- In the search bar in the upper left part of the window, enter the name of the desired location where you wish to teleport. Then click “Go”.

- A popup box will appear. Click “Move Here”.

- With that, the GPS location of your iPhone has been successfully changed and fixed. You can check it by clicking on the “Center On” icon or checking your iPhone’s location. Also, the location of the location-based app; you are currently using on your iPhone has been successfully changed too.
 vMix 4K - Software based live production. vMix 4K includes everything in vMix HD plus 4K support, PTZ control, External/Fullscreen output, 4 Virtual Outputs, 1 Replay, 4 vMix Call, and 2 Recorders.
Conclusion
So, that was all about the article. We have discussed 3 simple tricks to get a free iSpoofer Pro Plan License Key. Then, compared with iSpoofer Pro which allows you to change the location of up to 3 iOS devices at once, Wondershare Dr.Fone - Virtual Location (iOS) allows you to change the location up to 5 iOS devices at once. Compared with iSpoofer Pro, it is safer and easier to use and comes with more features.
How to Share Location in Messenger On Samsung Galaxy XCover 6 Pro Tactical Edition?
We usually host a gathering once in a while and invite our friends to come over. Most of us are already used to organizing such activities because we’ve been doing that for a long time now. However, we cannot deny that it’s much easier nowadays than years ago. Why so? Simply because the communication channels available today at our disposal are more digital and more capable. For instance, Facebook Messenger now allows users to share their whereabouts in a snap of a finger. Yes. That feature is called Live Location.
The Live Location feature on Messenger works beyond sending the address or coordinates of your exact location. It basically visualizes your whereabouts by means of an interactive map and updates the details from time to time. That means the receiver can view not only your position but also your movements. Is that helpful? Absolutely yes. It’s indeed a game-changer in today’s already convenient world. Is it highly recommended? With proper handling and adequate caution, Messenger’s Live Location can definitely do more good than harm to the users.
In this article, we will delve into the highlights and benefits of Facebook Messenger’s location-sharing features. We will also provide some tutorials on how to share Live Location on Messenger. Continue reading below to learn more.
Part 1. Everything You Should Know About Messenger’s Live Location
Facebook is well aware that sharing location details is essential to its users. That’s why developers have come up with a brilliant idea and rolled out Live Location on Messenger. It basically works like other location-sharing features. However, Live Location provides more precise and thorough location information. It’s in map form, where you can view the exact location and track the movements of the sender. You’ll continue to see updates for as long as the sharing is not halted on the other end. To navigate it properly, try to read tutorials on how to share Live Location on Messenger.


What if you wish to send a particular address from another location? There is no problem with that. Messenger allows users to search for a specific place, trace it on the map, and share the details. The receiver can view it in map form and get directions if necessary. See? It’s very easy and convenient. No need to type in long addresses just to share a particular location with your friend. You just have to find it precisely on the map and send the information afterward.
Convenience is just one thing. Messenger’s location-sharing feature has a lot more to offer to users. One of which is the accuracy of the shared location information. Since the details are automatically generated through GPS, you can be sure that it is correct and definite. If you go out and track it down the neighborhood, you can certainly find the location in no time. Just make sure that the location services on your smartphone are activated so you can view your progress in real time. Also, stay vigilant while you’re out and keep yourself safe from any harm. Remember that safety remains a priority and comes above convenience.
How to Grant Facebook Messenger the Permission to Access Your Location?
Facebook Messenger’s location-sharing feature will not work without the necessary access. That’s why you should first configure the permission settings on your mobile device to avoid unwanted disruptions. Don’t worry. It’s indeed a piece of cake. Check out the tutorial provided below.
- 1: Go to Settings.
- Step 2: Click Apps.

- Step 3: Find and click Messenger.

- Step 4: Click Permissions.


- Step 5: Click Location.

- Step 6: Select Allow Only While Using the App. If you’re quite conservative regarding this matter, click Ask Every Time instead. After that, Facebook Messenger will have access to your location information.

Part 2. How to Share My Location on Messenger?
How do I share my location on Messenger? As mentioned earlier, it’s very easy to use Facebook Messenger for location sharing. All it takes is just a few clicks on the platform. No need to manually type in the address or sketch the landmarks. Messenger does the rest of the work for you. In actuality, there are three ways to share your location on Messenger. Any of them can be of great help to you, depending on your current situation. Do you want to try them now? Check out the tutorials below.
Method 1: Share location on Facebook Messenger via Live Location
How to share my location on Messenger? Well, the first option you can try is through Live Location. It works best if you wish to tell somebody where exactly you are and give updates from time to time. Don’t worry. Although it looks complicated at a glance, in reality, it’s actually not rocket science. It only takes a few seconds to complete. Below is a tutorial on how to share Live Location on Messenger in easy steps.
- Step 1: Open the Facebook Messenger application on your mobile device.
- Step 2: Browse through your conversation feed and find the contact with whom you wish to share your Live Location. Click on it.
- Step 3: Click the More (+) icon at the bottom-left corner of the screen.
 /a>
/a>
- Step 4: Right after, click Location.

- Step 5: Click Start Sharing Live Location. Immediately, your current location details will be available and forwarded to the intended receiver. Live Location lasts for 60 minutes at maximum. If you wish to terminate it, simply click Stop Sharing Live Location.


Method 2: Share location on Facebook Messenger via Pinned Location
Let’s say there is a specific place you want to visit with your friend. Is there a way to share the address of the venue without you being there at the moment? Fortunately, it is possible. Apart from sharing your current location in real-time via Live Location, you can also send pinned locations on Messenger. You just need to search for it and then redirect the details to your friend. Yes. It’s just as simple as that. Do you want to try it on your smartphone? If so, follow the guide below.
- Step 1: Launch the Facebook Messenger application on your mobile device.
- Step 2: Scroll through your conversations and find the receiver from the list. Click on it.
- Step 3: On the text field, click the More (+) icon at the bottom-left corner.
- Step 4: Then, click Location.
- Step 5: Locate the search bar above the interactive map and type in the location you want to share.

- Step 6: Choose one from the suggested results and then click on it. The details will then be forwarded immediately to the intended receiver.
Method 3: Share location on Facebook Messenger via Google Maps location
How do I share my location in Messenger if I cannot find it on the map provided? Yes. That happens sometimes. There are certain places that are untraceable on the messaging platform. As a result, it doesn’t appear on the map when you try to search for it. But don’t sweat it. If you experience the same issue, you can instead use Google Maps to share location details. How to do it? Check out the tutorial provided below.
- Step 1: Launch the Google Maps application on your mobile device.
- Step 2: Click on the Search bar at the top and then type in the location.
 Software Update Pro - Check and update software installed on your computer.

- Step 3: Choose one from the suggestions and then tap on it. Make sure that it is exactly what you’re looking for.

- Step 4: Access the menu bar below the map and then click Share.

- Step 5: From there, click Chats or the Facebook Messenger logo.
- Step 6: Find the receiver from the provided list and then click the Send button next to its name.

NOTE: Of course, you can only send pinned locations via Google Maps. The Facebook Messenger’s Live Location is available within the platform only.
BONUS TIP: Protect Your Privacy With Wondershare Dr.Fone
There’s no denying that the location-sharing feature of Facebook Messenger is useful to many of us. It always comes in very handy whenever we need to meet people somewhere or invite them to our places. However, we should not become too complacent and let our guard down. Sharing sensitive information like whereabouts always comes with risk, regardless of the platform and the intention. Therefore, make it a habit to protect your privacy at all costs. In this regard, Wondershare Dr.Fone has something special to offer. Its Virtual Location feature, capable of modifying and simulating your location records, can be of great help for you. Don’t worry. It’s very easy to use. Here’s a short guide for you.
- Step 1: Download Wondershare Dr.Fone from its official website. Right after, install it on your computer.
- Step 2: Launch the newly installed software on your desktop. Once it fully loads up, connect your smartphone using a data cable. Follow the on-screen instructions and perform the steps accordingly to ensure the connection between the two devices is stable enough to handle the succeeding operations.
- Step 3: Navigate to the left-side panel and then click Toolbox. On the main dashboard, click Virtual Location. Is it your first time using this feature? If so, allow Wondershare Dr.Fone to download additional resources. Don’t sweat it. It will only take a few minutes to complete.
- Step 4: Once the downloading process has concluded, Wondershare Dr.Fone - Virtual Location will automatically open on a separate window. From there, go to the top-right menu bar and then click Teleport Mode. It is the first icon that appears in the row.
- Step 5: Head over to the top-left corner and enter your desired location into the search bar. Choose one from the suggested results. After that, click the Enter icon.
- Step 6: The details regarding your chosen location will be displayed on the computer screen. Review the information and make sure that it is the specific location you’re looking for. Once confirmed, click Move Here to proceed.
- Step 7: Immediately, the location settings on your smartphone will be changed according to the inputs you have provided to Wondershare Dr.Fone. You can verify it by checking the current location registered on your Maps app. After confirming that your mobile device is now showing a different location, you can now start browsing without worrying about your location’s privacy.
 CalendarBudget - Monthly subscription membership to CalendarBudget via web browser or mobile app. Support included.
NOTE: Resort to Wondershare Dr.Fone - Virtual Location if your internet browsing does not require you to provide your real address. If you wish to restore your original location settings, simply close the Wondershare Dr.Fone application and restart your smartphone.
Conclusion
Gone are the days when you had to write invitation cards manually and deliver them one by one. Nowadays, all you need to do is go online and use Messenger’s location-sharing feature. Have you already tried it? If not, you should take it into consideration and use it on your next agenda. Refer to the tutorial above on how to share Live Location on Messenger. It can certainly help you get started. How do I share my location on Messenger without physically being there? That’s simple. Use Messenger or Google Maps’s pinned location. Furthermore, download Wondershare Dr.Fone on your computer. Its Virtual Location feature, capable of modifying your location settings, can provide protection for your privacy. Just connect your Samsung Galaxy XCover 6 Pro Tactical Edition to the computer and set it up from there.
- Title: How To Fake GPS On Samsung Galaxy XCover 6 Pro Tactical Edition For Mobile Legends? | Dr.fone
- Author: Ava
- Created at : 2024-08-01 23:04:05
- Updated at : 2024-08-02 23:04:05
- Link: https://fake-location.techidaily.com/how-to-fake-gps-on-samsung-galaxy-xcover-6-pro-tactical-edition-for-mobile-legends-drfone-by-drfone-virtual-android/
- License: This work is licensed under CC BY-NC-SA 4.0.