
How to Fix Apple iPhone 7 Plus Find My Friends No Location Found? | Dr.fone
How to Fix Apple iPhone 7 Plus Find My Friends No Location Found?

In this time of modern technology, it is hard to be away from your phone or even leave it at home. When any task that we plan to do, usually already have an application released for the sole purpose of doing that task and needing to do it on your phone. When we message our friends, have a video call with our family, or just simply order food to eat at home, you can do all of them on the Apple iPhone 7 Plus device in your palm.
Another advantage of having our phones with us all the time is that you can also see the current location of either your friend or family. For Apple phone users, they have an app that is called “Find My Friends” that will show you the locations of the people that you are tracking. But what if you cannot find the location of the friend? We will find out the causes as to why no location can be found and how you can fix this in just a few simple steps.
Part 1: Why does an Apple iPhone 7 Plus say “no location found”?
When you are searching for your friend’s current location and it shows that “no location found”, there could be numerous reasons as to why that is happening. We have listed down the possible reasons why there is no location found.
Option #1: Your friend has not signed in to the “Find My Friends” application. Make sure that they are registered in the application before tracking their location.
Option #2: The other person’s mobile is not connected to the internet or their phone is off. This could also be another common reason why you cannot see their location.
Option #3: Make sure that their “Location Services” is turned on. Some users would turn this feature off which hinders the application from checking their current location.
Option #4: The other user must have set up the wrong date and time. If the date and time do not correspond to the global time, then it will cause problems and difficulty with tracking that user.
Option #5: The application might not have been enabled under “Location Services”. Make sure that the application has the permission to track your current location and you can do this by following the steps below.
- Step 1: Go to “Settings” and then “Privacy”.
- Step 2: You can then go to “Location Services” and make sure that the application “Find My Friends” is enabled to track your location.
Part 2: Tips To Fix “No Location Found” Available
If you encounter an issue that says “No Location Found”, there are numerous ways you can fix the “No Location Found” message on “Find My Friends” and we will share them with you.
Option #1: Adjust your phone’s date and time. You can reset your time by following the steps.
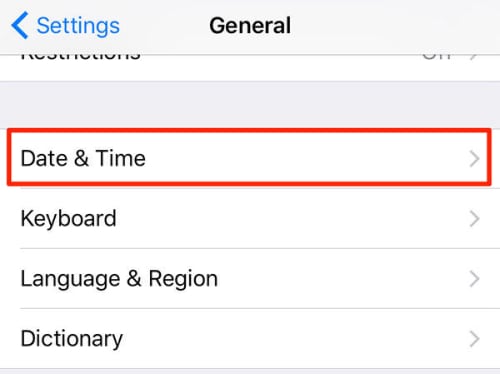
- Step 1: Go to “Settings” and choose “General”.
- Step 2: Then click on “Date & Time” and you can manually or automatically set the time.
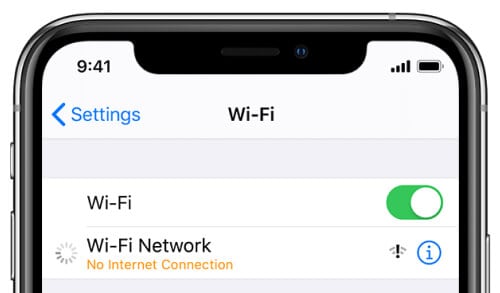
Option #2: Make sure that you or the other user is connected to the internet. Double-check if your phone is connected to the internet.

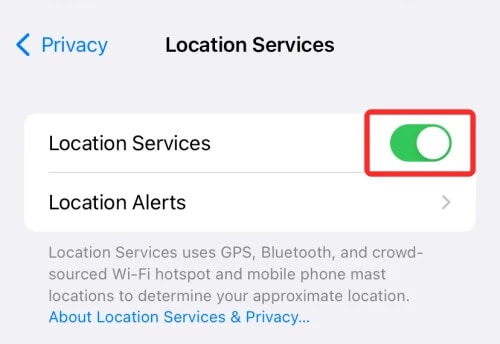
Option #3: Turn off and turn on your “Location Services”. Usually, this simple troubleshooting can fix this issue, you can try this out and check if you can see their location now. They can turn it on by following the steps below.
 KoolReport Pro is an advanced solution for creating data reports and dashboards in PHP. Equipped with all extended packages , KoolReport Pro is able to connect to various datasources, perform advanced data analysis, construct stunning charts and graphs and export your beautiful work to PDF, Excel, JPG or other formats. Plus, it includes powerful built-in reports such as pivot report and drill-down report which will save your time in building ones.
 It will help you to write dynamic data reports easily, to construct intuitive dashboards or to build a whole business intelligence cockpit.
KoolReport Pro package goes with Full Source Code, Royal Free, ONE (1) Year Priority Support, ONE (1) Year Free Upgrade and 30-Days Money Back Guarantee.
Developer License allows Single Developer to create Unlimited Reports, deploy on Unlimited Servers and able deliver the work to Unlimited Clients.
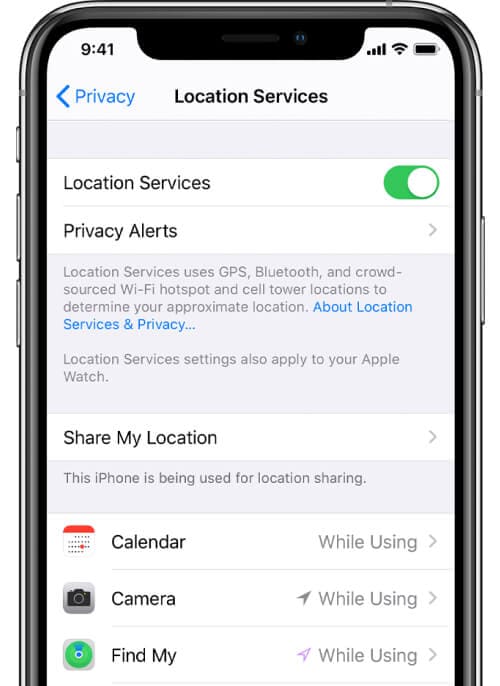
- Step 1: Go to “Settings” and choose “Privacy”.
- Step 2: After, you can look for “Location Services” and enable it.
Option #4: Enable “Location Services” for the “Find My Friends” application. There could be instances where your “Location Services” is not enabled for the application.
Part 3: How to Share Your Location with Find My Friends App?
If you want to share your location in the “Find My Friends” application, you can do that by following the steps below.
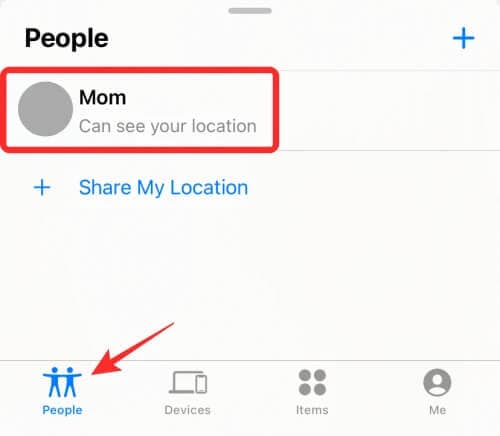
- Step 1: Open the “Find My Friends” application and select “People”.
- Step 2: Then you can tap on “Share My Location” and from there, you can type the phone number of the person you want to share your location too. You can also specify the amount of time you will share your location.
 Forex Robotron Basic Package
Part 4: How to Share a Fake Location to Others in Find App?
Sometimes we want our location to be kept secret and send a fake one to our friends and family. You can do that in our app, “Dr. Fone - Virtual Location “ which allows you to share a fake location with your friends.
Dr.Fone - Virtual Location
1-Click Location Changer for both iOS and Android
- Teleport from one location to another across the world from the comfort of your home.
- With just a few selections on your computer, you can make members of your circle believe you’re anywhere you want.
- Stimulate and imitate movement and set the speed and stops you take along the way.
- Compatible with both iOS and Android systems.
- Work with location-based apps, like Pokemon Go , Snapchat , Instagram , Facebook , etc.
3981454 people have downloaded it
You can use this application by following the steps below.
Step 1: Download the “Dr. Fone - Virtual Location” software on your laptop. Open and choose “Virtual Location”.

Step 2: You can then connect your phone to your computer and click on “Get Started”.

Step 3: You will then be redirected to your current location on the new page.

Step 4: If you want to change your location, you will need to turn on the “Teleportation” mode by clicking on the first icon, typing the location you want, and then clicking on the “Go” icon.


Step 5: Click on “Move Here” and your current location will show up as the location that you typed on Your Apple iPhone 7 Plus.

Conclusion
We hope the tips we shared helped fix the “No Location Found” issue on your phone. Sometimes basic troubleshooting such as restarting your phone or turning off and on your GPS. You can also use our tip to use a fake location that you can send to your friends if you want to play a prank on them.
Spoofing Life360: How to Do it on Apple iPhone 7 Plus?
In an era where location tracking has become a norm, many individuals value their privacy and wish to have more control over their location data. Whether you want to maintain your privacy, simulate being in a different place, or have other reasons for altering your Life360 location, this guide is here to help. We will explore the reasons why you might consider spoofing your Life360 location and provide you with step-by-step instructions on how to fake your location on Life360 on both iPhone and Android devices. Let’s delve into the world of location spoofing and regain control of your whereabouts.
Part 1: What is Life360?
Life360 is one of the admired apps known for tracking location. The app can be used as a location-sharing platform as well as you can chat with your friends via the in-app chat feature. Here are the basics. All this app suggests is that a group of people whether an office projects group or simply a college team or maybe the family members, download and install Life360 on their phones . Mind that the app supports iPhone and Android (6 and above) devices.
After the app gets installed, you can create a circle, which in other languages simply means a group, just like you create on Facebook or WhatsApp. This circle is having members who can share the information and location accountability with each other. You can also give invitations to other users by simply taking the help of their contact numbers or email addresses.
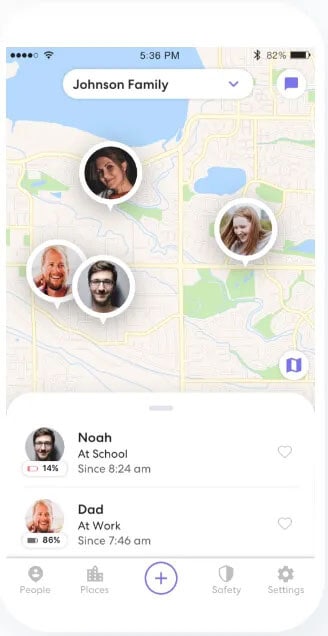
Using this app then, you can simply see the location of the other members as well as get notifications named Place Alerts. These notifications will tell you whether a user has arrived or left the selected location. This can be helpful if you are a parent and want your children to reach safely at a desired place.
Moreover, with the help of Life360, a user can easily control the ‘Check-in’ according to which he or she sends the alert to the circle to know them the exact location. You can also get to see the location history of the members to know their past locations.
Part 2: Why Do People Hate Being Tracked by Life360?
Unarguably Life360 can be considered one of the most helpful and fun apps. But the thing that sometimes or many times might bother people is the 24x7 interference with privacy.
For instance, spouses can monitor their better half and if any one of them does not understand enough, they can put various questions for your particular location and it may create chaos as a result. Not just it has a negative aspect, but it is possible that you are organizing a surprise for your partner, and for its execution; you are simply heading to a particular place. Having Life360 and being tracked by it can simply spoil the surprise as well.
For these reasons, a lot of people sum up the app as an intervention for their privacy. And for those who love their privacy, hating being tracked by Life360 is completely natural to them.
Part 3: Stop Life360 Tracking vs. Spoofing Life360
To stop or to spoof, that is the question! Yes, when you are annoyed with being tracked by Life360, you can have two options with you. Either you can stop Life360 tracking or spoof Life360 tracking. But what goes best? You might be wondering the same. For many of you, simply stopping the app and logging out from it can be a plain solution. However, we don’t support this. To us, the faking location on Life360 is much better.
- This is because firstly, if you log out and completely stop using the app, your members will get a notification for the same. To this, their curiosity will arise and none of them will stop questioning from you. To avoid this, we suggest spoofing Life360 location and not stopping it.
- Secondly, this may be fun as you can show off to your friends that you are traveling somewhere else. The list of friends may include those who are jealous of you. And this is the best way to double up their jealousy.
- Thirdly, if you tell the actual location of your device every time, many of the members, who are not having good intentions, can trace your routine and anything wrong can happen to you. Spoofing location can be a good way to trick them and catch their intentions.
Tips: Fake your Life360 location to any other address you require with Dr.Fone - Virtual Location! The Fake GPS feature for iPhone/Android prevents you from being tracked. Try it now and stop Life360 tracking you!
When it comes to learning how to trick Life360 on iOS or Android, the best option that should come to your mind should be Dr.Fone – Virtual Location (iOS/Android) . This tool comes to your rescue when you wish to change iOS location or Android location and keep your privacy on top. It helps you to simulate your movements along various routes. Apart from that, you can use it to make your virtual movement speed customized on the map. The tool is perfectly safe to use and carries a great reputation. Therefore, pondering over performance and success is not the thing you should fret upon. Here are the steps for Life360 spoofing location using Dr.Fone – Virtual Location (iOS/Android).
Step 1: Download Dr.Fone – Virtual Location (iOS/Android)
Get the tool on your computer for the process initiation. To do this, you can visit the official website and click the “Try It Free” button or you can directly click the “Download for PC” or “Download for Mac” as below. Next, install the tool and launch it. Choose the “Virtual Location” tab from the main screen.
Step 2: Get the Apple iPhone 7 Plus device Connected
Take your Apple iPhone 7 Plus now and connect it to the computer. Hit on “Get Started” once the phone is connected successfully.

Step 3: Find the Current Virtual Location
You will be shown a map on the next screen. Here, you can find your current virtual location. If the location is not showing, click on the “Current Virtual Location” icon that can be discovered at the lower right part.
Step 4: Enable Teleport Mode
You could observe the five icons at the top right of the screen. You need to click on the first icon which is to activate the Teleport Mode. After this, you can enter the place that you wish to teleport and press “Go”.
Step 5: Fake your Location on Life360
The program will make sure to recognize the place you have entered. A pop-up box will appear where the distance is mentioned. Click on “Move Here” and your location will be changed and shown as what you have selected.
 vMix Pro - Software based live production. vMix Pro includes everything in vMix 4K plus 8 channels of Replay and 8 vMix Call
Here is a video guide that helps you to fake your GPS location on Life360.
3,255,164
Part 5: How to Fake Location on Life360 Android
What if you want to know how to stop Life360 from tracking you? Well! You can go for a spoofing app for this too. There are lots of them available at the Google Play Store. For more clarity, we will help you know how you can use a spoofer app for Life360 fake location. Make sure to go along with the steps carefully.
Before you get the app worked, here is a requirement you need to follow. The requirement simply says you to enable the developer options in your Apple iPhone 7 Plus. If you know how to do it, it’s good. But if you don’t here are the steps.
Step 1: Open “Settings” in the first place and tap on “System”.
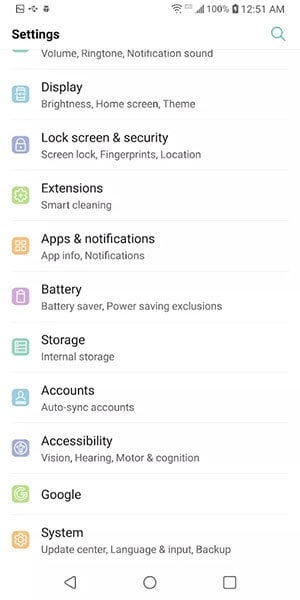
Step 2: Now, you need to go to the “About Phone” option. Followed by this, head to “Software info”.
Step 3: You will find the build number of your device here. You have to tap on it nearly 7 times.
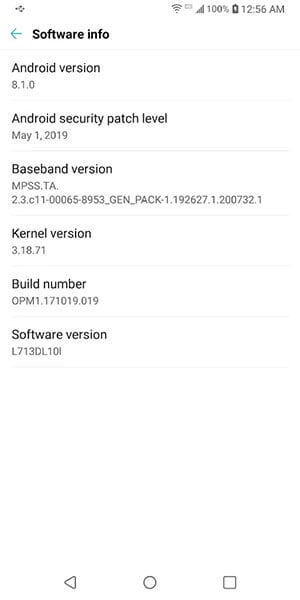
Step 4: Now, enter the lock code when asked and the developer options will be enabled.
 Video Converter Factory Pro
Step by Step Guide on how to fake your location on Life360 with Android Spoofer
Step 1: Now that you have turned on the developer options, you can visit the Play Store and look for Fake GPS Location app. Install it on your phone.
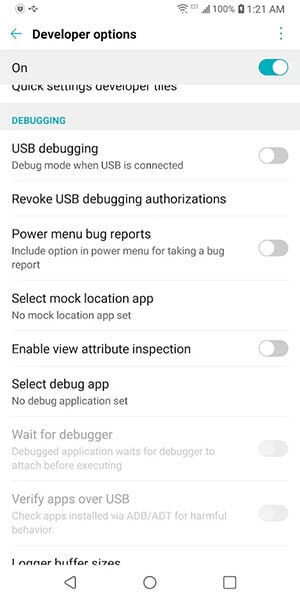
Step 2: Once installed, again go to “Settings” > “System” > “Developer Options”. Look for the “Select mock location app” and tap on it.
Step 3: Choose the Fake GPS app as the mock location app.
 Any DRM Removal for Win:Remove DRM from Adobe, Kindle, Sony eReader, Kobo, etc, read your ebooks anywhere.
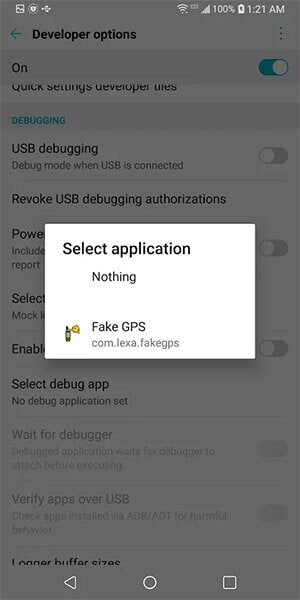
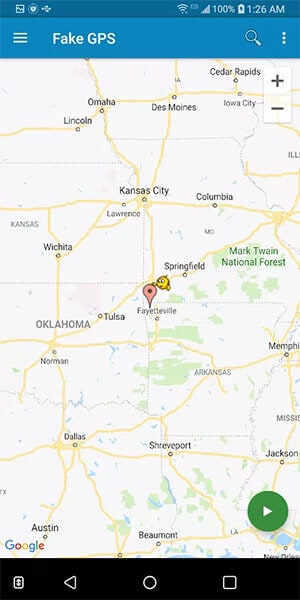
Step 4: Open the app now and choose the location you wish to fake and hit on the Play button. This was how to fake your location on Life360 on Android device.
If you want to find an easier way to fake location on life360 Android , you can also try to use Dr.Fone - Virtual Location(iOS/Android).

Dr.Fone - Virtual Location
1-Click Location Changer to Fake Your Location on Life360!
- Teleport from one location to another across the world from the comfort of your home.
- With just a few selections on your computer, you can make members of your circle believe you’re anywhere you want.
- Stimulate and imitate movement and set the speed and stops you take along the way.
- Compatible with both iOS and Android systems.
- Work with location-based apps, like Life360, Pokemon Go , Snapchat , Instagram , Facebook , etc.
3981454 people have downloaded it
Part 6: How to Stop Life360 from Tracking you
 Project Manager - Asset Browser for 3Ds Max
6.1 Use a burner phone
If you completely want Life360 to stop you from tracking, the very first method, and indeed a useful one is using a burner phone. This simply stands to have an extra phone with you and you can call it a burner phone. To have it, of course, you don’t have to spend much. Just have a cheap Android or iOS device with you. With this, you can easily trick your friends about your location.
- Now, all you have to do is to log out of the Life360 app from your main iPhone/Android.
- Install the app on the secondary or the burner phone and log in with the same account you were using on the original phone.
- There is nothing more to it. You can now abandon this burner phone and leave it for your work. This will make your friends or near ones think where you want them to show your location.
Note: As we have mentioned in the beginning, Life360 supports an inbuilt chat function. This is where the downside comes of having a burner phone as a solution. Putting simply, you may miss an important conversation if you have the app on a burner phone and you have left it at home when any of your friends try to chat with you. And this can cause doubts in their minds.
6.2 Pause Location Sharing in Life360 Settings
Here is another way to stop Life360 from tracking you. You can simply pause the location-sharing option from the settings. Let us mention the steps without any more discussion.
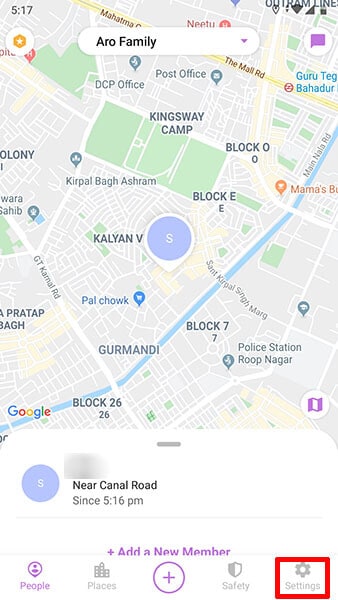
Step 1: At the lower right corner, hit on “Settings”.
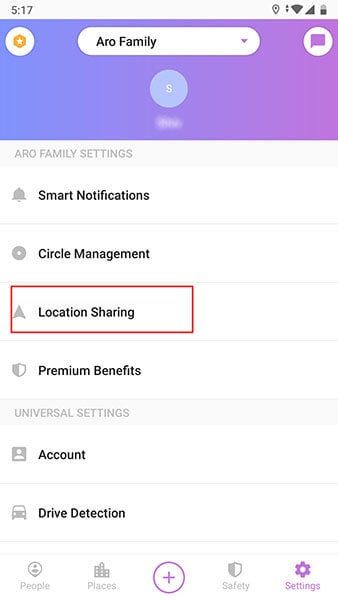
Step 2: Now, go to the Circle Switcher at the top and pick out the circle you wish not to share locations with.
Step 3: Hit on “Location Sharing”.
Step 4: Lastly, toggle off the slider and it will turn grey. You will see a message saying “Location Sharing Paused” and you are done.
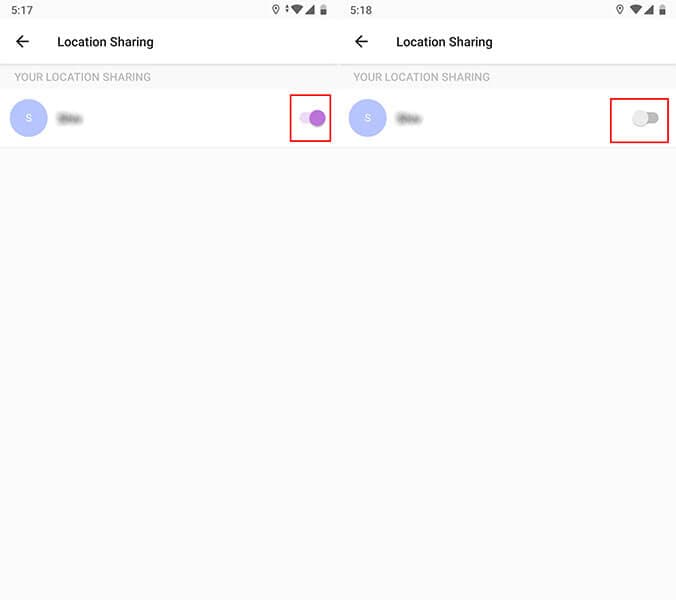
Note: When you disable or pause location for a particular group, your location can still be tracked by other circles. Make sure to choose all or as per your needs.
FAQs
- How do I delete my history on Life360?
While it is technically possible, the method to accomplish this is improbable in yielding the intended outcome. Essentially, the sole means to entirely erase your history is by either deleting your Life360 account or departing from the Circle. Merely turning off your GPS or data connection on your phone won’t suffice.
- Can I fake location without jailbreaking my iPhone?
Yes, it’s possible to fake your location on an iPhone without jailbreaking using third-party tools like Wondershare Dr.Fone - Virtual Location. This tool allows you to simulate GPS movement and set a fake location on your Apple iPhone 7 Plus without needing to jailbreak the Apple iPhone 7 Plus device. With Dr.Fone - Virtual Location, users can easily change their GPS location to any desired spot.
- How to spoof the actual movement from one place to the fake location?
Wondershare Dr.Fone - Virtual Location is a tool that allows users to spoof actual movement from one place to another fake location on an iPhone. By using its features, users can simulate movement along a specified route, imitating real-life GPS movement from one location to another.
- If I turn off the Wi-Fi on my iPhone, will Life360 stop tracking me?
Disabling Wi-Fi on your Apple iPhone 7 Plus might limit the accuracy of your location for Life360. However, Life360 can still track your location using cellular data and GPS. Turning off Wi-Fi alone might not entirely stop Life360 from tracking your location. It is especially true if other location services are still active on your device. To prevent tracking, you might need to adjust settings within your device’s location services.
Final Words
Life360 is no doubt a useful app that can help you know about the whereabouts of your near friends and family. However, when you hate being tracked on it, spoofing Life360 can come out as a great option. We discussed some helpful ways how to fake your location on Life360 in this article, including Dr.Fone - Virtual Location which allows you to manipulate your GPS location, simulate routes, and set up geofences, making it a versatile solution for your location spoofing needs. Hope you find this helpful.
How to Change Spotify Location After Moving to Another Country On Apple iPhone 7 Plus
Spotify is one of the best apps to access quality music and podcasts. Be it in your car while you commute from the workplace to home or simply when you are home with your latte, the music is made for every mood. Spotify is easy to use, you can make your own playlist and you have access to a lot of musical content.

But this depends on the country you are staying in. And if you’ve recently shifted your base, it can be tricky to change spotify region. But if you opt for the manual methods, it is a breeze to update location spotify. We will teach you how that is done effectively using different resources available to you.

Part 1: Reasons for changing Location on Spotify
But why to Change Location Spotify in the first place? Is it important to change your location if you are changing countries? Will that affect the music on the streaming app? Yes! It certainly will. Before we discuss the different ways to change country on spotify, let us understand why we should do it at all.
Region specific Content

Everything is not available everywhere. If you are looking for a specific motivational podcast that is a hit in the US, it might not be available in your region. You like that new Arabic song, maybe it won’t stream in your Australian lanes. The content can be restricted to a specific region and if you don’t stay there, it is far away from your reach. You have to rely on Spotify Change Location to access that musical content.
Playlists and Recommendations
Spotify uses your coordinates to provide the right music content for you. There are people who jump up and down and say that the app suggests songs that are their absolute favorite! As if it has read their minds. This is possible because Spotify identifies the most played songs in the region, detects the language and delivers these suggestions to you.
So, the content that you receive depends on the place that you are staying in.
Payment Plans

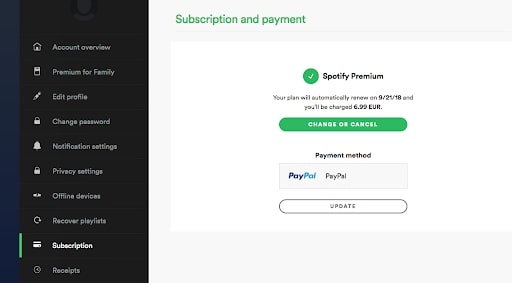
The Spotify premium account provides more benefits than the normal free version that people use. But what many of us are not aware of is that the premium version’s cost differs from place to place. If you can manage a spotify location update, you can save yourself some bucks.
Spotify Unavailable
 Greeting Card Builder
Spotify did gain a lot of popularity in a very short period of time. People are making money, uploading their own content and even exploring newer genres of music. However, Spotify is not available world-wide. Currently, it is only accessible from 65 countries. If you hail from a region where Spotify hasn’t launched yet, you need to update spotify location to a place where it is fully functional.
Part 2: How To Edit Your Country on Spotify?
You can change region spotify manually by directly tweaking a few settings in the Account Overview section. If you are using a Free Spotify account, then you will have to manually change your location. But a person who has a Premium Spotify account can access all the content from all those countries where spotify is legally available. Here’s how you can change the location using the Spotify settings -
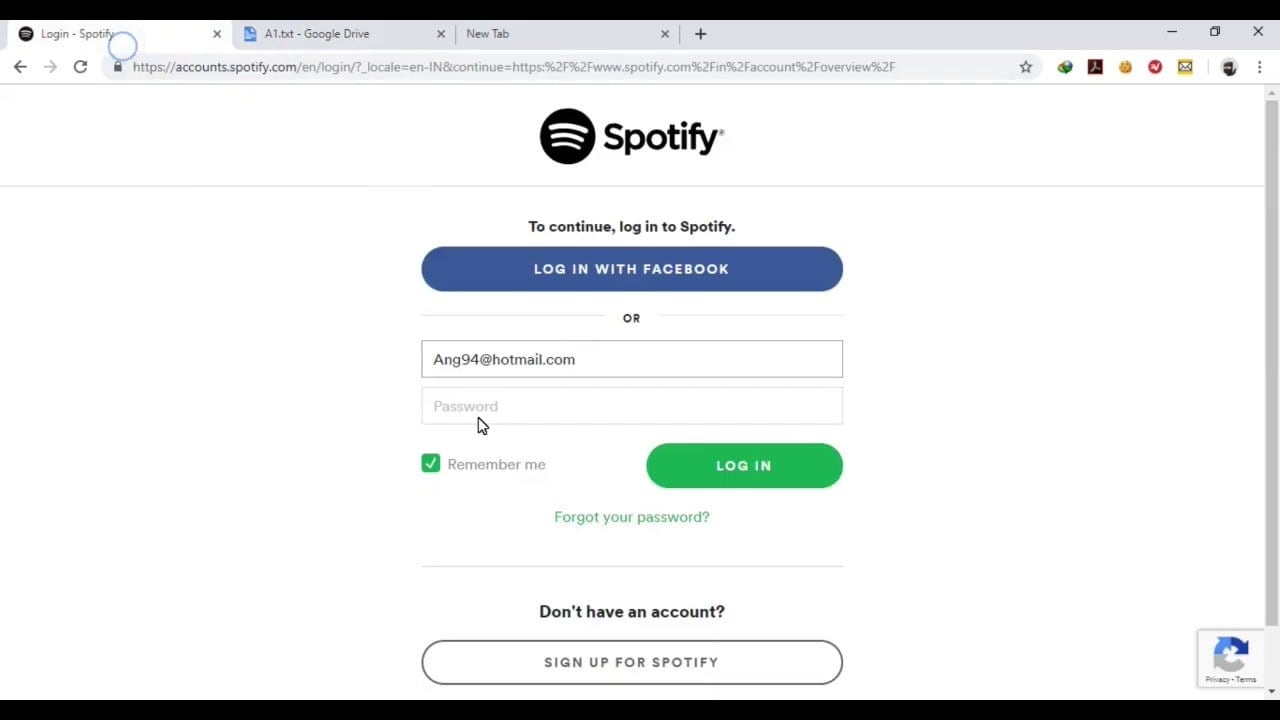
Step 1: Go to the Spotify Homepage on your desktop and Log into your account. This is how you do it if you happen to have a free account. Premium accounts don’t need it. After you Log in, go to the ‘Accounts’ section.
Step 2: From the sidebar, go to the ‘Account Overview’ option. When you click on it, you will find the ‘Edit Profile’ option on the screen. Go for it.
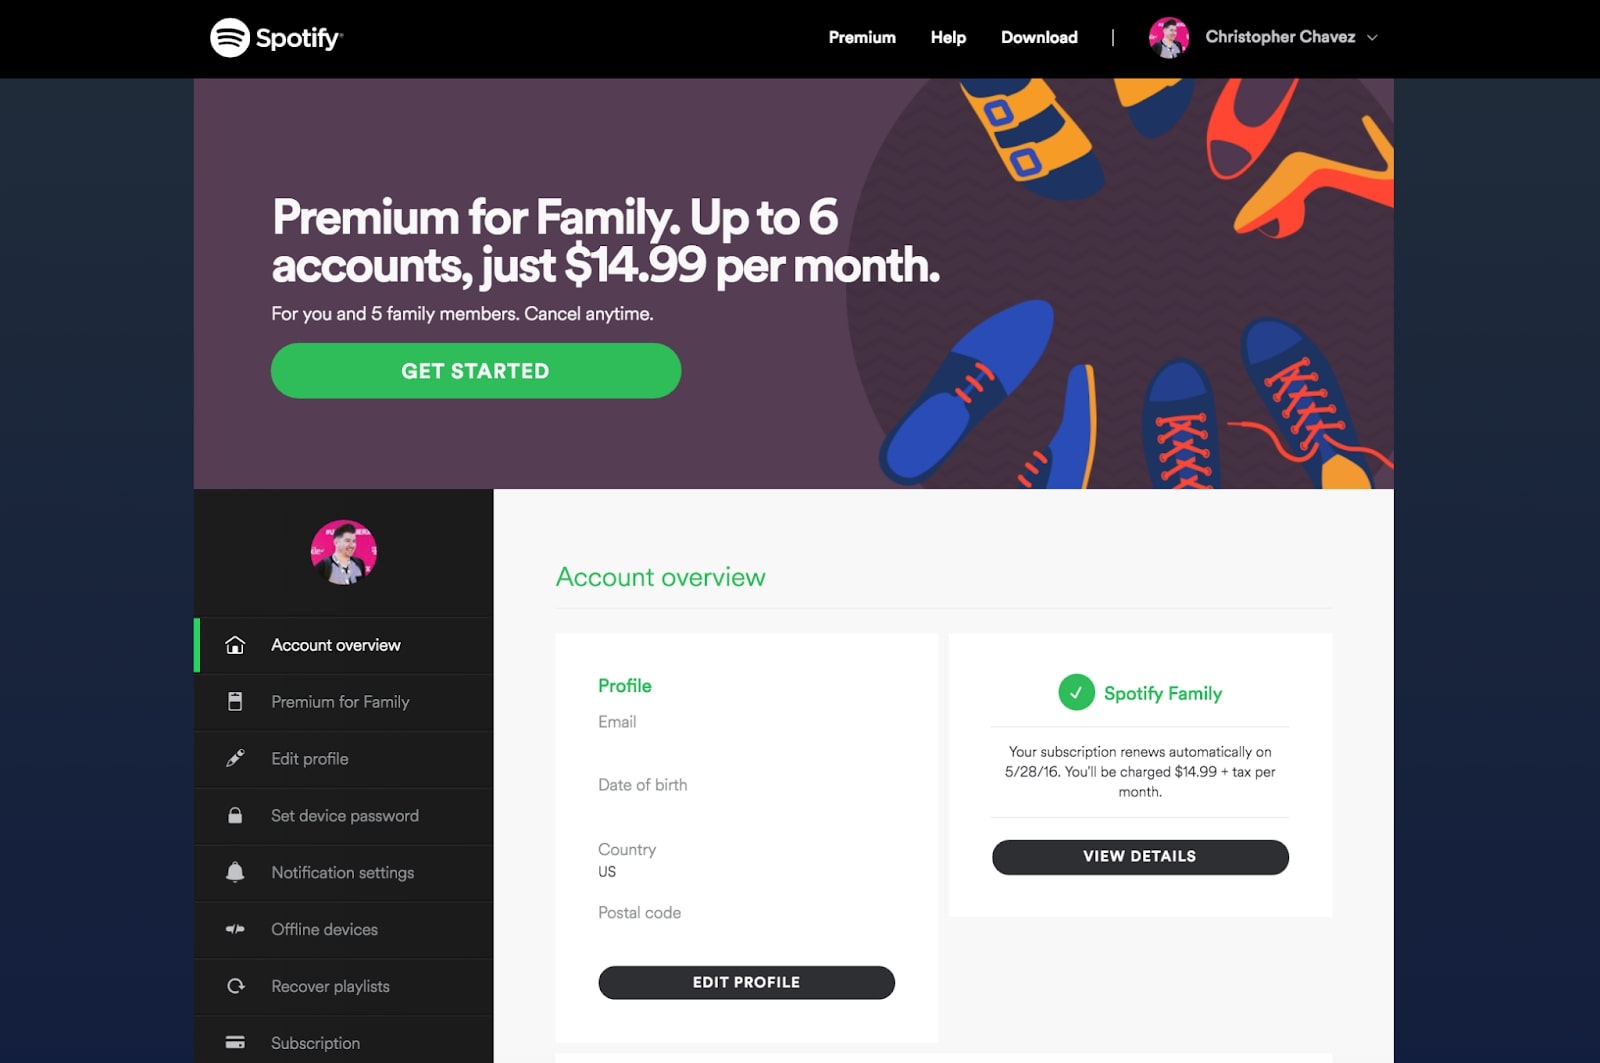
Step 3: Once you click on theEdit Profile option, there will be several categories that display your personal information. If you scroll down, you will find the ‘Country’ Option. Select the country of your choice there.
 PCDJ DEX 3 for Windows & MAC is the total entertainment DJ software solution, offering audio, video, and karaoke mixing ability. Automatic beat-sync, smart looping, 4 decks, DJ MIDI controller support, Karaoke Streaming and much more.
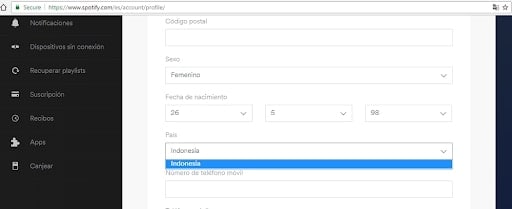
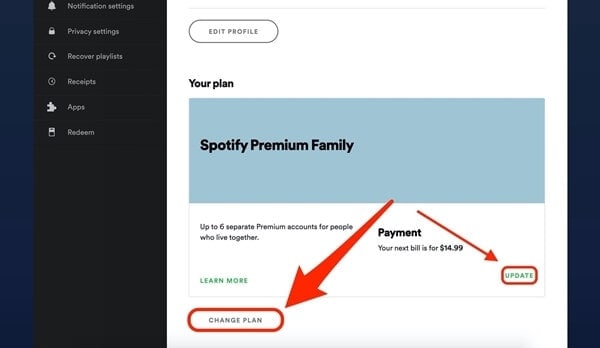
If you are a Spotify Free user, then you will have to go by the above mentioned method. But if you are a Spotify premium user, you don’t need to change location to access content. However, you can change it to update the Payment plans.
Step 4 (Premium): In the same Account Overview option, you can either ‘Update’ your new location and spotify works accordingly. Otherwise, you can completely Change your Plan as well.

Part 3: How to Use Apps to Fake Spotify Location?
Now you know that by Spotify Change Country, you can get more benefits and you can enjoy podcasts, music and other audio content that is otherwise unavailable in your region. So, it is understandable that you’d want to deliberately fake spotify location. This is possible when you use some of the best Location Spoofer softwares available on the internet. Our best suggestion would be Wondershare’s Dr.Fone. It is easy to use and your location will be changed within a few minutes in minimal steps.
Step 1: You need to download the executive file of the WondershareDr. Fone’s Virtual Location Spoofer. The android and even Windows compatible files are available on the website. Choose appropriately and download - and launch them.
Step 2: Once you launch the application, the homepage will open and several options will display on the screen. Choose the Virtual Location option that is usually at the end of the page.
Step 3: To Change Location on Spotify Mobile, connect your Apple iPhone 7 Plus to your computer - both Android and iPhones can detect the virtual location change. Then click on Get Started.
 Forex Robotron Gold Package
Step 4: A map will appear on the screen. You can change the pi to a new location or you can enter the new location into the search box displayed on top of the page. You can do this by going to the ‘Teleport Mode’ on the top right corner of the page.
Step 5: Once you are sure about the new virtual location, click on ‘Move Here’ option.
The New Location will now display on your Apple iPhone 7 Plus/Android Device’s GPS system too. And Spotify will reflect it too. So, when you decide to change location on spotify using this method, the new location will reflect in all your apps. So, it’s hard to figure out that you’ve deliberately changed the location.

Part 4: How to Use a VPN to change Spotify Location?
A Virtual Private Network App is also very useful for the Spotify change Region. But you need to keep two important points in mind - The Trial Versions do not provide complete protection and the features aren’t satisfactory. If you go for free VPNs available on the internet, you cannot be 100% sure that your data is safe. So, we have narrowed down the safest option for you. We suggest that you use Nord VPN if you cannot get your hands on a Location Spoofer.
Location Spoofers are much safer because they don’t maintain Log data like the VPNs. But if you have no other option left for Spotify update Location, then you can rely on NordVPN.
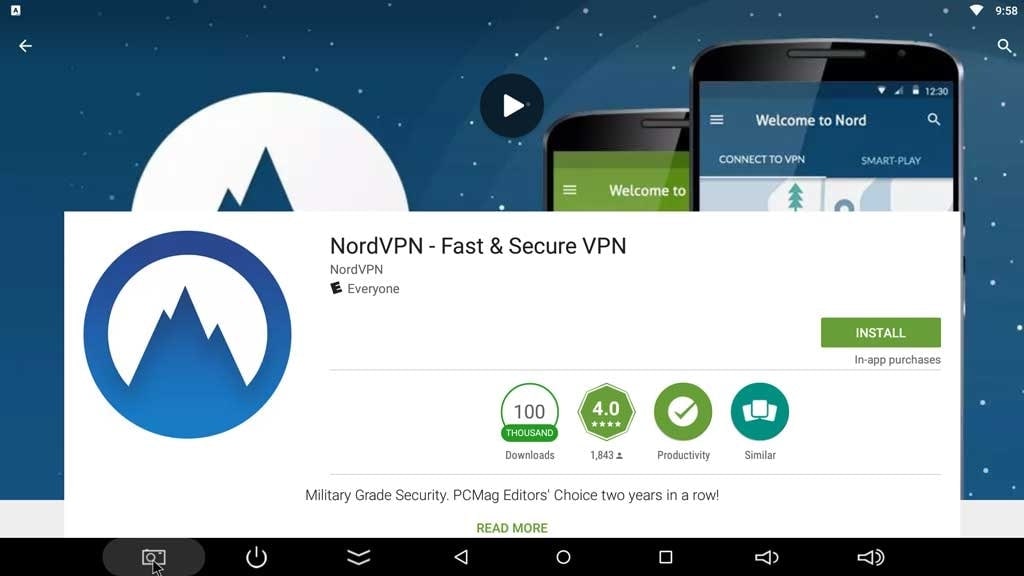
Step 1: Go to the AppStore or Google Play Store and choose NordVPN from the different VPN options available.
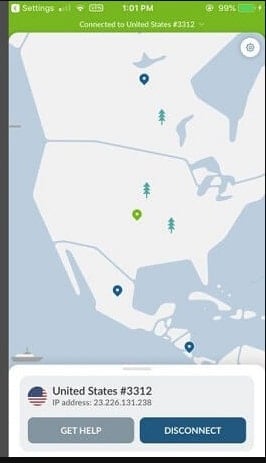
Step 2: Sign Up and create your account on the app. The main use of a VPN is to mask your IP and give you a new server for internet surfing. So, once you log in, NordVPN will find the closest server for you.
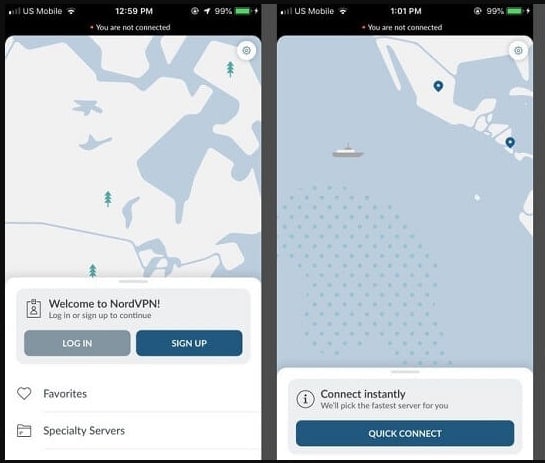
The automatic connect was made to United States - the closest server

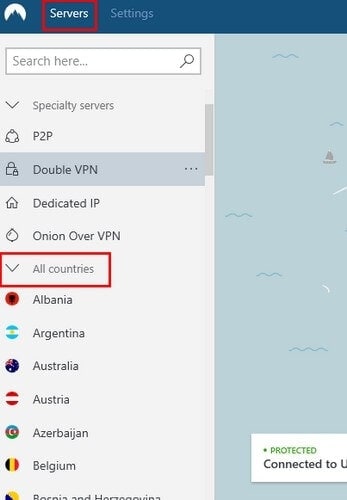
Step 3: In case you want to change to a specific country, You can go to ‘More Options’ and then choose Servers. Then go to All Countries and choose the country of your choice. Once you launch Spotify, the same will reflect there too.
The VPN works for all kinds of mobiles and it is very convenient to use. This is a good way to mask your IP address completely, so that no one can track your location change activity either. You can change servers several times a day to access content from across the world.
Conclusion
If you know the right way to do it, changing Spotify Location After Moving to Another Country is no big deal. You have several tools that will assist you in the job. Unless you are faking your location, you can change location directly from Spotify Account Overview too. But if you want to Change Location in Spotify for more benefits, then you can use the tools we have mentioned to get the job done. You can cut down the premium payment prices, listen to exotic music from across the world and also stay up to date with the podcast releases too.
- Title: How to Fix Apple iPhone 7 Plus Find My Friends No Location Found? | Dr.fone
- Author: Ava
- Created at : 2024-08-01 23:14:39
- Updated at : 2024-08-02 23:14:39
- Link: https://fake-location.techidaily.com/how-to-fix-apple-iphone-7-plus-find-my-friends-no-location-found-drfone-by-drfone-virtual-ios/
- License: This work is licensed under CC BY-NC-SA 4.0.