
How to Fix Asus ROG Phone 8 Pro Find My Friends No Location Found? | Dr.fone
How to Fix Asus ROG Phone 8 Pro Find My Friends No Location Found?

In this time of modern technology, it is hard to be away from your phone or even leave it at home. When any task that we plan to do, usually already have an application released for the sole purpose of doing that task and needing to do it on your phone. When we message our friends, have a video call with our family, or just simply order food to eat at home, you can do all of them on the Asus ROG Phone 8 Pro device in your palm.
Another advantage of having our phones with us all the time is that you can also see the current location of either your friend or family. For Apple phone users, they have an app that is called “Find My Friends” that will show you the locations of the people that you are tracking. But what if you cannot find the location of the friend? We will find out the causes as to why no location can be found and how you can fix this in just a few simple steps.
 SwifDoo PDF Perpetual (2-PC) Free upgrade. No monthly fees ever.
Part 1: Why does an Asus ROG Phone 8 Pro say “no location found”?
When you are searching for your friend’s current location and it shows that “no location found”, there could be numerous reasons as to why that is happening. We have listed down the possible reasons why there is no location found.
Option #1: Your friend has not signed in to the “Find My Friends” application. Make sure that they are registered in the application before tracking their location.
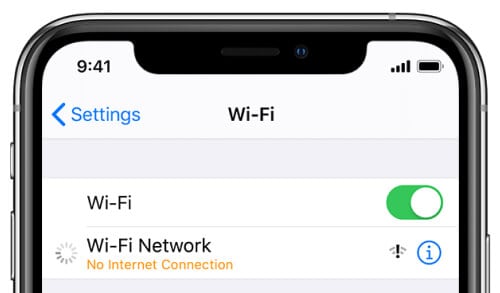
Option #2: The other person’s mobile is not connected to the internet or their phone is off. This could also be another common reason why you cannot see their location.
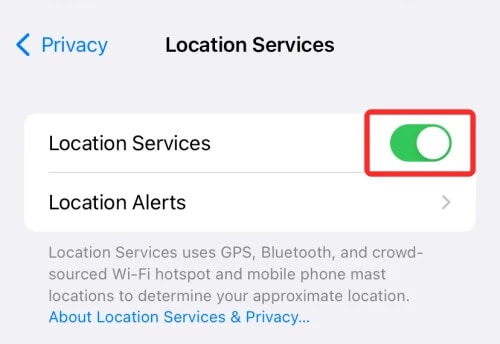
Option #3: Make sure that their “Location Services” is turned on. Some users would turn this feature off which hinders the application from checking their current location.
Option #4: The other user must have set up the wrong date and time. If the date and time do not correspond to the global time, then it will cause problems and difficulty with tracking that user.
Option #5: The application might not have been enabled under “Location Services”. Make sure that the application has the permission to track your current location and you can do this by following the steps below.
- Step 1: Go to “Settings” and then “Privacy”.
- Step 2: You can then go to “Location Services” and make sure that the application “Find My Friends” is enabled to track your location.

Part 2: Tips To Fix “No Location Found” Available
If you encounter an issue that says “No Location Found”, there are numerous ways you can fix the “No Location Found” message on “Find My Friends” and we will share them with you.
Option #1: Adjust your phone’s date and time. You can reset your time by following the steps.
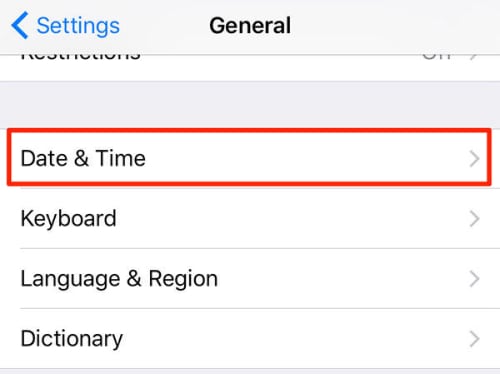
- Step 1: Go to “Settings” and choose “General”.
- Step 2: Then click on “Date & Time” and you can manually or automatically set the time.
Option #2: Make sure that you or the other user is connected to the internet. Double-check if your phone is connected to the internet.
Option #3: Turn off and turn on your “Location Services”. Usually, this simple troubleshooting can fix this issue, you can try this out and check if you can see their location now. They can turn it on by following the steps below.
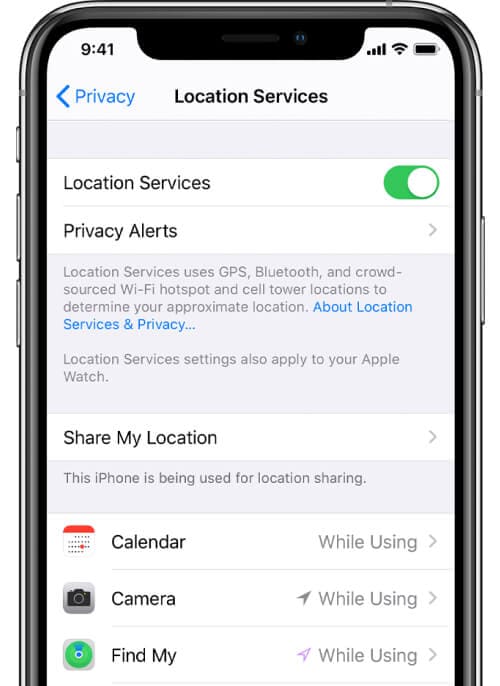
- Step 1: Go to “Settings” and choose “Privacy”.
- Step 2: After, you can look for “Location Services” and enable it.
Option #4: Enable “Location Services” for the “Find My Friends” application. There could be instances where your “Location Services” is not enabled for the application.
Part 3: How to Share Your Location with Find My Friends App?
If you want to share your location in the “Find My Friends” application, you can do that by following the steps below.
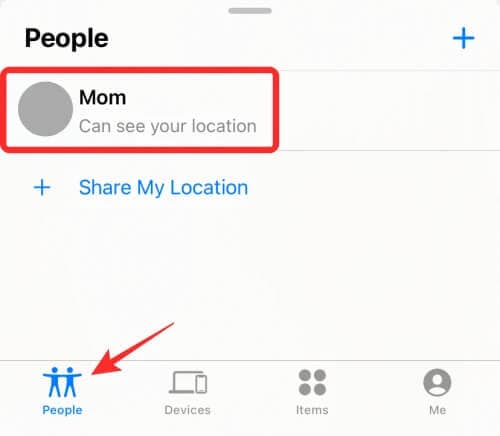
- Step 1: Open the “Find My Friends” application and select “People”.
- Step 2: Then you can tap on “Share My Location” and from there, you can type the phone number of the person you want to share your location too. You can also specify the amount of time you will share your location.

Part 4: How to Share a Fake Location to Others in Find App?
Sometimes we want our location to be kept secret and send a fake one to our friends and family. You can do that in our app, “Dr. Fone - Virtual Location “ which allows you to share a fake location with your friends.
 SwifDoo PDF Perpetual (1 PC) Free upgrade. No monthly fees ever.
Dr.Fone - Virtual Location
1-Click Location Changer for both iOS and Android
- Teleport from one location to another across the world from the comfort of your home.
- With just a few selections on your computer, you can make members of your circle believe you’re anywhere you want.
- Stimulate and imitate movement and set the speed and stops you take along the way.
- Compatible with both iOS and Android systems.
- Work with location-based apps, like Pokemon Go , Snapchat , Instagram , Facebook , etc.
3981454 people have downloaded it
You can use this application by following the steps below.
Step 1: Download the “Dr. Fone - Virtual Location” software on your laptop. Open and choose “Virtual Location”.

Step 2: You can then connect your phone to your computer and click on “Get Started”.

Step 3: You will then be redirected to your current location on the new page.
 Any DRM Removal for Mac: Remove DRM from Adobe, Kindle, Sony eReader, Kobo, etc, read your ebooks anywhere.
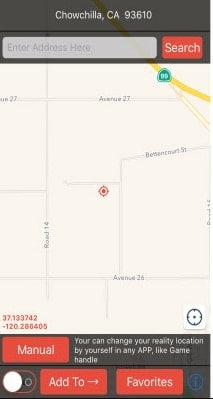
Step 4: If you want to change your location, you will need to turn on the “Teleportation” mode by clicking on the first icon, typing the location you want, and then clicking on the “Go” icon.

Step 5: Click on “Move Here” and your current location will show up as the location that you typed on Your Asus ROG Phone 8 Pro.
 Video Converter Factory Pro
Conclusion
We hope the tips we shared helped fix the “No Location Found” issue on your phone. Sometimes basic troubleshooting such as restarting your phone or turning off and on your GPS. You can also use our tip to use a fake location that you can send to your friends if you want to play a prank on them.
Methods to Change GPS Location On Asus ROG Phone 8 Pro

WPS Office Premium ( File Recovery, Photo Scanning, Convert PDF)–Yearly

The Internet is a vast space and you have a plethora of content on different websites and platforms. You can call it a two-way - give and take relationship when it comes to the dynamics of data exchange between the world wide web and the users.
When you visit websites, they use cookies to track your activities. When you visit a restaurant, the phone detects and saves the GPS in the memory. You click a picture in the Maldives, your phone seeks out geographic points to prepare the right time and date stamps.
You need your GPS to download and use certain apps. Similarly, your GPS might be the reason you are unable to play some games or use some applications. Change GPS Location Asus ROG Phone 8 Pro and this won’t be a problem for you.
But if you are wondering how can I change my location on my iPhone? These 5 methods will help you get fruitful results.
 KoolReport Pro is an advanced solution for creating data reports and dashboards in PHP. Equipped with all extended packages , KoolReport Pro is able to connect to various datasources, perform advanced data analysis, construct stunning charts and graphs and export your beautiful work to PDF, Excel, JPG or other formats. Plus, it includes powerful built-in reports such as pivot report and drill-down report which will save your time in building ones.
 It will help you to write dynamic data reports easily, to construct intuitive dashboards or to build a whole business intelligence cockpit.
KoolReport Pro package goes with Full Source Code, Royal Free, ONE (1) Year Priority Support, ONE (1) Year Free Upgrade and 30-Days Money Back Guarantee.
Developer License allows Single Developer to create Unlimited Reports, deploy on Unlimited Servers and able deliver the work to Unlimited Clients.
Part 1: Change GPS Location on Asus ROG Phone 8 Pro using a Professional PC Program
The PC Programs are entirely Software based and do a tremendous job to spoof Asus ROG Phone 8 Pro iOS 16 Location . You don’t have to buy any new equipment and you will be operating using your computer.
You can get this done within minutes if you have the right program with you. One of the best options in the market is Wondershare’s Dr.Fone. This is how you use Dr. Fone Virtual Location spoofer for GPS Spoofing iPhone.
Dr.Fone - Virtual Location
1-Click Location Changer for both iOS and Android
- Teleport from one location to another across the world from the comfort of your home.
- With just a few selections on your computer, you can make members of your circle believe you’re anywhere you want.
- Stimulate and imitate movement and set the speed and stops you take along the way.
- Compatible with both iOS and Android systems.
- Work with location-based apps, like Pokemon Go , Snapchat , Instagram , Facebook , etc.
3981454 people have downloaded it
Step 1: Go to the official website of Dr.Fone - Virtual Location (iOS) . This is easily available when you google it or you can also follow this link here. Then you can download the executive file, install and then launch the application. Once the home page opens, you will find several options - Opt for ‘Virtual Location’. It is usually at the bottom of the page.
Step 2: Now take your Asus ROG Phone 8 Pro device and connect it to the computer that has Dr. Fone. Then click on ‘Get Started’.
Step 3: Now, the world map will display on the screen and you can clearly see the coordinates and directions as well. On the top right corner, the third icon is called the ‘Teleport Mode’. Click on that and enter the name of the place in the search box. You can even pinpoint it, if you are sure about the place.
Step 4: If you are completely sure that you got the address right, click on the ‘Move Here’ option. It moves your Pin from your present location to your new virtual location.

If you are looking for a way to change Asus ROG Phone 8 Pro Location without Jailbreak, then this is one of the safest options for you. Also, you have other additional features like Phone Transfer, and Whatsapp Transfer along with Location spoofing. The application will never go to waste, won’t occupy much of your computer/PC/Laptop’s space and you can get the fake location iOS within minutes.
Part 2: Change GPS Location on Asus ROG Phone 8 Pro using External Device
You can achieve the iOS Spoof Location using External devices as well. These devices do not cause any inconvenience to you. They are meant to be small, fit into the lightning port of your iPhone, and act as an external source that will spoof the Asus ROG Phone 8 Pro location and the same will reflect in every app that uses or detects your iPhone’s geographic location.
The best external device to change phone location Asus ROG Phone 8 Pro is Double Location Dongle. This simple device can be utilized by following the steps below -
Step 1: The Double Location Dongle is a very small, white rectangle that connects to your iPhone’s port. But along with it, you also have to install the Companion app for location spoofing. Once you have both of them ready, connect the Asus ROG Phone 8 Pro device to your iPhone.
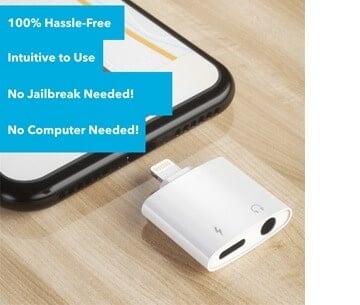
Note: The Companion App is not available on the App store. You have to download it from Double Location’s official website.
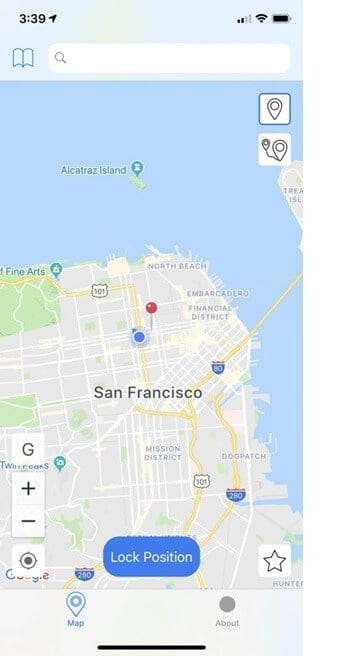
Step 2: The next step is to open the Double Location iOS companion app and then settle on the Map Tab.

Step 3: Unlike what we had seen in the Dr. Fone step, we cannot enter the location into any search box. You should move the pin to the location that you want to virtually shift to. Double Location provides some very good options that will help you during gaming. You can change all the appropriate settings and proceed.
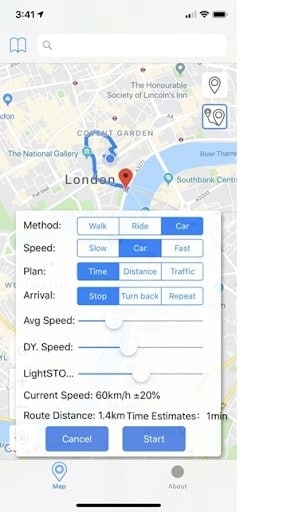
Step 4: On the bottom of the screen, Go for the lock position option. Once you do that, there will be a virtual shift in your geographic position and all your apps will register your new coordinates.
Part 3: Change GPS Location on Asus ROG Phone 8 Pro using XCode
You can change the geolocation Asus ROG Phone 8 Pro by using your coding expertise as well. That is why XCode exists. This Computer Program lets you change your Location in Asus ROG Phone 8 Pro by giving some GIT Commands to the PC while your Asus ROG Phone 8 Pro stays connected to it. By following these steps, you can understand how to do it. But if you’ve never had a liking for programming and coding languages, then you should probably skip this -
Step 1: Download and install XCode from the AppStore, directly to your Mac device. Launch the application.

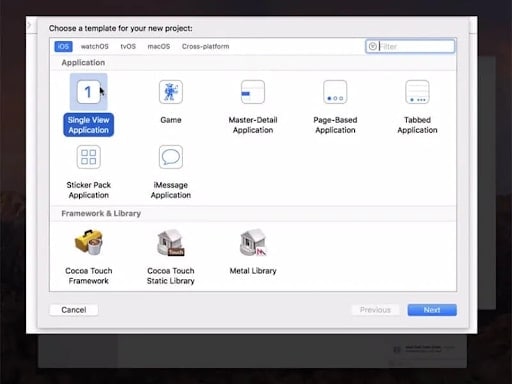
Step 2: Once you see the XCode window open, Go for the ‘Single View Application’ to start a new Project and go on by clicking on ‘Next’. You can set up a name and details for this particular project.
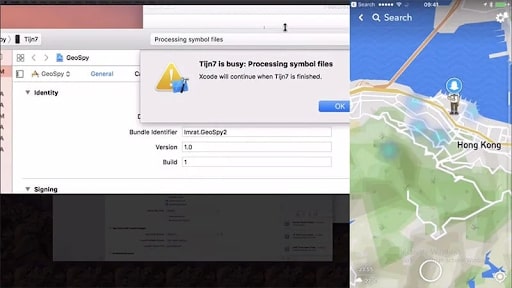
Step 3: A screen display will appear asking you about your identity. This is where the minimal coding part starts. You need to enter some GIT Commands to continue with the project.
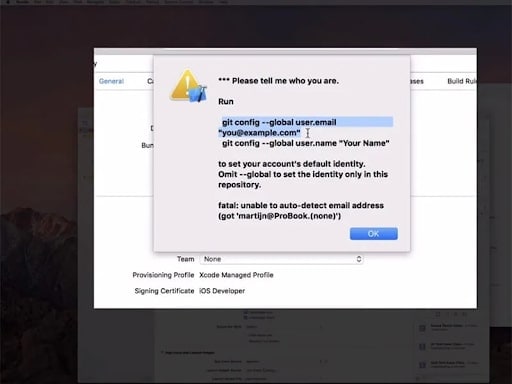
Step 4: Launch and run the terminal on your Mac device and enter these commands - git config –global user.email “[email protected]“ and git config –global user. name “your name”.You need to add your own details in the quoted space and continue to verify your identity.
Step 5: Once you enter the commands, go to the next step and establish the Development Team. Then you can proceed to connect your Asus ROG Phone 8 Pro device to your Mac device. Use the normal cable to do that.
 Simple and intuitive video editing
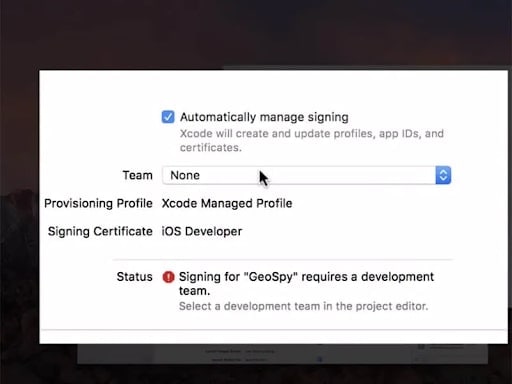
Step 6: To allow the program to process the Symbol Files, you will have to choose the model of your device. Go to the ‘Build Device’ option and continue as per the prompts. However, make sure that you keep your Asus ROG Phone 8 Pro unlocked for quick detection by the computer software.
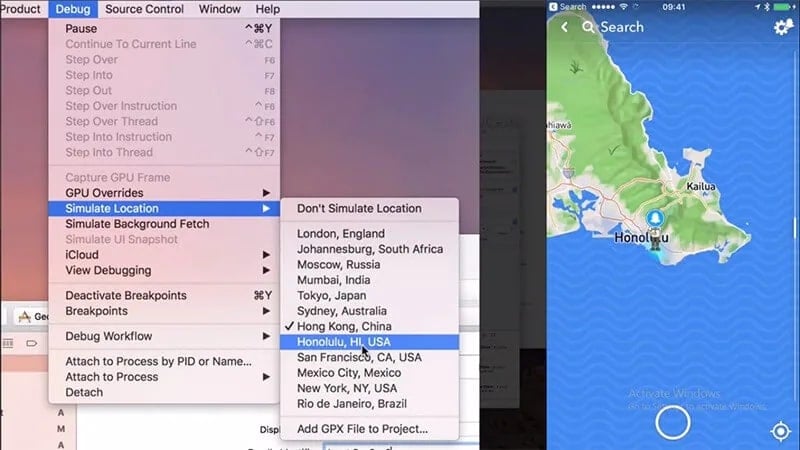
Step 7: Once that is done, you can come back to the actual location spoofing part. Go to the debug Menu > Simulation Location and specify the exact location that you want to virtually shift to. Once you are okay with it, the same will reflect on your Asus ROG Phone 8 Pro as well.

Part 4: Change GPS location on Asus ROG Phone 8 Pro using Cydia Location Faker App
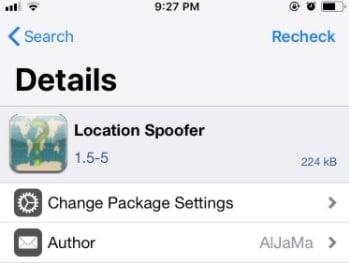
Cydia is also based on software applications and changes location in seconds, However, you need to note that you have to jailbreak your phone. If you don’t know how to do it or do not want to take the risk, Cydia’s LocationFaker app may not be the right fit for you. But if you are a jailbreak expert, this is a very comfortable GPS Changer for iPhone.
Step 1: Download the Cyndia LocationFaker app from the official website. LocationFaker8 is available for the iOS 8.0 model.
Step 2: After launching the app, enter the virtual location into the search box.
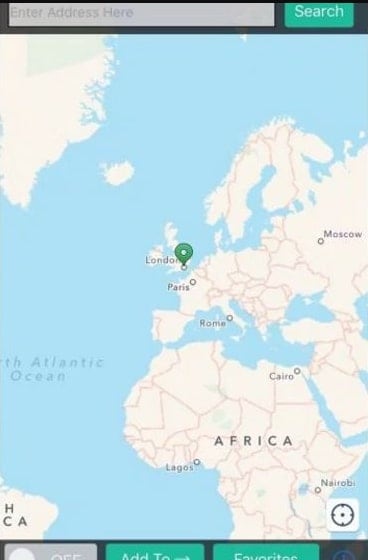
Step 3: If you are done with choosing the new location, shift the toggle from ‘OFF’ to ‘ON’ at the bottom of the page.
Step 4: Now we can decide which apps can access our new virtual location. At the bottom of the page, you will find an ‘i’ icon. Go click on it and choose the ‘White List’ option. This one will then take you to the app list and you can decide which of them will have access to the phone’s location.

Part 5: Change GPS Location on Asus ROG Phone 8 Pro using Location Handle
Location Handle is another useful application that you can use to change your location by a few meters or simply go with an automated movement system that changes your location gradually as if you are moving from one place to another. This is how you use it -
Step 1: Download the Location Handle app from the website or App store

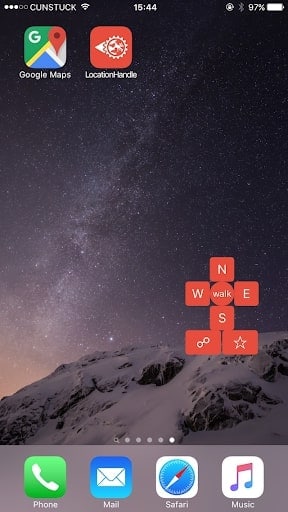
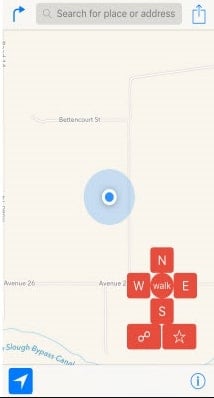
Step 2: There are four different types - Normal Mode - teleport to a new location; Offset Mode - Move a few feet away from the present location ; Automatic Mode - Slowly change your location from one point to another, as if walking ; Manual Mode - Change your location using a joystick.

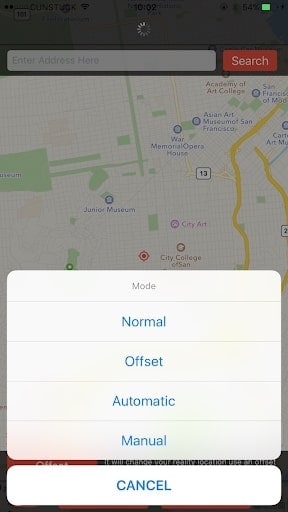
Step 3: Consider the Manual mode, because we want to change location to a far-off place and not necessarily for gaming.
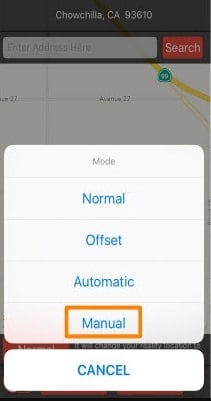
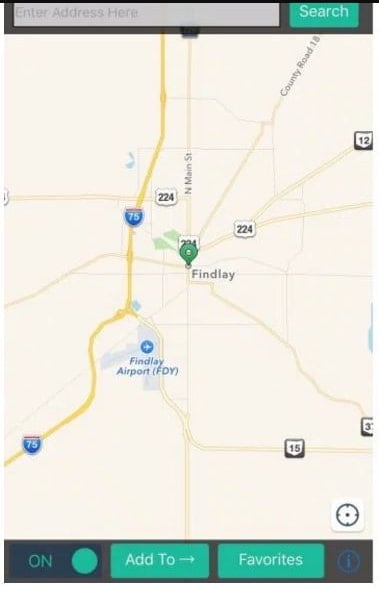
Step 4: Once the Manual mode is activated, the map will be displayed and you can change the pin location. You can enter the location name in the search box.
Step 5: The Joystick will appear on the page and you can use it to shift your location to wherever you want. Once you fix on the location, proceed and the new location will be updated.

Conclusion
We hope you are no longer wondering How to change Location services on Asus ROG Phone 8 Pro. These 6 methods are very effective and you can always opt for the one that is most comfortable for you. If you want a hassle-free PC program, we have that narrowed down for you. If you are a coding enthusiast, then we’ve listed a method that best fits you. Whatever the reason, with an iOS Fake GPS, life becomes much easier and sometimes even safe on the internet. You can explore beyond the boundaries without moving from your couch!
How to Use Life360 on Windows PC For Asus ROG Phone 8 Pro?
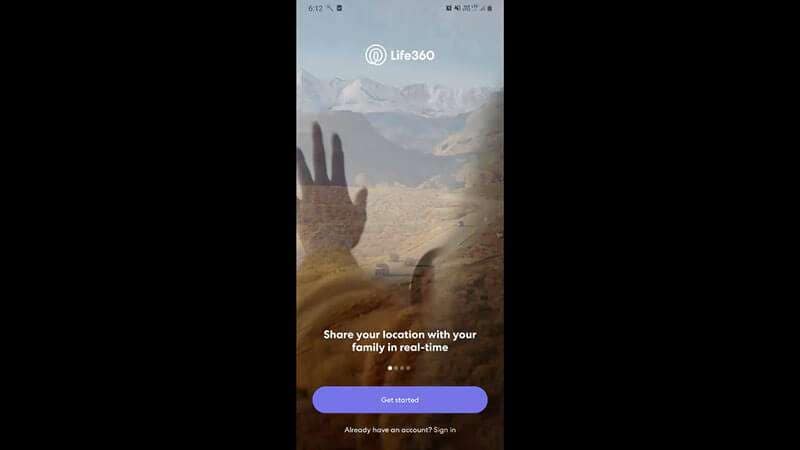
Life360 is an online platform that utilizes geo-location services to help users share their real-time location with friends and family. The app allows people to create a family group and stay connected to each other through features like chatting, sharing location, sending safety alerts, etc.
As of now, you cannot run Life360 on computer as it is only available for Android and iOS. Why? Because as opposed to a PC, one can easily carry their device everywhere! It means whether your kid is stuck in traffic and needs your help or your parents have lost their way back home, Life360 will instantly send you an alert on your device.
However, that doesn’t mean you cannot use Life360 on a PC. While it may seem a bit odd, there are a couple of methods that’ll allow you to get the Life360 app for Windows. In today’s guide, we are going to share some of these methods that’ll help you run the Life360 app on Windows.
So, without wasting another second, let’s dive straight into the guide.

Part 1: Why people seek to use Life360 on PC?
First things first; why would anyone want to use a family locator app like Life360 on their PC? Well, the truth is everyone has their own reason to get Life360 for PC. For instance, let’s say you are in the middle of an important project and don’t want to be bothered by alerts on your smartphone. However, you still don’t want to compromise with the safety of your family members.
In this situation, you can simply run the Life360 app on PC. This will allow you to directly keep track of the whereabouts of family members on your Windows system and you won’t have to constantly check your phone.
Life360 can also be used on a computer when your phone’s battery has completely drained and there’s no power outlet nearby. In this case, you can simply power-on your laptop, start the Life360 app and send your current whereabouts to family members.
Part 2: Is it possible to use Life360 on Windows PC?
Life360 is an extremely useful app for people who are always concerned about their closed ones. The app is basically designed with a vision to keep family members connected and safe. In addition to location sharing, the app also provides exclusive features like crash detection, place alerts, speed alerts, battery monitoring, etc.
The app also makes it easier for parents to monitor their child’s movement. Using the app, you can always know that your kids have safely reached school and back home. For any parent, knowing whether the kids are safe, is one less thing to worry about.
However, as we mentioned earlier, Life360 hasn’t been released for Windows yet. So, there’s no direct way to install and run the app on a Windows PC. While Life360 may release a dedicated Windows software in the future, as of now, you can only run it using the alternative methods.
These methods include:
Part 3: Use Life360 on Windows PC with Android emulator
The first and the most convenient way to run Life360 on computer is to use an Android Emulator. An emulator is basically a software that creates a virtual Android system on your computer. As a result, you’ll be able to run Android apps on your computer.
While there are dozens of Android emulators, Bluestacks seems to be the most popular and user-friendly option among all. Unlike other emulators, Bluestacks is easy to set up and use.
Here’s how you can run Life360 on a computer using Bluestacks Android emulator./
Step 1: Head over to Bluestacks official website and tap the download button.
Step 2: Open the installer and tap the “download” button. This will initiate the download process on your System.
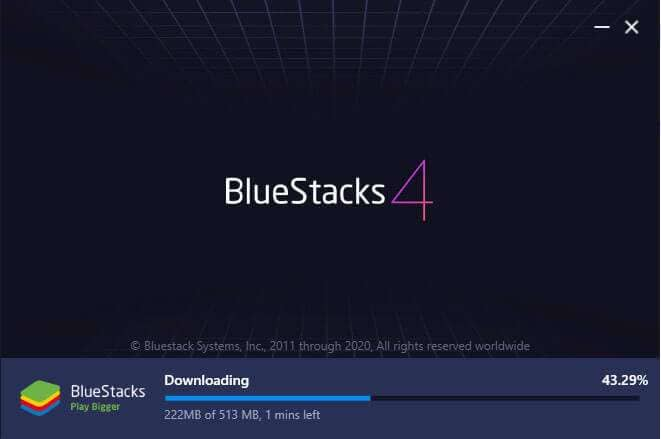
Step 3: Once the installation process completes, Bluestacks will start to boot. Keep in mind that the first boot may take some time, depending on your system configurations.
 PearlMountain Image Converter
Step 4: In the home screen, tap the “Google Play Store” icon. You’ll be asked to sign-in with your Google account. Enter the right credentials and log-in to the Google Play Store.

Step 5: In the top search bar, type-in Life360 and tap the “install” button to download the app.

Step 6: Life360 is now installed on your computer. Open the app and enter your login details. You’ll now be able to run Life360 on your PC.

Part 4: Use Life360 by mirroring Android to Windows PC
While running an emulator is a great way to get Life360 on PC, it has its own set of challenges. For instance, running an Android emulator is not easy when you have a low-configuration PC. Emulators like Bluestacks requires high system configuration otherwise they take forever to load.
In this situation, we have another alternative for you to run Life360 on PC. You can simply mirror your Android to your Windows system. Mirroring the Android device will allow you to see its content on the PC itself.
Here’s how you can mirror the Android device on your PC.
Step 1: Make sure that Bluetooth is activated on both devices.
Step 2: On your Windows PC, open “Settings” and select the “Systems” tab.

Step 3: Choose the “Projecting to this PC” option in the left menu-bar and make sure that “Available Everywhere” is selected.

Step 4: If you’re running Android Pie or above on your device, scroll down to open notification drawer and select “Smart View” (or “Cast” in some devices). You’ll see your PC listed here. Tap the button to start Android mirroring.

Step 5: It may take some while for the connection to establish. Once it does, you’ll be able to cast your device screen onto your computer and you’ll be able to run life360 on your system.

Keep in mind that you’ll still require your device to navigate through the content on your computer. Any action that you perform on your device will be replicated on your computer screen as well.
Final Verdict
Life360 is probably among the top family locators for Android users. Apart from its extensive range of features, the app provides a user-friendly interface, which allows it easier for even elders to use the app without any issues. Even though there isn’t a dedicated Life360 software for Windows, you can follow the above-mentioned methods to run the Life360 on PC.
You Might Also Like

Location-based apps
GPS spoof for dating apps
GPS spoof for social apps
Pokemon Go on PC
AR game tricks

Change Phone GPS Location Easily
- ● Teleport GPS location to anywhere
- ● Play AR games without moving
- ● Spoof Location on the popular Apps
- Title: How to Fix Asus ROG Phone 8 Pro Find My Friends No Location Found? | Dr.fone
- Author: Ava
- Created at : 2024-08-01 23:14:56
- Updated at : 2024-08-02 23:14:56
- Link: https://fake-location.techidaily.com/how-to-fix-asus-rog-phone-8-pro-find-my-friends-no-location-found-drfone-by-drfone-virtual-android/
- License: This work is licensed under CC BY-NC-SA 4.0.