
How to Share Location in Messenger On Infinix Smart 7 HD? | Dr.fone
How to Share Location in Messenger On Infinix Smart 7 HD?
We usually host a gathering once in a while and invite our friends to come over. Most of us are already used to organizing such activities because we’ve been doing that for a long time now. However, we cannot deny that it’s much easier nowadays than years ago. Why so? Simply because the communication channels available today at our disposal are more digital and more capable. For instance, Facebook Messenger now allows users to share their whereabouts in a snap of a finger. Yes. That feature is called Live Location.
The Live Location feature on Messenger works beyond sending the address or coordinates of your exact location. It basically visualizes your whereabouts by means of an interactive map and updates the details from time to time. That means the receiver can view not only your position but also your movements. Is that helpful? Absolutely yes. It’s indeed a game-changer in today’s already convenient world. Is it highly recommended? With proper handling and adequate caution, Messenger’s Live Location can definitely do more good than harm to the users.
In this article, we will delve into the highlights and benefits of Facebook Messenger’s location-sharing features. We will also provide some tutorials on how to share Live Location on Messenger. Continue reading below to learn more.

Part 1. Everything You Should Know About Messenger’s Live Location
Facebook is well aware that sharing location details is essential to its users. That’s why developers have come up with a brilliant idea and rolled out Live Location on Messenger. It basically works like other location-sharing features. However, Live Location provides more precise and thorough location information. It’s in map form, where you can view the exact location and track the movements of the sender. You’ll continue to see updates for as long as the sharing is not halted on the other end. To navigate it properly, try to read tutorials on how to share Live Location on Messenger.

What if you wish to send a particular address from another location? There is no problem with that. Messenger allows users to search for a specific place, trace it on the map, and share the details. The receiver can view it in map form and get directions if necessary. See? It’s very easy and convenient. No need to type in long addresses just to share a particular location with your friend. You just have to find it precisely on the map and send the information afterward.
Convenience is just one thing. Messenger’s location-sharing feature has a lot more to offer to users. One of which is the accuracy of the shared location information. Since the details are automatically generated through GPS, you can be sure that it is correct and definite. If you go out and track it down the neighborhood, you can certainly find the location in no time. Just make sure that the location services on your smartphone are activated so you can view your progress in real time. Also, stay vigilant while you’re out and keep yourself safe from any harm. Remember that safety remains a priority and comes above convenience.
How to Grant Facebook Messenger the Permission to Access Your Location?
Facebook Messenger’s location-sharing feature will not work without the necessary access. That’s why you should first configure the permission settings on your mobile device to avoid unwanted disruptions. Don’t worry. It’s indeed a piece of cake. Check out the tutorial provided below.
- 1: Go to Settings.
- Step 2: Click Apps.


- Step 3: Find and click Messenger.

- Step 4: Click Permissions.


- Step 5: Click Location.

- Step 6: Select Allow Only While Using the App. If you’re quite conservative regarding this matter, click Ask Every Time instead. After that, Facebook Messenger will have access to your location information.


 The Tube Sites Submitter is a fast and efficient tool for anyone who needs to upload videos quickly, easily and automatically to hundreds of tube sites in mere minutes .
 Part 2. How to Share My Location on Messenger?
How do I share my location on Messenger? As mentioned earlier, it’s very easy to use Facebook Messenger for location sharing. All it takes is just a few clicks on the platform. No need to manually type in the address or sketch the landmarks. Messenger does the rest of the work for you. In actuality, there are three ways to share your location on Messenger. Any of them can be of great help to you, depending on your current situation. Do you want to try them now? Check out the tutorials below.
Method 1: Share location on Facebook Messenger via Live Location
How to share my location on Messenger? Well, the first option you can try is through Live Location. It works best if you wish to tell somebody where exactly you are and give updates from time to time. Don’t worry. Although it looks complicated at a glance, in reality, it’s actually not rocket science. It only takes a few seconds to complete. Below is a tutorial on how to share Live Location on Messenger in easy steps.
- Step 1: Open the Facebook Messenger application on your mobile device.
- Step 2: Browse through your conversation feed and find the contact with whom you wish to share your Live Location. Click on it.
- Step 3: Click the More (+) icon at the bottom-left corner of the screen.
 Greeting Card Builder
- Step 4: Right after, click Location.

- Step 5: Click Start Sharing Live Location. Immediately, your current location details will be available and forwarded to the intended receiver. Live Location lasts for 60 minutes at maximum. If you wish to terminate it, simply click Stop Sharing Live Location.

Method 2: Share location on Facebook Messenger via Pinned Location
Let’s say there is a specific place you want to visit with your friend. Is there a way to share the address of the venue without you being there at the moment? Fortunately, it is possible. Apart from sharing your current location in real-time via Live Location, you can also send pinned locations on Messenger. You just need to search for it and then redirect the details to your friend. Yes. It’s just as simple as that. Do you want to try it on your smartphone? If so, follow the guide below.
- Step 1: Launch the Facebook Messenger application on your mobile device.
- Step 2: Scroll through your conversations and find the receiver from the list. Click on it.
- Step 3: On the text field, click the More (+) icon at the bottom-left corner.
- Step 4: Then, click Location.
- Step 5: Locate the search bar above the interactive map and type in the location you want to share.

- Step 6: Choose one from the suggested results and then click on it. The details will then be forwarded immediately to the intended receiver.
Method 3: Share location on Facebook Messenger via Google Maps location
How do I share my location in Messenger if I cannot find it on the map provided? Yes. That happens sometimes. There are certain places that are untraceable on the messaging platform. As a result, it doesn’t appear on the map when you try to search for it. But don’t sweat it. If you experience the same issue, you can instead use Google Maps to share location details. How to do it? Check out the tutorial provided below.
- Step 1: Launch the Google Maps application on your mobile device.
- Step 2: Click on the Search bar at the top and then type in the location.


- Step 3: Choose one from the suggestions and then tap on it. Make sure that it is exactly what you’re looking for.

- Step 4: Access the menu bar below the map and then click Share.

- Step 5: From there, click Chats or the Facebook Messenger logo.
- Step 6: Find the receiver from the provided list and then click the Send button next to its name.

NOTE: Of course, you can only send pinned locations via Google Maps. The Facebook Messenger’s Live Location is available within the platform only.
BONUS TIP: Protect Your Privacy With Wondershare Dr.Fone
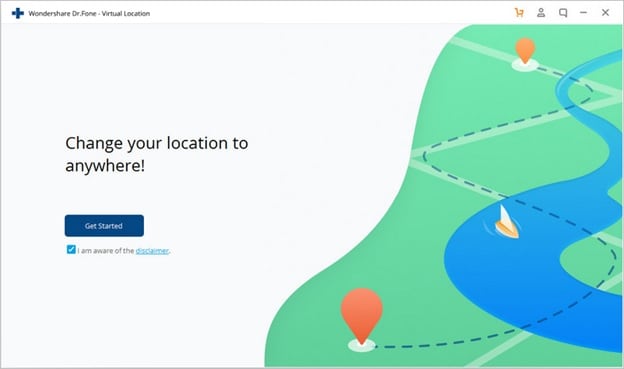
There’s no denying that the location-sharing feature of Facebook Messenger is useful to many of us. It always comes in very handy whenever we need to meet people somewhere or invite them to our places. However, we should not become too complacent and let our guard down. Sharing sensitive information like whereabouts always comes with risk, regardless of the platform and the intention. Therefore, make it a habit to protect your privacy at all costs. In this regard, Wondershare Dr.Fone has something special to offer. Its Virtual Location feature, capable of modifying and simulating your location records, can be of great help for you. Don’t worry. It’s very easy to use. Here’s a short guide for you.
- Step 1: Download Wondershare Dr.Fone from its official website. Right after, install it on your computer.
- Step 2: Launch the newly installed software on your desktop. Once it fully loads up, connect your smartphone using a data cable. Follow the on-screen instructions and perform the steps accordingly to ensure the connection between the two devices is stable enough to handle the succeeding operations.
- Step 3: Navigate to the left-side panel and then click Toolbox. On the main dashboard, click Virtual Location. Is it your first time using this feature? If so, allow Wondershare Dr.Fone to download additional resources. Don’t sweat it. It will only take a few minutes to complete.
- Step 4: Once the downloading process has concluded, Wondershare Dr.Fone - Virtual Location will automatically open on a separate window. From there, go to the top-right menu bar and then click Teleport Mode. It is the first icon that appears in the row.

- Step 5: Head over to the top-left corner and enter your desired location into the search bar. Choose one from the suggested results. After that, click the Enter icon.

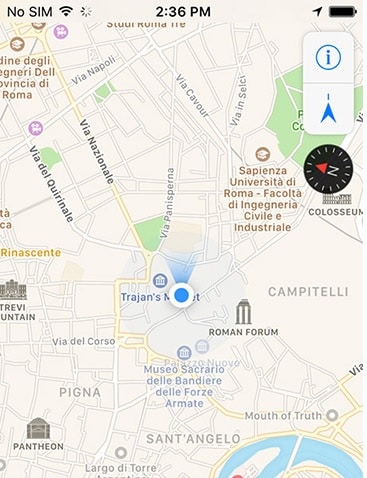
- Step 6: The details regarding your chosen location will be displayed on the computer screen. Review the information and make sure that it is the specific location you’re looking for. Once confirmed, click Move Here to proceed.

- Step 7: Immediately, the location settings on your smartphone will be changed according to the inputs you have provided to Wondershare Dr.Fone. You can verify it by checking the current location registered on your Maps app. After confirming that your mobile device is now showing a different location, you can now start browsing without worrying about your location’s privacy.

NOTE: Resort to Wondershare Dr.Fone - Virtual Location if your internet browsing does not require you to provide your real address. If you wish to restore your original location settings, simply close the Wondershare Dr.Fone application and restart your smartphone.
Conclusion
Gone are the days when you had to write invitation cards manually and deliver them one by one. Nowadays, all you need to do is go online and use Messenger’s location-sharing feature. Have you already tried it? If not, you should take it into consideration and use it on your next agenda. Refer to the tutorial above on how to share Live Location on Messenger. It can certainly help you get started. How do I share my location on Messenger without physically being there? That’s simple. Use Messenger or Google Maps’s pinned location. Furthermore, download Wondershare Dr.Fone on your computer. Its Virtual Location feature, capable of modifying your location settings, can provide protection for your privacy. Just connect your Infinix Smart 7 HD to the computer and set it up from there.

Key features:
• Import from any devices and cams, including GoPro and drones. All formats supported. Сurrently the only free video editor that allows users to export in a new H265/HEVC codec, something essential for those working with 4K and HD.
• Everything for hassle-free basic editing: cut, crop and merge files, add titles and favorite music
• Visual effects, advanced color correction and trendy Instagram-like filters
• All multimedia processing done from one app: video editing capabilities reinforced by a video converter, a screen capture, a video capture, a disc burner and a YouTube uploader
• Non-linear editing: edit several files with simultaneously
• Easy export to social networks: special profiles for YouTube, Facebook, Vimeo, Twitter and Instagram
• High quality export – no conversion quality loss, double export speed even of HD files due to hardware acceleration
• Stabilization tool will turn shaky or jittery footage into a more stable video automatically.
• Essential toolset for professional video editing: blending modes, Mask tool, advanced multiple-color Chroma Key
Will iSpoofer update On Infinix Smart 7 HD
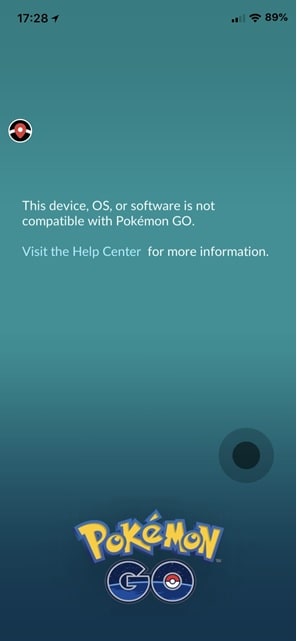
iSpoofer has been one of the most in-demand applications for changing your location while playing Pokemon Go. For all the right reasons, people wanted to stick to it to make sure that they catch the splendid Pokemon no matter where they are stationed. But the problems started when iSpoofer stopped working and there was no way anyone could continue to use or initiate iSpoofer update. When you open the application, you’d either see an error message, a subtle hint at an apology, or a pop-up that says that the app is under maintenance.
All of them are the alternative ways of saying - ‘We are not available anymore’. But will iSpoofer be back in the year 2021? Can we expect to revive our Pokemon catching abilities with the iSpoofer update? Even if it comes back, will it be available for Android and iPhone users? If not - then do we have any other application that we can use for this purpose? To get answers to all these questions, you have to continue to read this space.
Part 1: Why Can’t I update iSpoofer?
 Glary Utilities PRO - Premium all-in-one utility to clean, speed up, maintain and protect your PC

To put it very simple and upfront - The reason why you are unable to update iSpoofer is that it has been shut down. You can no longer use the existing application on the phone or download it from their website. Initially, when the app was down, people thought it could have been a Pogo update that is causing the error. So, they uninstalled the app and tried to download it again from the official website of the iSpoofer app. To their disappointment, the error message showed up even then. It took a while for everyone to accept that the application was no longer available and their desperate attempts to get it to work went in vain.

Undoubtedly, iSpoofer was a ‘game’ changer in the literal sense. You didn’t have to move from your place, you can catch some rare Pokemon and you get additional points for being the active wanderer. It’s of course a ‘cheat route’ to play the game and it has finally come to the notice of Niantic that a third-party app is being used to play the game.
Now that didn’t go down well with the makers. The whole essence of Pokemon Go is to ‘Go Out’ from the house to explore the presence of Pokemons in the surroundings. So, having a third-party application is going to change a lot of things. Pokemon blacklisted the app.
The main target users for iSpoofer were the Pokemon Go players. With them gone, the revenue and usage of the app have reduced to a great extent and the creators have decided to pull the app out. And that is why you will no longer find a new version of iSpoofer that will be compatible with the game. The older version has anyway been blacklisted and won’t be of any use for the players and no iSpoofer update information so far
Even in 2021, there is no guarantee that the app will be back so it’s better to not keep the hopes up. The major business for the app could have been in 2020 when the world stayed home. However, if everyone was unable to download and update the app in the year 2020, there are very bleak chances of having it back in 2021.
 Lyric Video Creator Professional Version
Part 2: Is there a good alternative for iSpoofer?
There are quite a few ways to spoof your location in the Pokemon Go Game but then they narrow down to even smaller numbers when we start searching for the ‘reliable’ options. So, here are a few ways you can find a good alternative for iSpoofer.
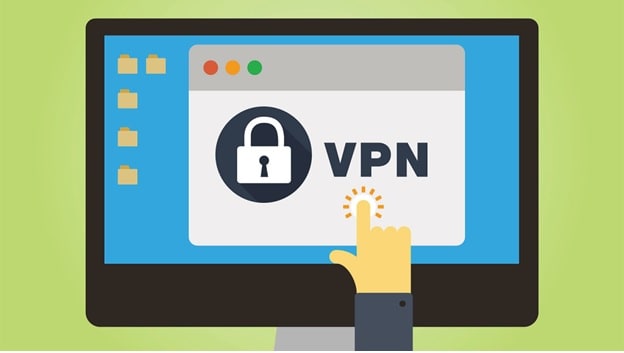
VPNs - There are certain VPNs that offer in-built location spoofing features that might come in handy for playing games like Pokemon Go. They change your location on the rest of the internet so it might be a little tricky for the makers to catch the foul play.

Google Play Store Apps - There are certain applications you will find on Google Play Store or even the App store that offer ‘Fake GPS’ changes. You simply have to search for ‘Fake GPS Location Changers’ and you get some options. Find the one with the best rating and this can work for a while. However, there is no guarantee of when they’ll abandon you.
 /a>
/a>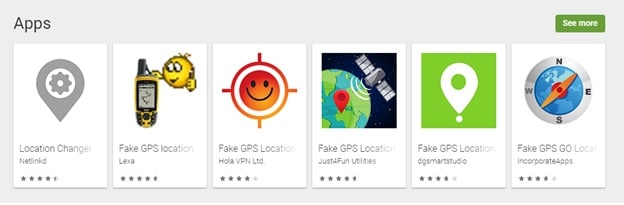
The most reliable option that you can go for is using - Dr. Fone. It is Wondershare’s master app that changes your location on the world map, the very same will reflect on all your devices, social media accounts, and internet searches. It’s very hard to detect that you’ve used a spoofer. This is how to use it -
Step 1 - You can use the Dr.Fone Location Spoofer for both Android and iPhones. So, starting off, you need to connect your Infinix Smart 7 HD (the phone) to your system - be it a laptop or a computer. You will be prompted to accept the ‘Terms and Conditions and then click on ‘Get Started’.
Step 2 - Once you are in, then the page will display a map and your location will be clearly mentioned. You need to go to the Teleport Mode you will find on the top right corner of the page. Enter your new location on the map.
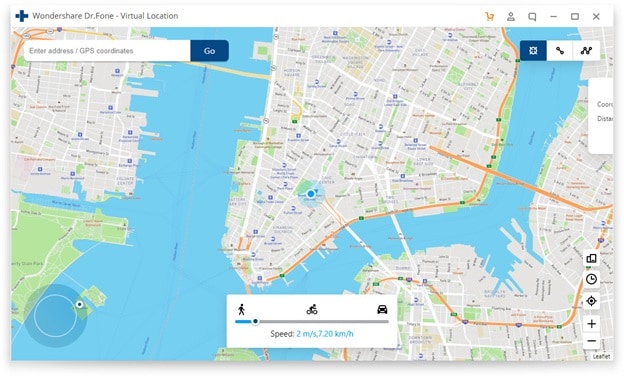
Step 3 - You can use the coordinates to get to the location or once the map displays, you can zoom in and move the pointer from one place to another and then click on ‘Move Here’ so that the location will be shifted from the previous one to new.

Step 4 - Now it’s easier to launch Pokemon Go but give it a few minutes before your changed location is completely registered and keep the new location realistic.
As in, you can’t jump from Russia to America in 2 hours, can you?
It’s quite easy to spoof your location for games like Pokemon Go using Dr. Fone and it will even stay undetected if you do it the right way. Also, the whole process to change the location hardly takes a few minutes, so you don’t have to spend time understanding how it all works. While you wait for the iSpoofer update (which may or may not come) you can use this in the meantime.
Thinking About Changing Your Netflix Region Without a VPN On Infinix Smart 7 HD?
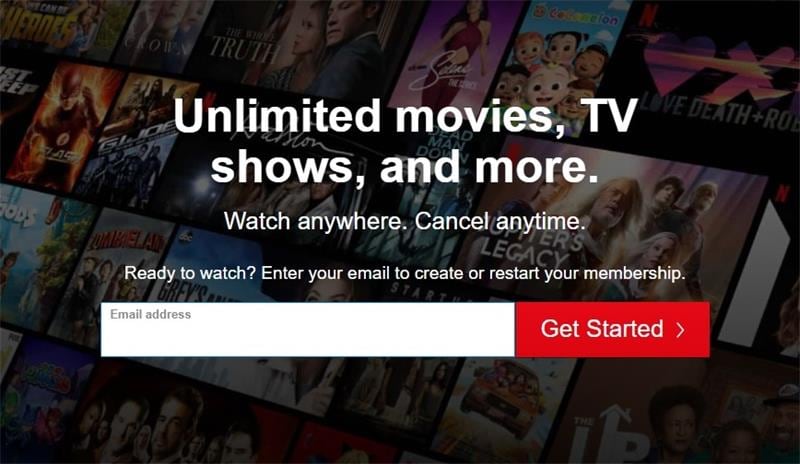
Netflix is easily one of the most popular streaming apps available today. It offers a huge library of movies, TV shows, documentaries, and more. However, the content you want to watch on Netflix depends on the country where you live.
The traditional method of circumventing region-locked content on Netflix is simply utilizing a VPN. You can also change Netflix country restrictions without it, but it will require a bit of work. If you’re interested to know how to change the Netflix region without a VPN, follow our quick article below to learn more.
Part 1: Netflix and Geo-Restrictions
Netflix offers subscribers a wide range of content, but their library varies per region due to licensing and copyright agreements. The service price sometimes costs less in other countries, which is why using VPNs to save money on subscriptions are highly popular.
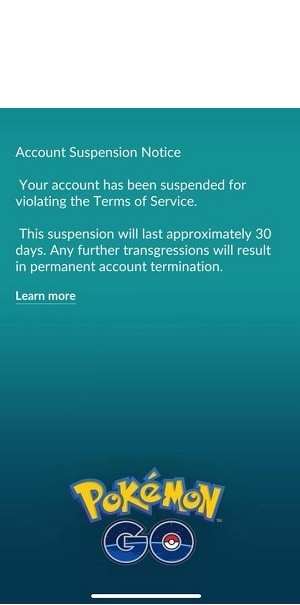
Using VPNs and other methods to change your region is not illegal, but it violates Netflix’s Terms of Use. If you’re caught using VPNs or other means to bypass their geo-restrictions, Netflix can suspend or terminate your account. This is why you should always take caution when navigating the streaming giant’s Terms of Use.
Part 2: Will Netflix Ban My Account If I Use a VPN?
If you’re wondering if Netflix bans accounts that use VPN, the answer is “No, they don’t”. On the other hand, Netflix will block access to content if it detects that you’re connected to VPN. If this happens, simply turn off your VPN or try connecting to different servers on your VPN and retry.
Part 3: Can You Change Your Netflix Region Without a VPN?
There are multiple ways to change your location on Netflix without a VPN, whether you’re on your computer, iPhone, or Android. You can use a smart DNS service, a Proxy Server, or a Tor browser to connect to a country you want to access. Follow our guide below to change country on Netflix now without a VPN.
Method 1: Using a Smart DNS
Utilizing Smart DNS to change country on Netflix without VPN actually works in the same way. This is because Smart DNS re-routes your connection through a server in a different country. Keep in mind that Smart DNS is still a service and will require a subscription from a Smart DNS provider.
Step 1: Find and select a DNS Server address from different online DNS providers. In this example, you’ll see using SurfShark .
Step 2: Register your IP address on your selected provider and obtain the appropriate DNS Server Address on your account.
 vMix HD - Software based live production. vMix HD includes everything in vMix Basic HD plus 1000 inputs, Video List, 4 Overlay Channels, and 1 vMix Call
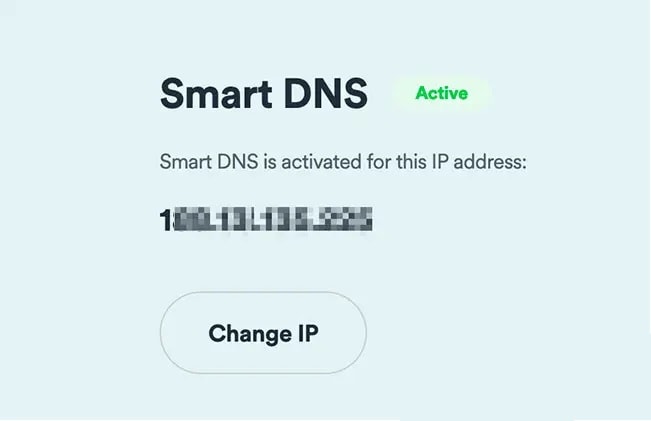
Step 3: Open Networking settings on your computer, iPhone, PlayStation, or Xbox and find DNS Settings (the image below is an example for the Windows system).
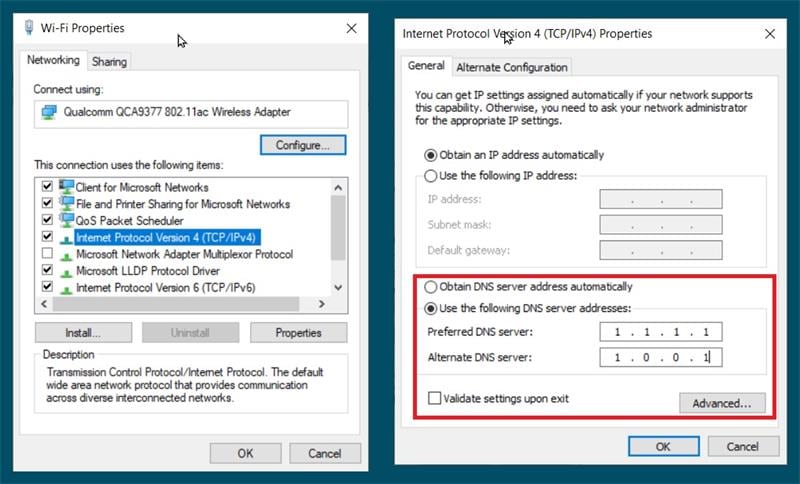
Step 4: Input your DNS Server address. Click Ok once done and restart your computer. The DNS address should activate once you reconnect to the internet.
Pros
- DNS servers are faster than a usual internet connection, so you can enjoy streaming at high connection speeds.
- DNS Servers don’t encrypt your traffic or hide your IP address.
Cons
- DNS doesn’t carry your information, as the server side will only see the IP address where the query came from, which hackers can manipulate.
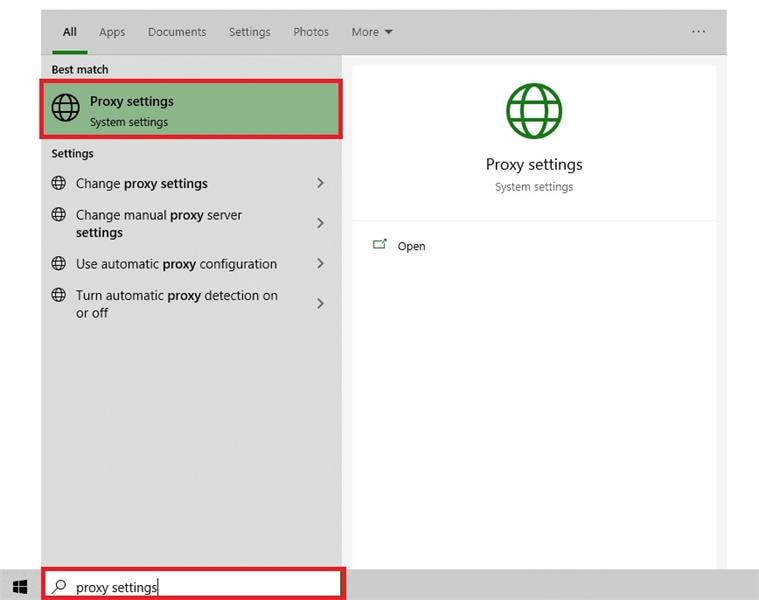
Method 2: Using a Proxy Server
Proxy Servers work the same as VPNs as it routes traffic to a third-party server. However, like DNS, Proxy Servers don’t encrypt data but can mask your IP address. Here are the steps to watch NetFlix with a Proxy Server.
Step 1: Search for Proxy Settings on your computer.
 Project Manager - Asset Browser for 3Ds Max
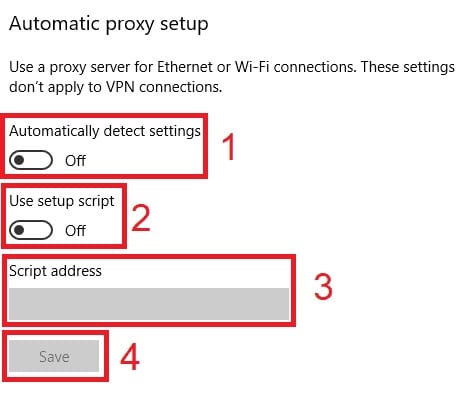
Step 2: Choose between Automatic or Manual proxy setup.
Step 3A: For Automatic proxy setup, turn on Automatically detect settings and Use setup script. Afterward, enter the Script address and click Save.
Step 3B: For Manual proxy setup, click Use a proxy server. Input Address and Port numbers. Click Save afterward.


Note
To change Proxy on mobile phones, change your phone’s proxy settings. Your Netflix app will automatically copy your phone’s proxy settings if done correctly.
Pros
- Proxy Servers mask your IP address retaining anonymity.
- Proxies improve web browsing performance, especially when downloading large files.
Cons
- Proxy Servers don’t encrypt data.
Method 3: Using a Tor Browser
For the unfamiliar, Tor is an open-source network that encrypts your connection while stopping trackers from following your activity. Here are the steps to start using Tor Browser to watch Netflix without a VPN.
Step 1: Download and install Tor Browser.
 PearlMountain Image Converter
Step 2: Launch Tor Browser and click Connect.
Step 3: Go to Netflix.com and log in to your account.
Note
Tor Browser is available across all major platforms, including Windows, macOS, Linux, and Android.
Pros
- Tor is completely free to use.
- Your browsing history automatically gets deleted.
Cons
- You can’t control the region you have access to, so your Netflix content is not guaranteed to have what you’re looking for.
Conclusion
Changing your Netflix region with or without a VPN certainly has its perks. This is because you can watch your favorite series unavailable to your country to maximize your streaming access. Choosing a country with a lower subscription price also saves you money.
While it’s not illegal to change your Netflix region, it does violate the streaming giant’s Terms of Use. You should always research and know the pros and cons when circumventing Netflix’s terms so your account doesn’t get suspended or terminated.
Dr.Fone - Virtual Location
1-Click Location Changer for both iOS and Android
- Teleport from one location to another across the world from the comfort of your home.
- With just a few selections on your computer, you can make members of your circle believe you’re anywhere you want.
- Stimulate and imitate movement and set the speed and stops you take along the way.
- Compatible with both iOS and Android systems.
- Work with location-based apps, like Pokemon Go , Snapchat , Instagram , Facebook , etc.
3981454 people have downloaded it
- Title: How to Share Location in Messenger On Infinix Smart 7 HD? | Dr.fone
- Author: Ava
- Created at : 2024-08-01 23:39:42
- Updated at : 2024-08-02 23:39:42
- Link: https://fake-location.techidaily.com/how-to-share-location-in-messenger-on-infinix-smart-7-hd-drfone-by-drfone-virtual-android/
- License: This work is licensed under CC BY-NC-SA 4.0.