
How to Share Location in Messenger On ZTE Nubia Flip 5G? | Dr.fone
How to Share Location in Messenger On ZTE Nubia Flip 5G?
We usually host a gathering once in a while and invite our friends to come over. Most of us are already used to organizing such activities because we’ve been doing that for a long time now. However, we cannot deny that it’s much easier nowadays than years ago. Why so? Simply because the communication channels available today at our disposal are more digital and more capable. For instance, Facebook Messenger now allows users to share their whereabouts in a snap of a finger. Yes. That feature is called Live Location.
The Live Location feature on Messenger works beyond sending the address or coordinates of your exact location. It basically visualizes your whereabouts by means of an interactive map and updates the details from time to time. That means the receiver can view not only your position but also your movements. Is that helpful? Absolutely yes. It’s indeed a game-changer in today’s already convenient world. Is it highly recommended? With proper handling and adequate caution, Messenger’s Live Location can definitely do more good than harm to the users.
In this article, we will delve into the highlights and benefits of Facebook Messenger’s location-sharing features. We will also provide some tutorials on how to share Live Location on Messenger. Continue reading below to learn more.

Part 1. Everything You Should Know About Messenger’s Live Location
Facebook is well aware that sharing location details is essential to its users. That’s why developers have come up with a brilliant idea and rolled out Live Location on Messenger. It basically works like other location-sharing features. However, Live Location provides more precise and thorough location information. It’s in map form, where you can view the exact location and track the movements of the sender. You’ll continue to see updates for as long as the sharing is not halted on the other end. To navigate it properly, try to read tutorials on how to share Live Location on Messenger.

What if you wish to send a particular address from another location? There is no problem with that. Messenger allows users to search for a specific place, trace it on the map, and share the details. The receiver can view it in map form and get directions if necessary. See? It’s very easy and convenient. No need to type in long addresses just to share a particular location with your friend. You just have to find it precisely on the map and send the information afterward.
Convenience is just one thing. Messenger’s location-sharing feature has a lot more to offer to users. One of which is the accuracy of the shared location information. Since the details are automatically generated through GPS, you can be sure that it is correct and definite. If you go out and track it down the neighborhood, you can certainly find the location in no time. Just make sure that the location services on your smartphone are activated so you can view your progress in real time. Also, stay vigilant while you’re out and keep yourself safe from any harm. Remember that safety remains a priority and comes above convenience.

How to Grant Facebook Messenger the Permission to Access Your Location?
Facebook Messenger’s location-sharing feature will not work without the necessary access. That’s why you should first configure the permission settings on your mobile device to avoid unwanted disruptions. Don’t worry. It’s indeed a piece of cake. Check out the tutorial provided below.
- 1: Go to Settings.
- Step 2: Click Apps.
- Step 3: Find and click Messenger.

- Step 4: Click Permissions.

- Step 5: Click Location.

- Step 6: Select Allow Only While Using the App. If you’re quite conservative regarding this matter, click Ask Every Time instead. After that, Facebook Messenger will have access to your location information.

![]() FX PRO (Gold Robot + Silver Robot(Basic Package))
FX PRO (Gold Robot + Silver Robot(Basic Package))
Part 2. How to Share My Location on Messenger?
How do I share my location on Messenger? As mentioned earlier, it’s very easy to use Facebook Messenger for location sharing. All it takes is just a few clicks on the platform. No need to manually type in the address or sketch the landmarks. Messenger does the rest of the work for you. In actuality, there are three ways to share your location on Messenger. Any of them can be of great help to you, depending on your current situation. Do you want to try them now? Check out the tutorials below.
Method 1: Share location on Facebook Messenger via Live Location
How to share my location on Messenger? Well, the first option you can try is through Live Location. It works best if you wish to tell somebody where exactly you are and give updates from time to time. Don’t worry. Although it looks complicated at a glance, in reality, it’s actually not rocket science. It only takes a few seconds to complete. Below is a tutorial on how to share Live Location on Messenger in easy steps.
- Step 1: Open the Facebook Messenger application on your mobile device.
- Step 2: Browse through your conversation feed and find the contact with whom you wish to share your Live Location. Click on it.
- Step 3: Click the More (+) icon at the bottom-left corner of the screen.


- Step 4: Right after, click Location.

- Step 5: Click Start Sharing Live Location. Immediately, your current location details will be available and forwarded to the intended receiver. Live Location lasts for 60 minutes at maximum. If you wish to terminate it, simply click Stop Sharing Live Location.

Method 2: Share location on Facebook Messenger via Pinned Location
Let’s say there is a specific place you want to visit with your friend. Is there a way to share the address of the venue without you being there at the moment? Fortunately, it is possible. Apart from sharing your current location in real-time via Live Location, you can also send pinned locations on Messenger. You just need to search for it and then redirect the details to your friend. Yes. It’s just as simple as that. Do you want to try it on your smartphone? If so, follow the guide below.
- Step 1: Launch the Facebook Messenger application on your mobile device.
- Step 2: Scroll through your conversations and find the receiver from the list. Click on it.
- Step 3: On the text field, click the More (+) icon at the bottom-left corner.
- Step 4: Then, click Location.
- Step 5: Locate the search bar above the interactive map and type in the location you want to share.

- Step 6: Choose one from the suggested results and then click on it. The details will then be forwarded immediately to the intended receiver.

Method 3: Share location on Facebook Messenger via Google Maps location
How do I share my location in Messenger if I cannot find it on the map provided? Yes. That happens sometimes. There are certain places that are untraceable on the messaging platform. As a result, it doesn’t appear on the map when you try to search for it. But don’t sweat it. If you experience the same issue, you can instead use Google Maps to share location details. How to do it? Check out the tutorial provided below.
- Step 1: Launch the Google Maps application on your mobile device.
- Step 2: Click on the Search bar at the top and then type in the location.

- Step 3: Choose one from the suggestions and then tap on it. Make sure that it is exactly what you’re looking for.

- Step 4: Access the menu bar below the map and then click Share.

- Step 5: From there, click Chats or the Facebook Messenger logo.
- Step 6: Find the receiver from the provided list and then click the Send button next to its name.


NOTE: Of course, you can only send pinned locations via Google Maps. The Facebook Messenger’s Live Location is available within the platform only.
BONUS TIP: Protect Your Privacy With Wondershare Dr.Fone
There’s no denying that the location-sharing feature of Facebook Messenger is useful to many of us. It always comes in very handy whenever we need to meet people somewhere or invite them to our places. However, we should not become too complacent and let our guard down. Sharing sensitive information like whereabouts always comes with risk, regardless of the platform and the intention. Therefore, make it a habit to protect your privacy at all costs. In this regard, Wondershare Dr.Fone has something special to offer. Its Virtual Location feature, capable of modifying and simulating your location records, can be of great help for you. Don’t worry. It’s very easy to use. Here’s a short guide for you.
- Step 1: Download Wondershare Dr.Fone from its official website. Right after, install it on your computer.
- Step 2: Launch the newly installed software on your desktop. Once it fully loads up, connect your smartphone using a data cable. Follow the on-screen instructions and perform the steps accordingly to ensure the connection between the two devices is stable enough to handle the succeeding operations.
- Step 3: Navigate to the left-side panel and then click Toolbox. On the main dashboard, click Virtual Location. Is it your first time using this feature? If so, allow Wondershare Dr.Fone to download additional resources. Don’t sweat it. It will only take a few minutes to complete.
- Step 4: Once the downloading process has concluded, Wondershare Dr.Fone - Virtual Location will automatically open on a separate window. From there, go to the top-right menu bar and then click Teleport Mode. It is the first icon that appears in the row.

- Step 5: Head over to the top-left corner and enter your desired location into the search bar. Choose one from the suggested results. After that, click the Enter icon.

- Step 6: The details regarding your chosen location will be displayed on the computer screen. Review the information and make sure that it is the specific location you’re looking for. Once confirmed, click Move Here to proceed.

- Step 7: Immediately, the location settings on your smartphone will be changed according to the inputs you have provided to Wondershare Dr.Fone. You can verify it by checking the current location registered on your Maps app. After confirming that your mobile device is now showing a different location, you can now start browsing without worrying about your location’s privacy.

NOTE: Resort to Wondershare Dr.Fone - Virtual Location if your internet browsing does not require you to provide your real address. If you wish to restore your original location settings, simply close the Wondershare Dr.Fone application and restart your smartphone.
Conclusion
Gone are the days when you had to write invitation cards manually and deliver them one by one. Nowadays, all you need to do is go online and use Messenger’s location-sharing feature. Have you already tried it? If not, you should take it into consideration and use it on your next agenda. Refer to the tutorial above on how to share Live Location on Messenger. It can certainly help you get started. How do I share my location on Messenger without physically being there? That’s simple. Use Messenger or Google Maps’s pinned location. Furthermore, download Wondershare Dr.Fone on your computer. Its Virtual Location feature, capable of modifying your location settings, can provide protection for your privacy. Just connect your ZTE Nubia Flip 5G to the computer and set it up from there.
Complete Tutorial to Use VPNa to Fake GPS Location On ZTE Nubia Flip 5G
In the present day, there’s barely any webpage or app that may not require your Geological location. This has been a major strategy of the site/app owners to push only the content that is relevant to your needs or may interest you. Therefore, every other webpage or app first fetches your Geological location and then behave accordingly.
For instance, there are several apps that only work in the US and not outside of it. But there is workaround for it too. You can actually make the app “think” that your Geological location is somewhere in US currently, instead of where you actually are. You can achieve this with a powerful vpna fake gps location apk. You may now wonder, hot to set it up and make use of it. So, without much delay, let’s now understand step by step tutorial on vpna fake gps location.
Part 1. About VPNa
Before we move any further with the tutorial, it is vital to understand what vpna fake gps location apk is! Just a small halt, though. But it’s worth the time. Out of the several apps available for your mobile devices to spoof your GPS location, VPNa fake gps apk is certainly the safest bet.
It is a known fact that your simply cannot alter the actual GPS location of your device but yes there is little workaround (a function) in Android that is utilized to test the GPS locations settings. And it is how VPNa fake gps location apk spoofs your device location with any preferred location on the face of the Earth. It makes use of “Enable Mock Locations” feature in the “Developer Settings” of your ZTE Nubia Flip 5G. Be it London, New York, Paris or Rome or any other location. Eventually, hiding your identity and furnishing you with absolute anonymity and online privacy.
Here are some of the main highlights of the VPNa fake gps location apk:
- First and foremost, you do not actually need to root your device to make use of this app.
- You can play prank with your friends by spoofing your location and making them believe that you’re travelling out of the country.
- Extremely user friendly app. Simply, look up for the desired fake location and hit Start.
- What’s more? Well, you can even save locations to make use of them later like a one click thing.

Part 2. Where to Download VPNa?
When it comes to downloading VPNa, the process is a breeze as far as Android users are concerned. The app is available on the Google Play Store , and all the Android users need to do is search it and download it. Moreover, it lies on the lighter end when it comes to app size, meaning users don’t need to have large free space.
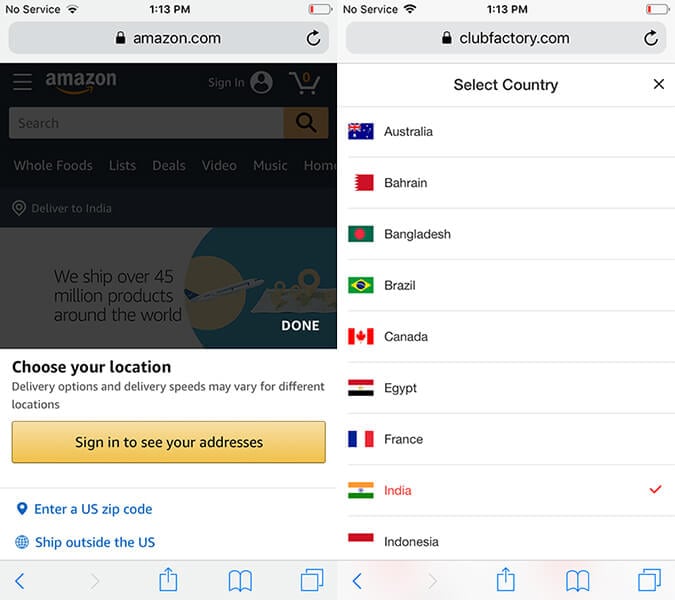
For iOS users, however, this app no longer exists. The app has discontinued its support for iOS devices and is no longer available on the Apps Store. However, there is no need to be disappointed as many better and well-reputed alternatives exist. Read the article till the end to discover the best location spoofer for iOS devices.
 OtsAV TV Webcaster
Part 3. Must-reads before using VPNa
Here in this section, we’re going to critically determine both the goods and bad of the vpna fake gps location apk. Let’s explore!
Pros of VPNa
- The app works at a lightning fast speed and is extremely useful to fake gps location for free.
- Functionality to save locations for further utilization in the near future makes it a one click solution.
- The best thing about vpna fake gps location apk is don’t actually have to Root your ZTE Nubia Flip 5G!
- Extremely simple process. Opt for the desired location and get started.
Cons of VPNa
- Reportedly, the newer version of the VPNa app is not able to spoof location in Pokemon Go, like the way it used to do.
- VPNa fake gps location free apkrequires the Google Play Service version 12.6.88. But upon installing the aforementioned version, reportedly, usersstarted to experience other issues like YouTube isn’t launching.
- Moreover, even if the newer version of the app does spoof the geological location properly. It is just not able to maintain it any longer than a few seconds. Implies, your spoofed location returns back to your actual location after a few seconds.
- You may get banned or suspended by some games or apps for spoofing your location. Making use of this app isn’t advised at all.
Part 4. How to set up VPNa on your Android to fake GPS
Ah! There we are. After acquiring all this valuable information, we’re now finally proceeding to learning about the step by step process on setting up and activating the vpna fake gps location free apk. Here’s all that you need to do on your ZTE Nubia Flip 5G to fake GPS.
Step 1: Download the vpna fake gps location free apk
- Visit the Google Play Store and navigate to the “vpna fake gps location” app. The search results may get piled up with several similar options, both paid and free.
Note: If you get along with any other app, it may require your ZTE Nubia Flip 5G to be rooted in the first place.
- Ensure to opt for the “vpna fake gps location” listing only as this app doesn’t require a rooted Android device. But your ZTE Nubia Flip 5G must be running on the OS version 4.0 or higher.
- Install the app and launch it afterwards.
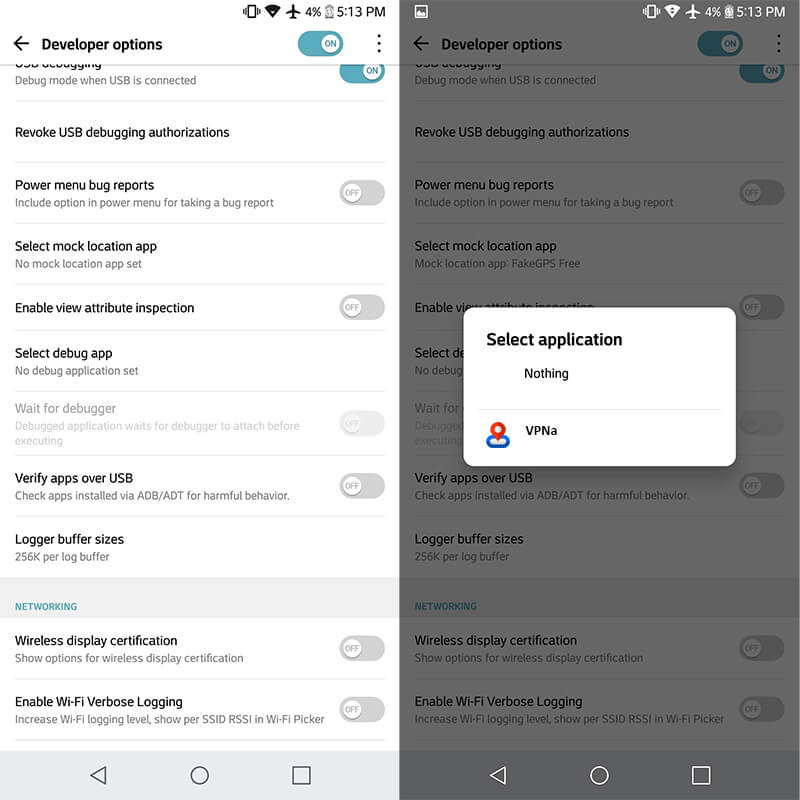
Step 2: Enable Mock Location on Android
- When you’re on the mainscreen of the app, you’ll be asked to “ENABLE MOCK LOCATIONS”. Tap on the pop up and then the “Developer options” screen will come up.
Note: The “Developer options” aren’t pre-enabled, you may require enable it manually first. For this, head to the “Settings” > “About Phone” > hit on “Build Number” – x7 times.
- Now, on “Developer Settings” opt in for “Select Mock location App” followed by selecting the “VPNa” app from the appearing options.
 Glarysoft File Recovery Pro - Helps to recover your lost file/data, even permanently deleted data.
Step 3: Search for a fake location and get started
- As soon as the fundamentals are set in place, you’re all ready to get started. Simply, hit the back button while on Developer Settings screen to get back into the vpna fake gps location app.
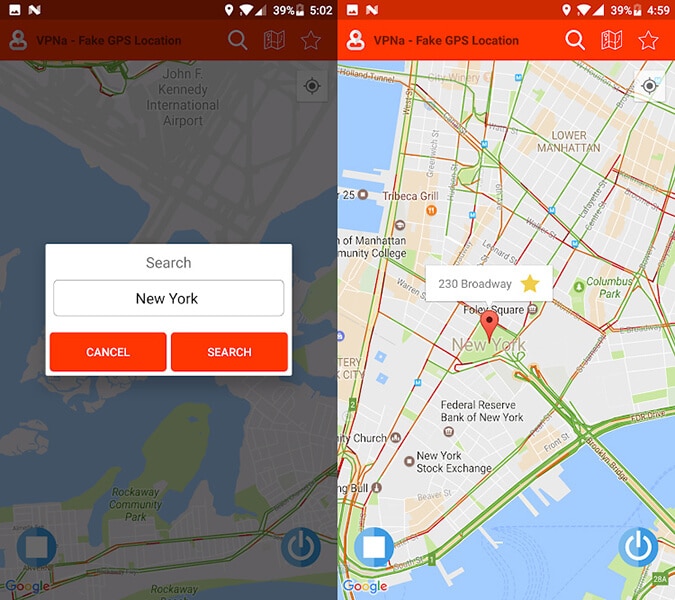
- Next, “Search” for the desired location using the search icon over the top. Lastly, push “Start/Power” button to activate the fake GPS location.
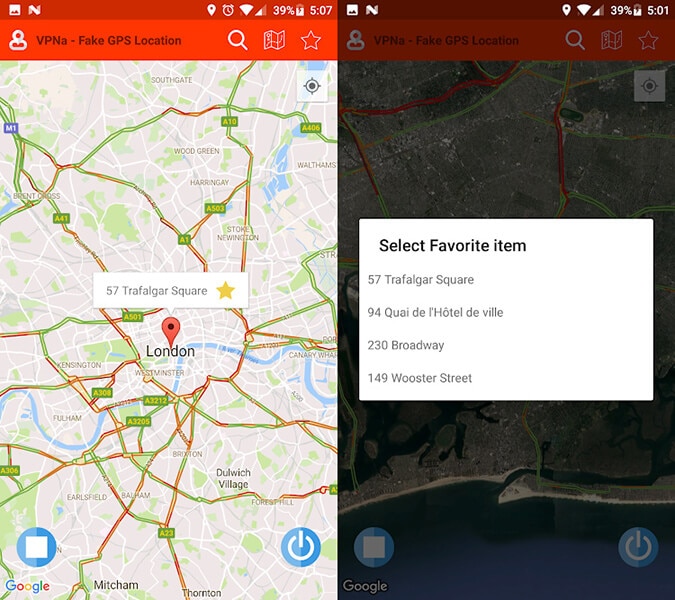
Note: You can also make use of the “Star” button on the “location marker”to pin the selected location over the map as your favorite.

Part 5. Example where VPNa does work
By faking GPS location with VPNa app, you can access desired content by bypass the Geo-restrictions. There are several instances where VPNa is successful solution for your GPS spoofing requirements. For instance, by spoofing location with VPNa you certainly:
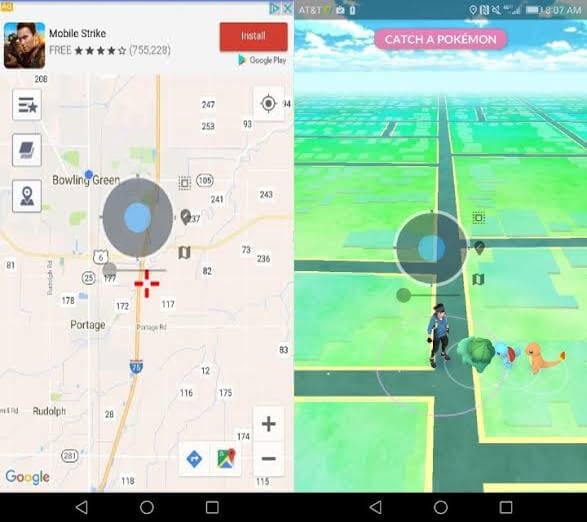
Can catch Pokemons of different variants in the Pokemon Go game. Without having to travel to several places.

Part 6: VPNa iOS version discontinued? How to fake GPS on iPhone?
Knowing that VPNa fake GPS location app no longer supports iOS can be a disappointment. However, we are at your rescue if you’re an iOS user. Wondershare has come up with a great tool named as Dr.Fone – Virtual Location (iOS&Android) that fulfills all your needs regarding faking location. In this section, we will learn about how you can fake location with this tool so that you don’t have to worry about the discontinuation of VPNa fake GPS apk’s iOS version. Here is how:
Mode 1: Teleport to Anywhere
Step 1: Download this VPNa fake GPS apk’s alternative on PC and install. Launch and hit “Virtual Location”.

Step 2: Establish connection between iPhone and PC. Click on “Get Started” right after that.

Step 3: You will be able to see the actual location on the map. Or you can hit “Center On” icon at the right side to get the accurate location displayed.
Step 4: Click on the “Teleport mode” which can be found as the first icon at the upper right corner. Put the place to teleport and hit on “Go” button.
 Glarysoft File Recovery Pro Annually - Helps to recover your lost file/data, even permanently deleted data.
Step 5: A pop up will appear once the system gets the place you want. From that pop-up, hit “Move Here” button.
Step 6: You are good to go now. The location will be changed as desired. You will see the chosen location fixed whenever you click the “Center On” icon. Also, the same location will be shown in the location-based apps. See, there is no need for any iOS version of VPNa fake GPS apk for the purpose when you have Dr.Fone - Virtual Location (iOS&Android).
Mode 2: Simulate Movement Between two Places
Step 1: You can choose the “One-stop route” i.e. the third icon in the upper right after launching the program.
Step 2: Please opt for the place where you wish to move and you will get aware of that place’s distance.
Step 3: Now, you need to set the speed for how fast you wish to travel. You can choose walk, cycling speed or car speed by sliding the slider given at the bottom. Once done, hit on “Move Here” from the pop-up.


Step 4: In the next pop-up, you are supposed to enter the number defining the number of times you wish to move between the two places. Once this gets done, click “March”.

Step 5: The simulation of the movement will now begin and you can track the position being moved with the selected mode of speed.

Mode 3: Simulate Movement for Multiple Places
Step 1: In this case, select the fourth icon at the upper right side. This icon denotes the “Multi-stop route”. Subsequently, select the locations one by one from where you want to travel.
Step 2: Note the pop-up box that now comes. It will make you know how far you are going to travel. Choose the moving speed.

Step 3: The next pop-up will ask you to enter the number for how many times you wish to show back and forth movements. Click “Start Moving” once done.

Step 4: The movement simulation will begin and your location will be seen moving as per your selected route.
Final Words
That was a completed tutorial about the vpna fake gps location apk, starting from gaining the insights of the app to understanding both the goods and bad of it. And finally the detailed step by step tutorial will help you get along with faking gps location smoothly.
3 Ways to Change Location on Facebook Marketplace for ZTE Nubia Flip 5G
Facebook Marketplace is a hub designed within Facebook that enables Facebook users to buy and sell stuff online. This marketplace has optimized the chances of buying and selling legit stuff, including household appliances, clothes, and electronic devices. You must enter the pictures of that product and write a good description.
All the potential buyers from the nearest locations will access it. Moreover, you can look up stuff on the marketplace and order your favorite product with just simple clicks. It is also possible if you want to change the location of marketplace listings to attract buyers and sellers of your nearby areas.
The following discussed points in the article will teach you how to change location on the Facebook marketplace:
Part 1: How to Change Location on the Facebook Marketplace on iOS and Android Devices
The Facebook Marketplace is a feature that finishes the gap between social media and digital marketplaces. With this helpful feature, you can now buy and sell items on your Facebook account to other Facebook users. In addition, you can filter the listings and see the buyers from a specific location by changing to a location.
Here, we will teach you the steps involved in changing the FB Marketplace location on your Android and iOS devices:
Step 1: The first step requires you to open the Facebook app on your ZTE Nubia Flip 5G or iPhone. Login to your Facebook account to initiate the procedure.

Step 2: If you have an Android device, you will see a hamburger icon situated at the top-right corner. You have to click on it to access the Facebook menu. Or, if you have an iPhone, click on the three dots on the bottom side of the application.
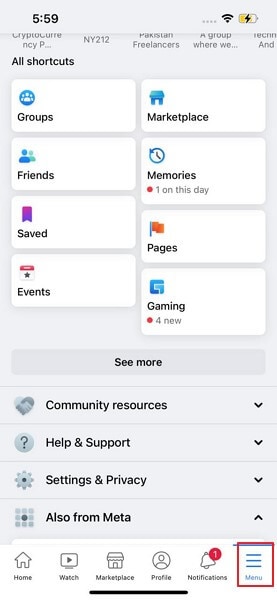
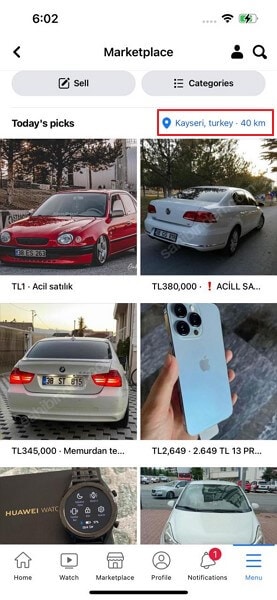
Step 3; After doing the prior step, you will now access the “Facebook Marketplace” feature. Your current location will be written in blue on the upper-right side of the existing Marketplace listings. You should click it to change your Marketplace location.

Step 4: Use the “Search Bar’ at the top of the screen to search and select the new location. After entering the target place, tap on the “Apply” button. You can also adjust the distance slider below “Custom radius” to change the location.


Step 5: Now, the Facebook Marketplace will refresh. You will now be able to see new listings for the selected location.

Part 2: How to Change Facebook Marketplace Location on Facebook Website
If you are using Facebook from a browser, it is also achievable to change the location and control the listings yourself. To perform this process on a browser, follow the given steps and achieve the Facebook marketplace change location:
Step 1: Access Facebook through the browser of your choice and sign in to your Facebook account.
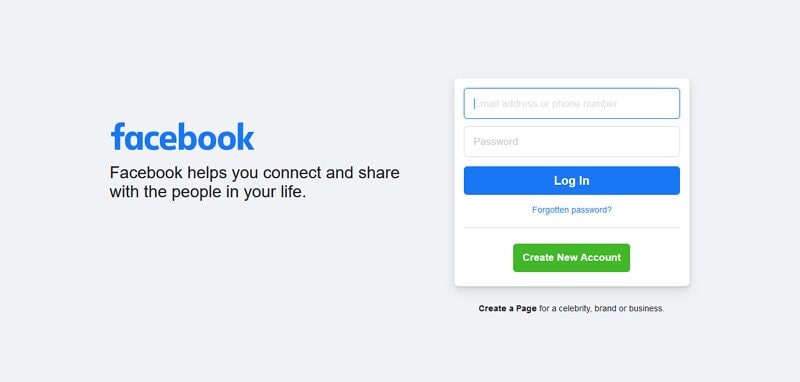
Step 2: There will be a “Marketplace” icon; click on it. Now, the current location will be displayed on the screen. You have to tap on your current location to fake the location of your marketplace.

WPS Office Premium ( File Recovery, Photo Scanning, Convert PDF)–Yearly

Step 3: Enter the desired location and hit the “Apply” button. The listing search radius can also be changed with the help of the dropdown button.

Step 4: Facebook marketplace will be refreshed, and your new listings for the selected location will be visible.

Dr.Fone – Virtual Location is an application that allows users to change their device location virtually. You can quickly teleport the GPS location to places of your choice. It is now super-easy and secure to virtually change your current location, bypass all the restrictions, and filter the listings on your Facebook marketplace.

What Makes Dr.Fone – Virtual Location the Best Solution?
The application holds a wide range of uses and characteristics, so it is considered the best way to change location. The following key points are mentioned why it is the best location changing solution available:
Dr.Fone - Virtual Location
1-Click Location Changer for both iOS and Android
- Teleport from one place to another across the world from the comfort of your home.
- With just a few selections on your computer, you can change the location on your Facebook marketplace.
- Stimulate and imitate movement and set the speed and stops you take along the way.
- Compatible with both iOS and Android systems.
- Work with location-based apps, like Pokemon Go , Snapchat , Instagram , Facebook , etc.
3981454 people have downloaded it
Simple Steps to Fake your Location on Facebook Marketplace
The following step guide will assist you in changing the location of the marketplace listing to get targeted buyers or sellers for the Facebook marketplace:
Step 1: Install the Program
The first step requires downloading Dr.Fone- Virtual Location (iOS/Android). Now, install it and launch the software on your PC.
Step 2: Connect your Phone
Click on “Virtual Location” from the available options and connect your phone to the computer with a USB cable. IPhone users, once connected, can link the software with Wi-Fi without any USB cable. Now, press the “Get Started” button.
Step 3: Provide your Desired Location
Now, activate the “Teleport Mode” by clicking the first icon on the upper-right side. Next, enter the target place you want to teleport to and click on the “Go” button.
Step 4: Change your Location
Now, click on “Move Here” in the popup box, and your location will be changed. Your Android or iOS device location will be shifted to the added location now. Then, you can open Facebook and see the buyers and sellers of the given location in the Marketplace.

Part 4: FAQs about Facebook Marketplace
- What are the extra services for me after changing my location on Facebook Marketplace?
There are no extra services given on the Facebook Marketplace after changing the location. You will be able to access the audience of the selected location.
- Is it secure if I give my address on the Facebook marketplace?
You must not offer your full name and your contact details. Meet in a safe and public place such as a park, restaurant, shopping mall, or police station. However, you still should not give your details to the buyer.
- Why is my Facebook marketplace displaying the wrong address?
You might have used a VPN service in the past, which affected your actual address on the Facebook Marketplace. Don’t worry, as you can change the current location with a mere click.
- How to change the Facebook marketplace plan?
There is no plan required to use the Facebook Marketplace. This feature is entirely free for all Facebook users.
- How to maximize sales on the Facebook marketplace?
There are various methods to attract more buyers to you. First, try to optimize the Facebook listing by adding more keywords in the description and title. Also, write a longer description and explain more details about the item. You can also hire a photographer who will take good pictures of your product.
Conclusion
The article concludes with how to change location on the Facebook Marketplace to perceive buyers and sellers of your nearby areas. This way, you will be able to meet the buyer or seller yourself and discuss the product peacefully. With Dr.Fone - Virtual Location , you can change the location of the marketplace listing and teleport to a place you want to sell/buy in.
 safe & secure
- Title: How to Share Location in Messenger On ZTE Nubia Flip 5G? | Dr.fone
- Author: Ava
- Created at : 2024-08-01 23:45:44
- Updated at : 2024-08-02 23:45:44
- Link: https://fake-location.techidaily.com/how-to-share-location-in-messenger-on-zte-nubia-flip-5g-drfone-by-drfone-virtual-android/
- License: This work is licensed under CC BY-NC-SA 4.0.