
How To Use Special Features - Virtual Location On Poco X5? | Dr.fone
How To Use Special Features - Virtual Location On Poco X5?
Wondershare Dr.Fone - Virtual Location comes with multiple unique features that can be used to enhance the flow of spoofing location. With all these amazing features, you can easily change your iOS location without blinking an eye. Rather than making things complicated, Dr.Fone makes it easy for you to manage operations when you perform actions like changing Android locations.
Part 1: Circle Route (For Multi-Stop Route)
The circle route feature is under the multi-stop route mode. When your starting point is close to the ending point, a pop-up asks if you want to set up a circle route. Click Yes to create a circular path on the map.

Part 2: Realistic Mode (For One-Stop Route and Multi-Stop Route)
This particular feature makes the simulation look realistic with the ability to fluctuate the speed of the simulation. If you wish to turn on realistic mode for the one-stop or multi-stop route, look for the respective checkmark option in the panel on the left.

Part 3: Fluctuation Mode (For Teleport Mode)
Whenever you are teleporting your smartphone device to another location, you can try using the fluctuation mode feature offered against it. As you activate Teleport Mode from the top-right section and search for a location, you will discover the Fluctuation Mode toggle in the confirmation tab. Turn on the toggle to slightly switch the location from the selected point to show realistic motion.

Part 4: Cooldown Timer (For Teleport Mode and Jump Teleport Mode)
While teleporting the location of your smartphone to different places for playing games like Pokemon Go, you are bound to activate a cooldown timer within your location-changing app to show realistic movement. By locating the Cooldown Timer on the right pane of icons, activate it, and this feature will automatically calculate the cooling time by measuring the distance between your destination and the starting point.

It is recommended not to start the movement until the cooldown time is completed to avoid unnecessary bans. Moreover, you can also activate the Auto jump after cooldown in the Jump teleport mode after turning on the Cooldown Timer.
This option will automatically jump you to the next destination once the timer ends. It is helpful for games like Pokemon Go, where the game servers can detect frequent jumps with no cooldown time.
Part 5: Import/Export GPX File
You can also import and export specific navigated locations from Dr.Fone in the form of GPX files. While you can export GPX files for keeping a record of your location, you can also import such files for inserting specific locations to simulate or teleport to. Find out how you can import and export GPX files with this location-changing application:
Step 1Export the GPX File
If you have defined a proper location to simulate at a particular instant using Dr.Fone - Virtual Location, you can have this location exported by clicking the Export icon on the top of the left panel. This will open a window where you can set the location for saving the GPX file.

Step 2Import a GPX File
For importing a GPX file on the platform, click the Import button on the right pane. As this opens a window, select the GPX file you wish to import to the platform.

Step 3Wait for the File to be Read
Wait for a moment until Dr.Fone - Virtual Location recognizes the specific locations within the GPX file and displays them on the map.

Part 6: Historical Records
If you want to use a similar track record on your smartphone again, you can access the historical records saved on the platform for easy access.
Step 1Open Historical Records
Click the Historical Records button on the right pane to access the entire history involving the connected smartphone and the location spoofing platform.

Step 2Access Any Location from the History
Select the Go button adjacent to any particular historical record to re-launch a similar simulation for the Poco X5 device. You can also click Clear All to delete all historical records.


Part 7: Favorite List
You can also set up favorite locations within the platform to define quick accessibility to your favorite locations. To do that, you have to follow the guidelines shown next:
Step 1Favorite Specific Locations
While setting up locations in Jump Teleport Mode, One-Stop Route, or Multi-Stop Route, you can tap on the Favorite icon adjacent to every marked location or favorite an entire route with the Favorite icon on the top of the left panel.

Step 2Access your Favorite Section
To look for your favorite locations, look for the Favorite icon on the right pane to open a list containing all locations you have marked. You can choose the Move option to automatically move into a particular location in no time.

Looking For A Location Changer On Poco X5? Look No Further
How do you use your Poco X5? Do you use it to make calls, watch content on streaming apps and stay in touch with people through messages and social media alone, or do you use the phone for practically everything from finding dates to meeting and playing augmented reality-based games like Pokémon GO, too? If you are the hip and the happening type who likes to live life differently, this app we’re talking about is just for you - a location changer on Poco X5, which can help you spoof location iOS 16.

Part I: Why Do I Need To Change GPS Location On Poco X5?
For an average user who uses an Poco X5 to make calls, watch videos, stay productive, and be on top of things, there is no need to change GPS location. However, there are reasons to get a location changer on Poco X5 in case you want to do any of the following:
- play location-aware games such as Pokémon GO
- go on dates outside geographical restrictions imposed by apps
- protect your privacy on websites and apps you visit and use
- access the geo-restricted content catalogs on streaming websites
- play pranks on friends!
Part II: Can I Spoof My Location On Poco X5 iOS 16? Are There Any Risks?
As we know, iOS 16 has been released, and there are many new features. Therefore, it is a pertinent question: can I use the location spoofer Poco X5 app on iOS 16? Furthermore, what risks are involved in using a GPS spoofer app for Poco X5?
The answer is YES, you can!
Using this GPS spoofer Poco X5 app on Poco X5 running iOS 16 is possible because this location spoofer Poco X5 app does not run on the Poco X5 at all! So thereby taking away the biggest pain point - you can use this location spoofer on Poco X5 no matter if you’re using release version iOS or beta iOS!
About risks, there are zero risks to spoofing your location using a location spoofer Poco X5 app.
Part III: How To Change GPS Location Without Jailbreak Using Dr.Fone - Virtual Location
Now, let’s get right down to the point - which app are we talking about, and how to use this location changer on Poco X5 running iOS 16?
Wondershare Dr.Fone is a comprehensive, multi-module tool to help you with nearly all your daily requirements. Do you want to take regular backups? Use Phone Backup to take full and selective backups in one click. Did you get locked out of your phone? Use Screen Unlock to gain access. Accidentally deleted an important video or photo permanently? Not a problem! Use Data Recovery to quickly recover any video/ photo/ file from your device in a few clicks! Have iOS issues? Use System Repair to fix all issues without data loss in a few clicks. You get the drift here.
Wondershare Dr.Fone - Virtual Location is another module in the comprehensive arsenal of Dr.Fone that helps you fake GPS iOS 16 without downloading any app on the Poco X5 itself. The advantage here is that you can be running ios 16 and not worry about being unable to spoof location because your favorite location spoofer Poco X5 app is not working on Poco X5 anymore due to iOS 16. Dr.Fone will work because it works from your computer and interacts directly with the Poco X5 without downloading an app to the Poco X5.
Dr.Fone - Virtual Location
1-Click Location Changer for both iOS and Android
- Teleport from one location to another across the world from the comfort of your home.
- With just a few selections on your computer, you can make members of your circle believe you’re anywhere you want.
- Stimulate and imitate movement and set the speed and stops you take along the way.
- Compatible with both iOS and Android systems.
- Work with location-based apps, like Pokemon Go , Snapchat , Instagram , Facebook , etc.
3981454 people have downloaded it
This is how you use Dr.Fone Virtual Location, an iOS 16 Pokémon go spoofer tool, to spoof your location on Poco X5:
Step 1: Download Dr.Fone
Step 2: Launch Dr.Fone

Step 3: Choose Virtual Location and connect your phone.

Step 4: Click Get Started. NEW Feature: Poco X5 users are now able to go wireless after setting this up the first time!
The screen shows your real location – as per the actual GPS coordinates of your device.

That’s it! You are now ready to perform techno-wizardry, relocate to another place, or even simulate movement between two points easily! Here’s how:
Teleporting To Another Location
Step 1: Click the crosshairs icon at the top right to activate Teleport Mode
Step 2: Start typing your destination location and click Go

Step 3: You will get a popup to confirm. Click Move Here, and your location will change to reflect the chosen location. Now on, in all supported location-based apps, you will see your chosen location until you restart the Poco X5. This allows you to break the paywall of dating apps, too, as they will see your current location as the location you chose, allowing you to find dates outside the boundaries set by the apps for free.
Simulating Movement Between Two Points
Want to catch Pokémon on the streets of Vermont in the United States while relaxing on your couch in Tasmania, Australia? Wonderful idea! Here’s how to use Dr.Fone Virtual Location spoofer Poco X5 app to simulate movement such as walking the streets and catching more Pokémon:
Step 1: In the Virtual Location interface, click the middle icon at the top right (which looks like inverted S) to symbolize movement simulation between two points.
Step 2: Type your destination and click Go.
Step 3: A popup shows the distance of the place from your current location (spoofed).

Step 4: Dr.Fone Virtual Location allows you to choose the simulation speed – you can select walking, cycling and a four-wheeler to simulate those speeds. Click Move Here.
Step 5: In a new popup, choose if you want to route to repeat and select the number of times. Click Match to start.

You should now see your location dot moving along your chosen route at the speed you selected. Open Pokémon Go and start catching!
Simulating Movement Between Multiple Points
Similarly, you can simulate between multiple points to play elaborate pranks on your friends and family. If you simply spoof your location to another point as shown previously, they might not believe it. But, if you show movement from one location to another, they can’t deny that, can they? This movement simulation also helps with games such as Pokémon GO.
Step 1: Click the icon at the top right (looks like italicized N)
Step 2: Start clicking the points you want to simulate movement from and through. NOTE: Simulate movements as would happen in real life otherwise game algorithms will catch up and you are liable to get banned for cheating.

Step 3: Distance gets re-calculated after each selection. When you are satisfied with your route simulation, click Move Here.

Step 4: Choose if you want to repeat this route and click Match to start the fun.
You can watch the video below to get your location changed on your Poco X5 with Wondershare Dr.Fone
Part IV: FAQs
Here are some commonly asked questions to help you with location spoofer Poco X5 apps.
FAQ 1: Will a location spoofer Poco X5 app damage my Poco X5 or its GPS?
Not in the least. Dr.Fone Virtual Location spoofer on Poco X5 works from the computer and does not affect either the Poco X5 or the GPS chip inside the Poco X5. So when you want to come back to your real location, all you need to do is restart the Poco X5.
FAQ 2: Do I need to jailbreak to use a location spoofer Poco X5 app?
Can’t say for other apps in the market, but Wondershare Dr.Fone – Virtual Location does not require you to jailbreak your Poco X5. It works using the computer to temporarily change the GPS coordinates of your Poco X5, and you can stop spoofing your location anytime by simply restarting your handset. It does not cause security issues with iOS or risk your privacy at all.
FAQ 3: Can I jailbreak Poco X5 to spoof location using Cydia?
The jailbreakers are only catching up to iOS 15 right now. It is being reported that they are close to jailbreaking iOS 15. As you are running iOS 16, you cannot jailbreak Poco X5 to spoof location using Cydia. Furthermore, jailbreaking is not recommended in today’s age given the security and privacy risks it poses.
Conclusion
Location spoofer Poco X5 apps are gaining prevalence today mostly among gamers who use these GPS spoofer Poco X5 apps to catch more Pokémon. However, anyone can use a location changer on Poco X5 for several other benefits such as breaking the geo-restrictions in dating apps and streaming websites to find dates outside your city limits for free and accessing a catalog of movies and TV shows that is not available in your region due to licensing or other considerations. There are several Poco X5 location spoofer apps in the market, each extolling its virtues. None of them, however, come close to Wondershare Dr.Fone - Virtual Location spoofer on Poco X5 given its intuitive interface and ease of use. Not only can you use it on iOS 16 without problem as this app works from a computer, but you also do not have to think about security issues that jailbreaking a device brings because Dr.Fone Virtual Location changer on Poco X5 works without jailbreaking the Poco X5.
 safe & secure
How to Use Life360 on Windows PC For Poco X5?
Life360 is an online platform that utilizes geo-location services to help users share their real-time location with friends and family. The app allows people to create a family group and stay connected to each other through features like chatting, sharing location, sending safety alerts, etc.
As of now, you cannot run Life360 on computer as it is only available for Android and iOS. Why? Because as opposed to a PC, one can easily carry their device everywhere! It means whether your kid is stuck in traffic and needs your help or your parents have lost their way back home, Life360 will instantly send you an alert on your device.
However, that doesn’t mean you cannot use Life360 on a PC. While it may seem a bit odd, there are a couple of methods that’ll allow you to get the Life360 app for Windows. In today’s guide, we are going to share some of these methods that’ll help you run the Life360 app on Windows.
So, without wasting another second, let’s dive straight into the guide.
Part 1: Why people seek to use Life360 on PC?
First things first; why would anyone want to use a family locator app like Life360 on their PC? Well, the truth is everyone has their own reason to get Life360 for PC. For instance, let’s say you are in the middle of an important project and don’t want to be bothered by alerts on your smartphone. However, you still don’t want to compromise with the safety of your family members.
In this situation, you can simply run the Life360 app on PC. This will allow you to directly keep track of the whereabouts of family members on your Windows system and you won’t have to constantly check your phone.
Life360 can also be used on a computer when your phone’s battery has completely drained and there’s no power outlet nearby. In this case, you can simply power-on your laptop, start the Life360 app and send your current whereabouts to family members.
Part 2: Is it possible to use Life360 on Windows PC?
Life360 is an extremely useful app for people who are always concerned about their closed ones. The app is basically designed with a vision to keep family members connected and safe. In addition to location sharing, the app also provides exclusive features like crash detection, place alerts, speed alerts, battery monitoring, etc.
The app also makes it easier for parents to monitor their child’s movement. Using the app, you can always know that your kids have safely reached school and back home. For any parent, knowing whether the kids are safe, is one less thing to worry about.
However, as we mentioned earlier, Life360 hasn’t been released for Windows yet. So, there’s no direct way to install and run the app on a Windows PC. While Life360 may release a dedicated Windows software in the future, as of now, you can only run it using the alternative methods.
These methods include:
Part 3: Use Life360 on Windows PC with Android emulator
The first and the most convenient way to run Life360 on computer is to use an Android Emulator. An emulator is basically a software that creates a virtual Android system on your computer. As a result, you’ll be able to run Android apps on your computer.
While there are dozens of Android emulators, Bluestacks seems to be the most popular and user-friendly option among all. Unlike other emulators, Bluestacks is easy to set up and use.
Here’s how you can run Life360 on a computer using Bluestacks Android emulator./
Step 1: Head over to Bluestacks official website and tap the download button.
Step 2: Open the installer and tap the “download” button. This will initiate the download process on your System.
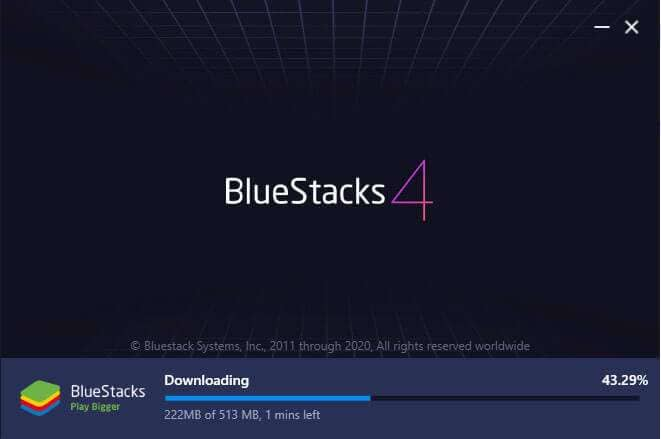
Step 3: Once the installation process completes, Bluestacks will start to boot. Keep in mind that the first boot may take some time, depending on your system configurations.

Step 4: In the home screen, tap the “Google Play Store” icon. You’ll be asked to sign-in with your Google account. Enter the right credentials and log-in to the Google Play Store.

Step 5: In the top search bar, type-in Life360 and tap the “install” button to download the app.

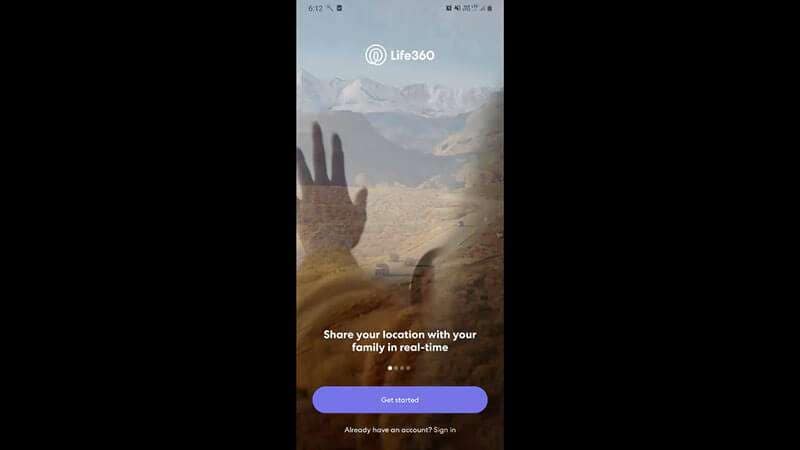
Step 6: Life360 is now installed on your computer. Open the app and enter your login details. You’ll now be able to run Life360 on your PC.

Part 4: Use Life360 by mirroring Android to Windows PC
While running an emulator is a great way to get Life360 on PC, it has its own set of challenges. For instance, running an Android emulator is not easy when you have a low-configuration PC. Emulators like Bluestacks requires high system configuration otherwise they take forever to load.
In this situation, we have another alternative for you to run Life360 on PC. You can simply mirror your Android to your Windows system. Mirroring the Android device will allow you to see its content on the PC itself.
Here’s how you can mirror the Android device on your PC.
Step 1: Make sure that Bluetooth is activated on both devices.
Step 2: On your Windows PC, open “Settings” and select the “Systems” tab.

Step 3: Choose the “Projecting to this PC” option in the left menu-bar and make sure that “Available Everywhere” is selected.

Step 4: If you’re running Android Pie or above on your device, scroll down to open notification drawer and select “Smart View” (or “Cast” in some devices). You’ll see your PC listed here. Tap the button to start Android mirroring.

Step 5: It may take some while for the connection to establish. Once it does, you’ll be able to cast your device screen onto your computer and you’ll be able to run life360 on your system.
Keep in mind that you’ll still require your device to navigate through the content on your computer. Any action that you perform on your device will be replicated on your computer screen as well.
Final Verdict
Life360 is probably among the top family locators for Android users. Apart from its extensive range of features, the app provides a user-friendly interface, which allows it easier for even elders to use the app without any issues. Even though there isn’t a dedicated Life360 software for Windows, you can follow the above-mentioned methods to run the Life360 on PC.
You Might Also Like
Location-based apps
GPS spoof for dating apps
GPS spoof for social apps
Pokemon Go on PC
AR game tricks

Change Phone GPS Location Easily
- ● Teleport GPS location to anywhere
- ● Play AR games without moving
- ● Spoof Location on the popular Apps
Also read:
- [New] 2024 Approved The Black Illusion Vs Silver Miracle
- [New] Rhythm & Reels Instagram Music Secrets for 2024
- 2024 Approved Embracing Resilience Against Online Detractors
- In 2024, A Detailed Guide on Faking Your Location in Mozilla Firefox On Nokia C02 | Dr.fone
- In 2024, A Detailed VPNa Fake GPS Location Free Review On Apple iPhone 13 mini | Dr.fone
- In 2024, Apply These Techniques to Improve How to Detect Fake GPS Location On Honor 70 Lite 5G | Dr.fone
- In 2024, Ingenious Webcam Use Cases at Home
- In 2024, Nikon D 500 4K DSLR Camera Review
- Inverse Viewing in YouTube Original Ideas for Rewinders for 2024
- Ist Die AV1-Kodierung in Adobe Premiere Pro Verfügbar Für Den Import Bzw. Export Von Medieninhalten?
- Prank Your Friends! Easy Ways to Fake and Share Google Maps Location On Huawei Nova Y71 | Dr.fone
- Seamless Integration Turning Audio Into Written Format in MS Word
- The Complete Guide to Restoring Missing Msvcr8#0dll Files
- Title: How To Use Special Features - Virtual Location On Poco X5? | Dr.fone
- Author: Ava
- Created at : 2024-10-24 19:39:34
- Updated at : 2024-10-28 16:02:07
- Link: https://fake-location.techidaily.com/how-to-use-special-features-virtual-location-on-poco-x5-drfone-by-drfone-virtual-android/
- License: This work is licensed under CC BY-NC-SA 4.0.