
In 2024, 3 Ways to Fake GPS Without Root On Sony Xperia 1 V | Dr.fone
3 Ways to Fake GPS Without Root On Sony Xperia 1 V
Fake GPS is an Android application for tweaking your GPS settings. It will help you avoid being tracked by your parents or a stranger spying on you in many situations. Faking GPS will also aid you in using an application that is banned in your region or playing a trick in the games like Pokemon Go.
In other words, it is called GPS spoofing. Some users believe in a misconception that the Sony Xperia 1 V device will have to be rooted for GPS spoofing. But that’s wrong. It’s possible to alter the location without rooting your phone. If you have no idea how to fake GPS no root and want to know more, keep reading this article. We created this guide to curb your worries and help you fix your issue! Let’s begin now!
Part 1: The one-stop way to fake GPS on your iOS and Android without root
Have trouble catching Pokemon? Or maybe you’re trying to get a date. Whatever your reason, with Dr. Fone’s Virtual Location, you can quickly teleport your phone to anywhere in the world with a single click. You can even move along a route that you draw!
Try it with location-based apps like Pokemon Go or Tinder to fake movement and enjoy all the fun on the go. It works perfectly with any application to fake GPS without root. The app is compatible with Windows and macOS devices to use any of them for GPS spoofing on your smartphone.
Dr.Fone - Virtual Location
1-Click Location Changer for both iOS and Android
- Teleport from one location to another across the world from the comfort of your home.
- Fake GPS location on Android without root.
- Stimulate and imitate movement and set the speed and stops you take along the way.
- Compatible with both iOS and Android systems.
- Work with location-based apps, like Pokemon Go , Snapchat , Instagram , Facebook , etc.
3981454 people have downloaded it
Steps to fake GPS no root on your iOS and Android
Step 1: Download Dr. Fone
Download Dr.Fone – Virtual Location on your PC and run it to begin fake GPS without root. Then, choose “Virtual Location” from the given options from the home interface.


Step 2: Connect Your Device
Connect your iOS device with the lightning cable or your Sony Xperia 1 V using a USB cable. You can also connect your iOS device via WiFi after being connected once. Click on “Get Started” now.

Step 3: Set the Accurate Location
Before GPS spoof without root, you have to find and set your actual location on the map. If the location is not shown correctly, hit the “Center On” icon located at the lower right part.

Step 4: Turn on Teleport Mode
Click the second icon present in the upper right to turn on the “teleport mode.” Now, type where you want to teleport in the space given on the top left. After that, click “Go” to start a fake GPS with no root.
Step 4: Chance the Location
Now, you will be able to trick all the location-based apps with your fake location. Click on “Move Here” when the popup box shows.

Even when you click the “Center On” icon for location yourself, the location will remain fixed to where you have done teleporting.
Part 2: Other APPs to fake GPS without jailbreak no root
Fake GPS Location – Hola
Other than Dr.Fone, you can use its alternative Hola on Android devices. It’s available to use in more than 43 languages free of cost. With this fake GPS Android no root application, you can choose from an extensive list of places worldwide to set your location. For android users who can’t afford a PC or laptop to perform GPS spoofing with Dr.Fone, they can choose Hola for convenience.

Pros
- Quick to alter the location to wherever you want in the world.
- Pretty easy to use by anyone you wish without any hassle.
- You will not see any ads.
- The interface is user-friendly.
Cons
- Many times, the cursor doesn’t work correctly.
- It can drain your device’s battery, unlike Dr.Fone – Virtual Method.
Fake GPS Go Location Spoofer
Fake GPS Go Location Spoofer is a perfect solution for those looking for a reliable GPS spoofer. It is available as an app, eliminating the need to be rooted to use it. Additionally, it’s incredibly simple to use and can fool all Geo-location based applications on your device.
You’ll have fun letting your friends think you’re partying like a rock star or relaxing on some tropical island while they are stuck at the office or school doing work.

Pros
- It can be used with a joystick to match the movement on the screen.
- It can be integrated with other third-party applications using the share button.
- Helps in altering location change frequency.
- You can customize routes easily.
Cons
- It Consumes too much battery.
- It doesn’t work on all GPS-related apps.
GPS Emulator
GPS emulator is another such application that helps you in fake GPS no root. If you’re looking to fake your location without too many advanced features, this might be for you. It’s straightforward, and it gets the job done quickly. It demands modification in your Sony Xperia 1 V setting like turning on the developer mode, deactivating mock location, etc.

Pros
- Provides access to three map types for allowing you to teleport location conveniently.
- Permit you to enable or disable GPS coordinates injection for Google services.
- Easy switching to a different map mode.
- Easy to use.
Cons
- No updates for so long.
- May heat up the phone if used for long.
Conclusion
If you plan to root your device to fake GPS without mock location no root, drop that idea. You are now aware of some of the best ways to fake GPS without rooting your device. It’s highly recommended to use Dr.Fone - Virtual Location when you want to do more and change your GPS location.
4 Methods to Turn off Life 360 On Sony Xperia 1 V without Anyone Knowing
Life 360 has made tracking our friends and loved ones so easy. It is an excellent choice for staying updated about family when you have security concerns. Despite this, it can be intrusive when you need your privacy. If you’re a group member and wonder how to turn off Life360 without parents knowing on iPhone and Android devices, you’re in luck. This article will provide you with a complete guide on how to turn off Life 360 without anyone knowing.
Part 1: What is Life 360?
Many applications are available today to help family and friends track each other for various purposes. One such app is Life360, and it has been successful since its launch. This tracking app makes it easy to trace the location of your loved ones or anyone you want to track. But, first, you need to create a circle of friends on a map.
Life360 works by sharing your GPS location on the map, allowing the members of your circle to view it. As long as your GPS location is turned on, those in your circle will always have access to your exact location. Life360 developers are continually releasing new features to improve their tracking function.

Some of the available Life360 features include notifying you when a member of your circle moves to a new point and it will send a help alert when there’s an emergency. In addition, the app automatically contacts the emergency contacts you added when you do this. However, this doesn’t change that it can get intrusive when you need some privacy. That’s why the next section covers how to turn Life360 off.

Part 2: How to Turn off Life360 without Knowing
There are times when you want to turn Life360 off without it showing so that people don’t know your present location. But, if you have no idea how to go about it, you’re in luck. This section covers the best methods to stop sharing your location with friends and family on Life360.
1. Turn Off Your Circle’s Location on Life360
There is the possibility of limiting the details about your location to others in your circle. One way to turn Life360 without anyone knowing is by choosing a circle and disconnecting from them. The steps below break down the entire process.
- First, launch Life360 on your device and navigate to ‘settings.’ You can find it at the bottom right corner of the screen.
- Next, choose a circle you want to stop sharing your location with at the top of the page.

- Tap on ‘location sharing’ and click on the slider next to it to disable location sharing.

- Now you can recheck the map, and it will show ‘location sharing paused.

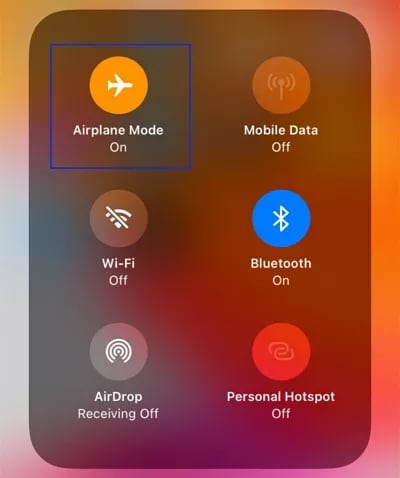
2. Turn off Your Sony Xperia 1 V’s Airplane Mode
Another option you have to stop sharing location on Life360 is by switching on Airplane mode. You can do this on your Android and iOS devices. Once you enable Airplane mode, you’ll see a white flag on your last saved location.
For your iOS devices: open ‘control center’ and tap on the ‘airplane mode’ button. Alternatively, you can go to settings and tap on ‘airplane mode’ to switch it on.
For Android owners wondering how to turn location off on life360 through Airplane mode, swipe down from the top of your screen and select the ‘Airplane mode’ icon. You can also turn it on by visiting ‘settings’ and selecting ‘network & internet’ from the option displayed. Finally, find the airplane mode and switch it on.

These steps will help you turn off location sharing on Life360. However, the downside of using Airplane mode is that it prevents you from accessing the internet. In addition, with the Airplane mode turned on, you can’t make or receive phone calls, either. Therefore, we don’t recommend this as your top choice when learning to turn off Life 360.
3. Disable GPS Service on Your Device
Another top method of turning off Life360 is disabling the GPS service on your device. It is an effective option, and you can carry it out on your iOS and Android devices. Below, we’ll break down the steps of doing this on your Android and iOS devices.
For iOS
iOS users can easily turn off GPS services by following the steps we’ll be providing below.
- First, open Settings on your smartphone.
- Next, locate the ‘personal’ category and tap on ‘location services’ from the options displayed.
- Next, disable GPS location services

For Android
You’re not left out of this option; below are the steps to disable GPS service on your Sony Xperia 1 Vs.
- Firstly, visit ‘settings’ on your device.
- On the menu, scroll to ‘privacy’ and tap on it.
- It will open a new page. Select ‘location’ from the options provided.
- If you want to disable GPS services on your Sony Xperia 1 V, turn off location tracking for apps.

Part 3: Best Ways to Fake Location on Life360 without Anyone Knowing-Virtual location [iOS/Android Supported]
Although Life360 can be helpful in emergencies or security issues, it can also prove quite problematic. If you want some privacy or don’t trust members of your circle, you might want to learn how to turn off Life 360. The problem with turning off the Life360 location is that members of your circle might notice, which would inevitably cause some conflict.
Fortunately, you have another effective option, and that is by faking your GPS location using a location spoofer. You can display the location you want while keeping your true location safe on Life360. Dr. Fone –Virtual location is an excellent tool for faking your location.
Dr.Fone - Virtual Location
1-Click Location Changer for both iOS and Android
- Teleport from one location to another across the world from the comfort of your home.
- With just a few selections on your computer, you can make members of your circle believe you’re anywhere you want.
- Stimulate and imitate movement and set the speed and stops you take along the way.
- Compatible with both iOS and Android systems.
- Work with location-based apps, like Pokemon Go , Snapchat , Instagram , Facebook , etc.
3981454 people have downloaded it
Steps to Fake Location Using Dr. Fone – Virtual Location
Below, we’ve broken down the process for you; keep reading to learn how to fake location using Dr. Fone – Virtual Location.
1. Firstly, you have to download Dr. Fone – Virtual Location on your PC. After downloading and installing, launch the app to get started.
2. Select ‘virtual location’ from the options displayed on the main menu.
3. Next, connect your iPhone or Android device to your PC and click ‘get started.’
4. Next, you have to turn on the ‘teleport mode’ by clicking its icon at the upper right corner of the screen.

5. Now, enter the location you want to teleport to on the upper left side of the screen and then click the ‘go’ icon.
6. Click ‘move here’ in the popup box to change your location to this new place.
Automatically, your location will change to the chosen place on the map and your mobile device.

Part 4: FAQ About Turn off Location on Life360
1. Are there any risks to turning off GPS location?
Yes, there are some dangers associated with turning off location on Life360. No one knows where you are anymore, which could be dangerous in the case of an emergency.
2. Can Life360 track my location when I switch My Sony Xperia 1 V off?
When your phone is off, your GPS location is automatically disabled. Therefore Life360 won’t be able to track your location; it will only display your last logged location.
3. Does Life360 tell my circle when I turn off the location?
Yes, it does. It will send a ‘location sharing paused’ notification to all your group members. Additionally, if you log out from Life360, it will notify your circle immediately.
Conclusion
Life360 is a useful app for professional and personal circles. However, it can be intrusive on our privacy sometimes. Most times, the youths want to learn how to turn off Life360 without their parents knowing on iPhone and Android devices. This article provides you with different methods you can achieve this. If you want to learn how to turn off life 360 without showing up, the best option is to fake your location. We hope the guide above helps you utilize Dr.Fone - Virtual Location without any issues.
How to Share Location in Messenger On Sony Xperia 1 V?
We usually host a gathering once in a while and invite our friends to come over. Most of us are already used to organizing such activities because we’ve been doing that for a long time now. However, we cannot deny that it’s much easier nowadays than years ago. Why so? Simply because the communication channels available today at our disposal are more digital and more capable. For instance, Facebook Messenger now allows users to share their whereabouts in a snap of a finger. Yes. That feature is called Live Location.
The Live Location feature on Messenger works beyond sending the address or coordinates of your exact location. It basically visualizes your whereabouts by means of an interactive map and updates the details from time to time. That means the receiver can view not only your position but also your movements. Is that helpful? Absolutely yes. It’s indeed a game-changer in today’s already convenient world. Is it highly recommended? With proper handling and adequate caution, Messenger’s Live Location can definitely do more good than harm to the users.
In this article, we will delve into the highlights and benefits of Facebook Messenger’s location-sharing features. We will also provide some tutorials on how to share Live Location on Messenger. Continue reading below to learn more.
Part 1. Everything You Should Know About Messenger’s Live Location
Facebook is well aware that sharing location details is essential to its users. That’s why developers have come up with a brilliant idea and rolled out Live Location on Messenger. It basically works like other location-sharing features. However, Live Location provides more precise and thorough location information. It’s in map form, where you can view the exact location and track the movements of the sender. You’ll continue to see updates for as long as the sharing is not halted on the other end. To navigate it properly, try to read tutorials on how to share Live Location on Messenger.

What if you wish to send a particular address from another location? There is no problem with that. Messenger allows users to search for a specific place, trace it on the map, and share the details. The receiver can view it in map form and get directions if necessary. See? It’s very easy and convenient. No need to type in long addresses just to share a particular location with your friend. You just have to find it precisely on the map and send the information afterward.
Convenience is just one thing. Messenger’s location-sharing feature has a lot more to offer to users. One of which is the accuracy of the shared location information. Since the details are automatically generated through GPS, you can be sure that it is correct and definite. If you go out and track it down the neighborhood, you can certainly find the location in no time. Just make sure that the location services on your smartphone are activated so you can view your progress in real time. Also, stay vigilant while you’re out and keep yourself safe from any harm. Remember that safety remains a priority and comes above convenience.
How to Grant Facebook Messenger the Permission to Access Your Location?
Facebook Messenger’s location-sharing feature will not work without the necessary access. That’s why you should first configure the permission settings on your mobile device to avoid unwanted disruptions. Don’t worry. It’s indeed a piece of cake. Check out the tutorial provided below.
- 1: Go to Settings.
- Step 2: Click Apps.

- Step 3: Find and click Messenger.

- Step 4: Click Permissions.

- Step 5: Click Location.

- Step 6: Select Allow Only While Using the App. If you’re quite conservative regarding this matter, click Ask Every Time instead. After that, Facebook Messenger will have access to your location information.

Part 2. How to Share My Location on Messenger?
How do I share my location on Messenger? As mentioned earlier, it’s very easy to use Facebook Messenger for location sharing. All it takes is just a few clicks on the platform. No need to manually type in the address or sketch the landmarks. Messenger does the rest of the work for you. In actuality, there are three ways to share your location on Messenger. Any of them can be of great help to you, depending on your current situation. Do you want to try them now? Check out the tutorials below.
Method 1: Share location on Facebook Messenger via Live Location
How to share my location on Messenger? Well, the first option you can try is through Live Location. It works best if you wish to tell somebody where exactly you are and give updates from time to time. Don’t worry. Although it looks complicated at a glance, in reality, it’s actually not rocket science. It only takes a few seconds to complete. Below is a tutorial on how to share Live Location on Messenger in easy steps.
- Step 1: Open the Facebook Messenger application on your mobile device.
- Step 2: Browse through your conversation feed and find the contact with whom you wish to share your Live Location. Click on it.
- Step 3: Click the More (+) icon at the bottom-left corner of the screen.

- Step 4: Right after, click Location.

- Step 5: Click Start Sharing Live Location. Immediately, your current location details will be available and forwarded to the intended receiver. Live Location lasts for 60 minutes at maximum. If you wish to terminate it, simply click Stop Sharing Live Location.

Method 2: Share location on Facebook Messenger via Pinned Location
Let’s say there is a specific place you want to visit with your friend. Is there a way to share the address of the venue without you being there at the moment? Fortunately, it is possible. Apart from sharing your current location in real-time via Live Location, you can also send pinned locations on Messenger. You just need to search for it and then redirect the details to your friend. Yes. It’s just as simple as that. Do you want to try it on your smartphone? If so, follow the guide below.
- Step 1: Launch the Facebook Messenger application on your mobile device.
- Step 2: Scroll through your conversations and find the receiver from the list. Click on it.
- Step 3: On the text field, click the More (+) icon at the bottom-left corner.
- Step 4: Then, click Location.
- Step 5: Locate the search bar above the interactive map and type in the location you want to share.

- Step 6: Choose one from the suggested results and then click on it. The details will then be forwarded immediately to the intended receiver.
Method 3: Share location on Facebook Messenger via Google Maps location
How do I share my location in Messenger if I cannot find it on the map provided? Yes. That happens sometimes. There are certain places that are untraceable on the messaging platform. As a result, it doesn’t appear on the map when you try to search for it. But don’t sweat it. If you experience the same issue, you can instead use Google Maps to share location details. How to do it? Check out the tutorial provided below.
- Step 1: Launch the Google Maps application on your mobile device.
- Step 2: Click on the Search bar at the top and then type in the location.

- Step 3: Choose one from the suggestions and then tap on it. Make sure that it is exactly what you’re looking for.

- Step 4: Access the menu bar below the map and then click Share.

- Step 5: From there, click Chats or the Facebook Messenger logo.
- Step 6: Find the receiver from the provided list and then click the Send button next to its name.

NOTE: Of course, you can only send pinned locations via Google Maps. The Facebook Messenger’s Live Location is available within the platform only.
BONUS TIP: Protect Your Privacy With Wondershare Dr.Fone
There’s no denying that the location-sharing feature of Facebook Messenger is useful to many of us. It always comes in very handy whenever we need to meet people somewhere or invite them to our places. However, we should not become too complacent and let our guard down. Sharing sensitive information like whereabouts always comes with risk, regardless of the platform and the intention. Therefore, make it a habit to protect your privacy at all costs. In this regard, Wondershare Dr.Fone has something special to offer. Its Virtual Location feature, capable of modifying and simulating your location records, can be of great help for you. Don’t worry. It’s very easy to use. Here’s a short guide for you.
- Step 1: Download Wondershare Dr.Fone from its official website. Right after, install it on your computer.
- Step 2: Launch the newly installed software on your desktop. Once it fully loads up, connect your smartphone using a data cable. Follow the on-screen instructions and perform the steps accordingly to ensure the connection between the two devices is stable enough to handle the succeeding operations.
- Step 3: Navigate to the left-side panel and then click Toolbox. On the main dashboard, click Virtual Location. Is it your first time using this feature? If so, allow Wondershare Dr.Fone to download additional resources. Don’t sweat it. It will only take a few minutes to complete.
- Step 4: Once the downloading process has concluded, Wondershare Dr.Fone - Virtual Location will automatically open on a separate window. From there, go to the top-right menu bar and then click Teleport Mode. It is the first icon that appears in the row.
- Step 5: Head over to the top-left corner and enter your desired location into the search bar. Choose one from the suggested results. After that, click the Enter icon.
- Step 6: The details regarding your chosen location will be displayed on the computer screen. Review the information and make sure that it is the specific location you’re looking for. Once confirmed, click Move Here to proceed.
- Step 7: Immediately, the location settings on your smartphone will be changed according to the inputs you have provided to Wondershare Dr.Fone. You can verify it by checking the current location registered on your Maps app. After confirming that your mobile device is now showing a different location, you can now start browsing without worrying about your location’s privacy.

NOTE: Resort to Wondershare Dr.Fone - Virtual Location if your internet browsing does not require you to provide your real address. If you wish to restore your original location settings, simply close the Wondershare Dr.Fone application and restart your smartphone.
Conclusion
Gone are the days when you had to write invitation cards manually and deliver them one by one. Nowadays, all you need to do is go online and use Messenger’s location-sharing feature. Have you already tried it? If not, you should take it into consideration and use it on your next agenda. Refer to the tutorial above on how to share Live Location on Messenger. It can certainly help you get started. How do I share my location on Messenger without physically being there? That’s simple. Use Messenger or Google Maps’s pinned location. Furthermore, download Wondershare Dr.Fone on your computer. Its Virtual Location feature, capable of modifying your location settings, can provide protection for your privacy. Just connect your Sony Xperia 1 V to the computer and set it up from there.
Also read:
- Claude AI Demystified: Why It’s a Must-Have in Tech Innovation
- Full Guide to Fix iToolab AnyGO Not Working On Nokia XR21 | Dr.fone
- How to Fix My Honor 90 GT Location Is Wrong | Dr.fone
- In 2024, 5 Easy Ways to Change Location on YouTube TV On Tecno Pop 7 Pro | Dr.fone
- In 2024, Best 10 Mock Location Apps Worth Trying On Samsung Galaxy M34 | Dr.fone
- In 2024, Here are Some of the Best Pokemon Discord Servers to Join On Vivo Y36i | Dr.fone
- In 2024, How To Remove Screen Lock PIN On Tecno Spark 10C Like A Pro 5 Easy Ways
- In 2024, Inside the Immersive Evolution VR's Present State and Foreseen Obstacles
- In 2024, Pinnacle Enterprise Data Vaulting
- In 2024, What is Fake GPS Location Pro and Is It Good On Vivo X90S? | Dr.fone
- Life360 Learn How Everything Works On Apple iPhone 12 Pro Max | Dr.fone
- Quick Steps for Fetching DotSub Media: Videocasts and Captions
- Win 11 Guide: Reactivate Disabled Slack Notifications
- Title: In 2024, 3 Ways to Fake GPS Without Root On Sony Xperia 1 V | Dr.fone
- Author: Ava
- Created at : 2024-10-17 02:34:03
- Updated at : 2024-10-22 21:21:29
- Link: https://fake-location.techidaily.com/in-2024-3-ways-to-fake-gps-without-root-on-sony-xperia-1-v-drfone-by-drfone-virtual-android/
- License: This work is licensed under CC BY-NC-SA 4.0.