
In 2024, A Detailed Guide on Faking Your Location in Mozilla Firefox On Vivo Y100A | Dr.fone
A Detailed Guide on Faking Your Location in Mozilla Firefox On Vivo Y100A
Mozilla Firefox is one of the most famous browsers known for its security. Like other browsers, it also tracks your location and shares it with websites. Although Firefox asks for your permission before sharing your location, it can still be a privacy concern for many people. For many reasons, disabling your location is disadvantageous, so Firefox spoof location can resolve your concerns.
It is not hard to change or spoof your location in Mozilla Firefox. Stick with this article to learn different ways to fake a location in Firefox on devices.

Part 1: Preparations Before Spoofing Your Location in Firefox
Before starting with Firefox location spoof, you must be aware of how the platform and websites determine your location. There are many ways a browser can detect your location. It includes services like IP addresses, GPS tracking, Wi-Fi, and Bluetooth. The main tool browsers and websites use to determine your location is HTML5 Geolocation API.

1. Basic Understanding of the HTML5 Geolocation API
Basically, a browser API called HTML5 Geolocation API is used by websites and browsers to detect a user’s location using longitude and latitude coordinates. It is strictly based on user permissions for detecting location. That means you will receive a permission prompt whenever a website or browser uses it to detect your location. If you refuse the permission, they can’t use this API for location determination.
2. How Does HTML5 Geolocation Work?
HTML5 Geolocation determines your location using the longitude and latitude coordinates with the help of GPS. If your device doesn’t have GPS tracking, it uses Wi-Fi and cell tower signals to detect the Vivo Y100A device’s location. The location detected by HTML5 Geolocation is highly accurate with accuracy up to street level. Due to its high precision in locating users, it can create privacy issues for users.
Part 2: How to Fake Your Location in Mozilla Firefox on Computers
Many ways are available for you to fake or disable your desktop location in Mozilla Firefox to address your privacy concerns. You can either disable or change the location in the browser or use a third-party app or extension. Below, we have explained the three most common ways to fake or disable your location in Firefox.
Method 1: Disable Geolocation in Firefox
If you want to stop websites from accessing your location from Mozilla Firefox, you can disable the geolocation feature using Firefox Settings. The process to disable your location in Mozilla Firefox is covered using these steps:
Step 1: Open Mozilla Firefox on your computer to disable its location. Click the “Three Vertical Bars” icon to select “Settings.” Now, tap “Privacy & Security” from the left sidebar and navigate to “Permissions.”

Step 2: Click “Settings” in front of “Location” to manage the location settings. It will open a window with a list of all the websites that can access your location. Depending on your needs, you can choose between “Remove Web Site” or “Remove All Web Sites” to remove their location access.

Step 3: If you want to block the websites from accessing your location indefinitely, you can select the “Block new requests asking to access your location” option. Once selected, click “Save Changes” to disable your geolocation on Firefox.

Method 2: Manually Change Your Firefox Location
Disabling your location on Mozilla Firefox can stop websites from accessing your location. It also means websites with location-based services will no longer work. That’s why it is better to spoof the location on Firefox rather than disabling it. Firefox allows you to manually change your location using its advanced settings. The steps required for this process are given below:
Step 1: Once Mozilla Firefox is open, type “about:config” and press Enter. You will see a warning screen as you modify advanced settings. You have to click on the “Accept the Risk and Continue” button to proceed further.

Step 2: First search for “Geo.enabled,” and when it appears, toggle its value from “True” to “False” to disable geolocation. To spoof your location, search for “geo.provider.network.url” and press the “Pen” icon to edit it.

Step 3: You can enter your desired location using its latitude and longitude coordinates. The format to enter your location coordinates should be:
“data:application/json,{“location”: {“lat”: LATITUDE VALUE, “lng”: LONGITUDE VALUE}, “accuracy”: 27000.0}.”
Once done, your geolocation will be changed to your desired location.

Method 3: Use The Location Guard Firefox Extension
Another way you can protect your location from websites is to use the “Location Guard “ add-on in Mozilla Firefox. It is generally recognized as an extension, also available in the Add-Ons Store of Firefox. The steps to add “Location Guard” and use it to alter your location are following:
Step 1: Click on the “Three Vertical Bars” icon from the top left corner of your Firefox and select “Add-ons and themes.” Tap “Extensions” from the left sidebar and search for “Location Guard” in the Add-Ons Store. Once located, click “Add to Firefox” to add it to your browser.

Step 2: You can choose between two options to protect your location’s privacy. Using the “Privacy Levels” option, you can select a privacy level and location range to add noise when a website tries to locate you. It stops websites from detecting your accurate location, though they can still locate the general area.

Step 3: Using its “Fixed Location” feature from the left sidebar, you can change your location. Here, select any location from the map by placing the “Marker” on it to change your browser’s location.

Part 3: How to Fake Your Location in Mozilla Firefox on Phones
It is not only on computers where you can use Firefox fake location but also on smartphones. You can easily disable or change your Firefox location on your iOS or Android device. Three different methods to disable or change the location in Mozilla Firefox are summarized below:
Method 1: Disable Geolocation Sharing on the Firefox Browser
If you use the Firefox browser on your phone, it allows you to disable your location using a couple of simple steps. Disabling location services for the Firefox browser differs on Android and iOS devices. A detailed step-by-step process for disabling location is given below for both platforms:
On Android
Step 1: Open the Firefox browser on your phone and press the “Three Dots” icon from the bottom right corner. Select “Settings” from the menu and navigate to the “Privacy and Security” section.
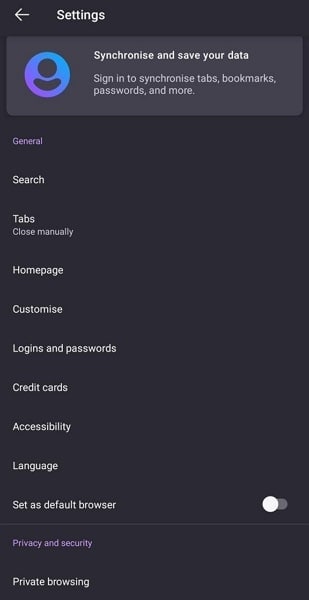
Step 2: Now, tap “Site Permissions” and select “Location.” In the “Location” option, select “Blocked” to disable the location access on the Firefox browser.

On iPhone
Step 1: On your iPhone, open “Settings” and scroll down to “Firefox.” After locating the app, select it and press “Location” on the next screen.

Step 2: In the “Location” menu, you can select “Never” to completely disable the location access for the Firefox browser. To only stop Firefox from detecting your accurate location, turn off the toggle of the “Precise Location” option.

Method 2: Spoof Your Location in Firefox Using Dr.Fone - Virtual Location
Nowadays, many websites work with the help of location-based services. Disabling geolocation from the Firefox browser means they won’t work. It means you need a tool that can change your Firefox location without affecting your favorite platforms.
Wondershare Dr.Fone - Virtual Location provides you with an excellent way to do Firefox location spoofing. You will not have to worry about websites or apps detecting your location as fake when using this tool.
Dr.Fone - Virtual Location
1-Click Location Changer for both iOS and Android
- Teleport from one location to another across the world from the comfort of your home.
- With just a few selections on your computer, you can make members of your circle believe you’re anywhere you want.
- Stimulate and imitate movement and set the speed and stops you take along the way.
- Compatible with both iOS and Android systems.
- Work with location-based apps, like Pokemon Go , Snapchat , Instagram , Facebook , etc.
3981454 people have downloaded it
Main Features of Dr.Fone - Virtual Location
- Dr.Fone - Virtual Location allows you to play location-based games. It includes games like Pokémon Go, Minecraft Earth, and Jurassic World Alive, all from the comfort of your bed.
- If you use a dating app like Tinder or Bumble, you can increase your likes and matches using this tool.
- You can bypass the geo-restriction of apps and enjoy their content with the tool’s help.
Steps Required for Spoofing Location in Firefox via Dr.Fone - Virtual Location
Using Dr.Fone- Virtual Location to spoof your location in Mozilla Firefox is simple and quick. You will need to install Dr.Fone on your computer and follow these steps for location spoofing:
Step 1: Install Dr.Fone on Your System
Download and install Dr.Fone on your computer and connect your phone to it. Access Dr.Fone, select “Virtual Location,” and click “Get Started” on the next screen to begin the process.

Step 2: Activate the Teleport Mode on Dr.Fone
After clicking “Get Started, “ a map will open where you must select your original location. It can be done using the “Center On” icon from the right sidebar. To choose your fake location, you will need to activate “Teleport Mode” from the top right corner.

Step 3: Spoof Your Location in Firefox
Enter your desired fake location in the provided space and press “Go” once the mode is activated. It will take you to the entered location, where you need to select “Move Here” to complete the process. You can confirm the location spoof by opening any location-based app on your phone.

Method 3: Change Your Location in Firefox Using ExpressVPN
Browsers like Mozilla Firefox tracks your location by using your IP address. You can use a VPN to spoof your IP location to protect your actual location from websites. ExpressVPN is a VPN that is available for both Android and iOS devices. You can use these steps to change your location using ExpressVPN:
Step 1: Install ExpressVPN on your phone and create an account for it. If you are already a user of ExpressVPN, then log in with your account.
Step 2: Select your desired fake location from the “Smart Location” tab after logging in. Once a location is selected, press “Connect” to change to the desired fake location.

Conclusion
In today’s digital world, you have to compromise your privacy to some extent. However, it doesn’t mean that you should not try to use tools available to you to protect your privacy to the limit. Dr.Fone - Virtual Location solves your concerns regarding location sharing with ease. With this tool, you can fake location in Firefox and still enjoy all the features and services offered by location-based websites and apps.
How to Find iSpoofer Pro Activation Key On Vivo Y100A?
There are specific situations where it is necessary to fake your GPS location. By spoofing locations, you can teleport to anywhere in the world, hide your true location to prevent others from tracking you, have access to content that is restricted in your current location, and so on. Spoofing locations is also conducive in location-based games such as Pokémon GO.
There are specific applications that allow you to spoof the location of your device. However, there are no such apps for iPhones as Apple does not allow GPS spoofing apps in the App store. To change the location of your iPhone, you can connect it to your PC and use a spoofing application there to change its location. We are going to talk about iSpoofer, a professional location spoofing application; 3 ways to get the iSpoofer Pro Plan License Key for free; Wondershare Dr.Fone - Virtual Location (iOS), a better alternative to iSpoofer; and the steps to spoof your iPhone GPS location using Wondershare Dr.Fone - Virtual Location (iOS).
Part 1: Ways to Get the iSpoofer Pro Plane License Key Free 2022
iSpoofer is a professional GPS simulation desktop application that can be used to spoof the GPS location of an iOS device. It runs on Windows and Mac computers. To change the GPS location of your iOS device, you have to install and run this application on your PC, connect your iOS device to your PC, and then spoof its location by using the application on your PC.
iSpoofer has a free version and 2 subscription plans - Pro plan and Volume plan. For unlimited spoofing, you can use the Pro plan of iSpoofer, which is available at $4.95 per month. With this plan, you can change the location of up to 3 iOS devices at once. To activate iSpoofer Pro on your PC, you will have to enter a license key sent to you via email after you pay for its subscription. However, there are a few tricks with which you can get this license key without subscribing and activate iSpoofer Pro and use it for free. Below, we have mentioned 3 ways to get a free iSpoofer Pro Plan License Key.
- Check on Community Days: The game Pokémon GO sometimes offers free iSpoofer Pro PlanLicense Keys on Community Days. Community Day is a worldwide special event in Pokémon GO that occurs every month for a few hours. Various kinds of special bonuses and rewards are offered on Community Days. Among these offers, a free iSpoofer Pro Plan License Key might be available on a particular Community Day. Make assured you do not miss this offer because the key will be available only for a few hours before it gets expired.

- Check out websites: Certain websites throughout the internet occasionally offer free iSpoofer Pro Plan License Keys. Try to check them out from time to time, and someday you might be lucky to get a free iSpoofer Pro Plan License Key. One of such websites is http://www.spoofer.pro/.

- Subscribe to YouTube channels: Another way to get a free iSpoofer Pro PlanLicense Key is to subscribe to YouTube channels that offer giveaways of these license keys. There are specific YouTube channels that offer free iSpoofer Pro Plan License Keys to their lucky subscribers. Make sure you subscribe to such channels and keep checking their videos, especially around giveaway times, to see if you are the lucky subscriber to win the giveaway.

Part 2: The safer way to Spoof on iPhone
A much better and safer way to spoof your iPhone location is to do it using Wondershare Dr.Fone - Virtual Location (iOS). It is a desktop application that can be used to instantly fake the GPS location of your iOS device with just a click of your mouse. It is compatible with both Windows and Mac computers. You can use this fantastic application to safely change your GPS location on several applications, including WhatsApp, Snapchat, Tinder, and Pokémon GO. It allows you to change the location of up to 5 iOS devices at once.
Key features:
- It comes with an integrated joystick feature for controlling GPS movement.
- GPS movement can also be controlled with a keyboard.
- Offers 3 modes - teleport your location, simulate movement between two spots, and simulate movement along a specified route.
- Offers; both automatic and manual GPS movements.
- Compatible with Windows XP and above, and Mac OS X 10.13 and above.
- Requires a minimum RAM of 256 MB and a minimum free hard disk space of 200 MB.
Steps to spoof your iPhone location using Wondershare Dr.Fone - Virtual Location (iOS):
- Download and install Wondershare Dr.Fone - Virtual Location (iOS) on your Windows or Mac PC. Launch the application.
- Once the application is launched, a window will appear with a variety of options. Click “Virtual Location” from those options.
- Connect your iPhone to your PC. via USB cord. Once your device is connected successfully, click on the “Get Started” button.

- A new window will appear where the actual GPS location of your iPhone will be shown. If it is not accurately displayed, click on the “Center On” icon in the lower right part of the window to show the accurate location.
- Click on the “teleport mode” icon in the upper-right part of the window (the 3rd one from the right). This will activate “teleport mode”.
- In the search bar in the upper left part of the window, enter the name of the desired location where you wish to teleport. Then click “Go”.

- A popup box will appear. Click “Move Here”.
- With that, the GPS location of your iPhone has been successfully changed and fixed. You can check it by clicking on the “Center On” icon or checking your iPhone’s location. Also, the location of the location-based app; you are currently using on your iPhone has been successfully changed too.

Conclusion
So, that was all about the article. We have discussed 3 simple tricks to get a free iSpoofer Pro Plan License Key. Then, compared with iSpoofer Pro which allows you to change the location of up to 3 iOS devices at once, Wondershare Dr.Fone - Virtual Location (iOS) allows you to change the location up to 5 iOS devices at once. Compared with iSpoofer Pro, it is safer and easier to use and comes with more features.
Full Guide to Fix iToolab AnyGO Not Working On Vivo Y100A
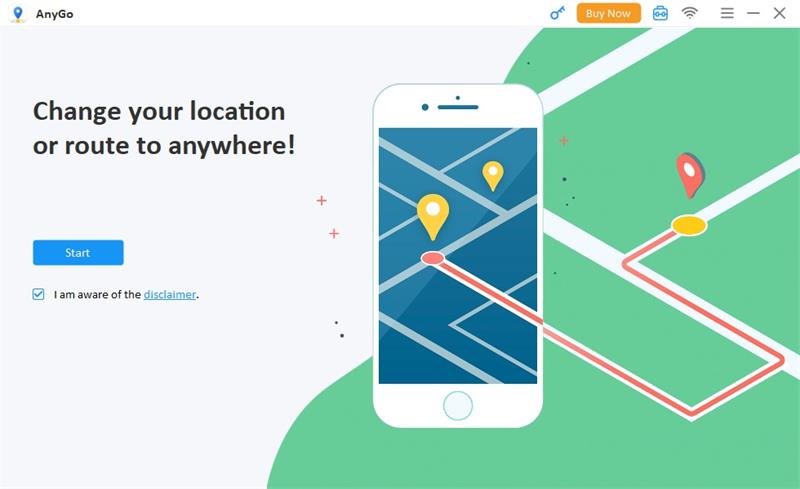
If you want to go anywhere in the world without moving an inch from your home and wondering how to change location on your iPhone, then iToolab AnyGO is the app for you. Not literally, but it allows you to teleport your current location anywhere around the globe. It is considered the most famous and widely used GPS spoofing locator, which offers various options than merely faking your current location.
It also allows you to simulate GPS movement, which helps you play games after importing GPX route files. You can use a joystick or keyboard to simulate easily anywhere. But users of this app are experiencing some technical problems and improper functionality and hence can not seem to get on with it. And if you are among those unlucky guys and wondering if iToolab AnyGO not working, how to fix it? Then you’re at the right place.
In this article, you will get to know exactly how to fake location on iPhone and fix iToolab AnyGO when it is not working. Though there are numerous problems that users are complaining about, here you will know the most common problems faced by many users. So stay tuned.
Part 1. What is iToolab AnyGo?
This app is a GPS spoofing app that changes location on iPhone anywhere around the globe. But the fun part with this app is that now you can gain access to the location-based games and apps that you normally could not access. This opens gates to endless possibilities where you can watch any TV show, download any location-based app, and play games. In short, this app removes any geo-based restrictions on you without jailbreaking your phone.
Here are some prominent pros of the app in a nutshell:
- Spoof GPS location on your iPad/iPhone with jump mode.
- Change locations multiple times.
- Works perfectly with geo-based games like Pokemon GO.
- Play AR games naturally.
- Enable 2-spot or multi-spot movement or follow the GPX route.
And here are some of the drawbacks:
- It is difficult to change locations multiple times and your account may also suspend.
Part 2. How to fix the iToolab AnyGo not working issue?
Issue 1: The map does not appear in the program
First, check your network connection if iToolab AnyGO doesn’t show on the map. Then, if the internet is available, download the latest iToolab AnyGO. You can check it out by clicking the menu and hitting the “Check for updates” button. Alternatively, you can uninstall and re-install AnyGO to acquire the latest version.
Issue 2: iPhone/iPad unable connecting AnyGO
Follow these step-by-step guides if your iPhone/iPad cannot connect with iToolab AnyGO.
- Try to re-plug and unplug your device, and connect again after restarting the program.
- Also, try different USB ports and original USB cables, as maybe there’s an issue with the USB connection.
- Also, make sure that your computer and your device are correctly connected. If not, then iTunes cannot detect your device.
Note: Make sure that your iOS version should be compatible with AnyGO. iOS 8 or the latest versions ensure compatibility.
Issue 3: AnyGO repeatedly crashes
If this issue still exists, try to re-open the program again and again. If crashing continues, send program log files to the support team.
For Mac:
Head to the top menu of Mac and click Go, then click the Options button over the keyboard. A drop-down menu will appear with library options. Go to library>logs>Diagnostic reports and find log file”iToolab AnyGO” for mac crash.
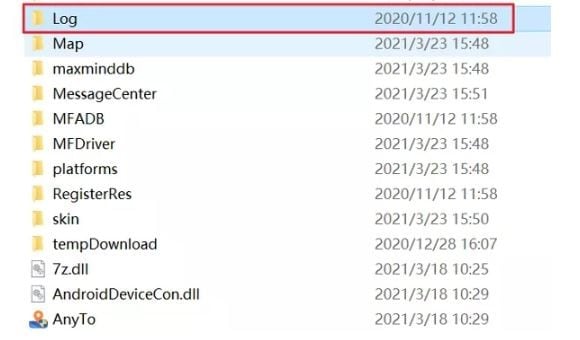
For Windows:
On AnyGO, Go to the installation path. Locate the log folder and compress it before sending it to the support team.
Tips: iToolab AnyGo still not working? Switch to Dr.Fone - Virtual Location for seamless and reliable location simulation. Say goodbye to issues and enjoy hassle-free location control. Try It now!
Part 3. Best iToolab AnyGo Alternative Program You Can Use in 2024
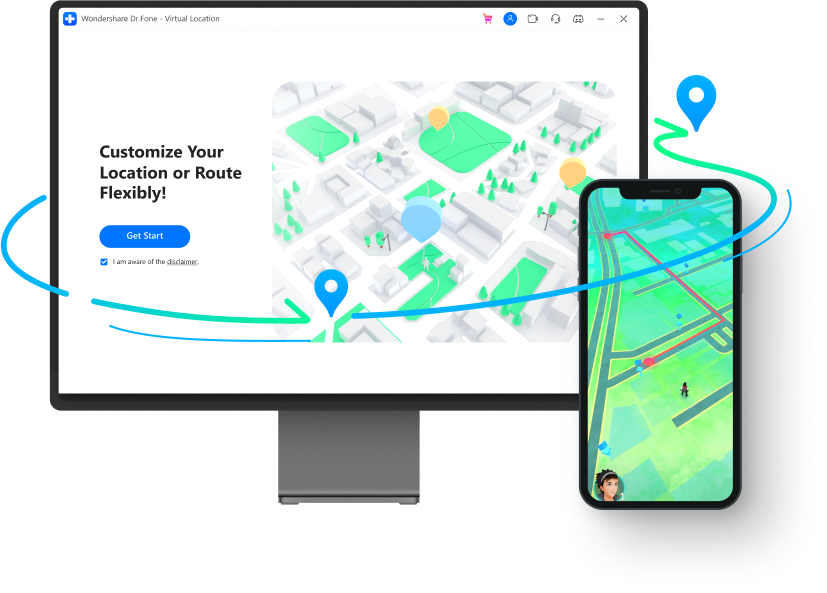
If you are searching for an alternative app to the iToolab AnyGo, look no further and check out the Dr.Fone - Virtual Location . It is similar to other GPS spoofing apps but promises a smooth, natural, and realistic simulation of any GPS location.
Games are always fun playing with joysticks. And if you play games like Pokemon GO with it, you will experience better and seamless control over your Pokemon character in the simulation.
The app has a low detection rate which prevents you from jailbreaking and avoids getting your account banned. The developers are always alert and constantly updating the app, so you get the most benefit from Dr. Fone Virtual Location. In addition, it is highly compatible with devices running the latest version, so you do not have to worry if the app will work on your device if you are running iOS 17 or Android 12 or later versions.
One great feature that Dr. Fone Virtual Location consists of is sharing your fake location with your family. So you can play pranks with them and have a great time. You can also connect with new friends and get to know their whereabouts.
So much of the talk. If you are wondering how to use Dr.Fone - Virtual Location app? Here’s what you should know. Follow the below step-by-step guide:
How to use the joystick for flexible and smooth GPS control
- The joystick feature is located in the teleport option at the upper-right corner in the 5th location.
How to simulate movement along the route using 2 spot location
- Go to “One-Stop mode” at the corner on top.
- Select the spot on the map you wish to go. The pop-up will tell you how far it is.
- Drag the slider to select how fast you wish to move. Choose between cycling, walking, and driving. Let’s take cycling for example.
- Enter a number to decide how many times you want to cycle between the two locations. Now click “Move Here”. Your character will start moving.
How to export and import GPX location
- Click the export button to store the path as a GPX file
- Import the shared GPX file to your Dr. Fone Virtual Location.
- Download it from another website. Now click the “Open” button.
- Wait some time to complete the import process. Once done, it is now ready for use.
How to teleport anywhere around the globe
Firstly download the Dr. Fone Virtual Location app. Though the app’s current version has an old interface, the functionality is cleared from any glitches. The latest interface will soon be available. Now click on the “Virtual Location” from the options and connect your Android/ iPhone to your computer, and hit “Get Started”.
Now in the window, find your existing location on your map with the help of the “center on” icon, which is located on the right sidebar. You will go to your current location upon clicking.
Now hit “teleport mode” at the top right. Enter your desired teleport located and hit the “Go” icon. Let’s visit Rome for this example.
You have successfully teleported to Rome. Click “Move Here”
Now your location is fixed to Rome.
How to add your route as a favorite
- On your virtual location screen, click on the five-star beside the route and add it to your favorite.
- Once you have added, hit the five-star icon again at the right-sidebar and locate the route you wish to use. Now hit the “Move” button and start walking along your favorite route again.
How to simulate movement along the route using multi-spot
- Choose multi-spot mode at the top right corner.
- The left sidebar tells how far it will travel to reach the location. Now set the moving speed and specify the number of times to cycle between the locations. Now click “Start Moving”.
You can watch the video below to fix iToolab AnyGo not working
Conclusion
If you are experiencing issues in the app and thinking iToolab AnyGo not working how to fix it? This is the answer. But if you are looking for an alternative, look no other than Dr.Fone - Virtual Location (iOS/Android). The app is very easy to use, teleports you in one click, and lets you use any location-based apps and games that are otherwise impossible to play.
 safe & secure
Also read:
- [New] Turbocharged Windows Content Assessment
- How Can I Use a Fake GPS Without Mock Location On Vivo Y02T? | Dr.fone
- How to Fix Life360 Shows Wrong Location On Samsung Galaxy M34 5G? | Dr.fone
- How To Simulate GPS Movement With Location Spoofer On Lava Agni 2 5G? | Dr.fone
- In 2024, Mastering Sports Viewership in the Digital Age
- Mastering iPhone Screen Recording with Minimal Fuss
- Solution Found! How to Restore Sound on a Non-Responsive Laptop Headphone Connector
- Transferring Your Spotify Playlists to Deezer: A Step-by-Step Guide
- Upgrade Your Audio Quality - Enhance MP3s From 128 Kbps to 320 Kbps
- What Is a SIM Network Unlock PIN? Get Your Infinix Hot 30 5G Phone Network-Ready
- Will the iPogo Get You Banned and How to Solve It On Infinix Note 30 VIP | Dr.fone
- Will the iPogo Get You Banned and How to Solve It On Samsung Galaxy S23 Ultra | Dr.fone
- Title: In 2024, A Detailed Guide on Faking Your Location in Mozilla Firefox On Vivo Y100A | Dr.fone
- Author: Ava
- Created at : 2024-10-02 17:03:21
- Updated at : 2024-10-05 17:47:19
- Link: https://fake-location.techidaily.com/in-2024-a-detailed-guide-on-faking-your-location-in-mozilla-firefox-on-vivo-y100a-drfone-by-drfone-virtual-android/
- License: This work is licensed under CC BY-NC-SA 4.0.