
Methods to Change GPS Location On Nokia C12 Plus | Dr.fone
Methods to Change GPS Location On Nokia C12 Plus
 HD Video Converter Factory Pro

The Internet is a vast space and you have a plethora of content on different websites and platforms. You can call it a two-way - give and take relationship when it comes to the dynamics of data exchange between the world wide web and the users.
When you visit websites, they use cookies to track your activities. When you visit a restaurant, the phone detects and saves the GPS in the memory. You click a picture in the Maldives, your phone seeks out geographic points to prepare the right time and date stamps.
You need your GPS to download and use certain apps. Similarly, your GPS might be the reason you are unable to play some games or use some applications. Change GPS Location Nokia C12 Plus and this won’t be a problem for you.
But if you are wondering how can I change my location on my iPhone? These 5 methods will help you get fruitful results.

Part 1: Change GPS Location on Nokia C12 Plus using a Professional PC Program
The PC Programs are entirely Software based and do a tremendous job to spoof Nokia C12 Plus iOS 16 Location . You don’t have to buy any new equipment and you will be operating using your computer.
You can get this done within minutes if you have the right program with you. One of the best options in the market is Wondershare’s Dr.Fone. This is how you use Dr. Fone Virtual Location spoofer for GPS Spoofing iPhone.
Dr.Fone - Virtual Location
1-Click Location Changer for both iOS and Android
- Teleport from one location to another across the world from the comfort of your home.
- With just a few selections on your computer, you can make members of your circle believe you’re anywhere you want.
- Stimulate and imitate movement and set the speed and stops you take along the way.
- Compatible with both iOS and Android systems.
- Work with location-based apps, like Pokemon Go , Snapchat , Instagram , Facebook , etc.
3981454 people have downloaded it
Step 1: Go to the official website of Dr.Fone - Virtual Location (iOS) . This is easily available when you google it or you can also follow this link here. Then you can download the executive file, install and then launch the application. Once the home page opens, you will find several options - Opt for ‘Virtual Location’. It is usually at the bottom of the page.

Step 2: Now take your Nokia C12 Plus device and connect it to the computer that has Dr. Fone. Then click on ‘Get Started’.


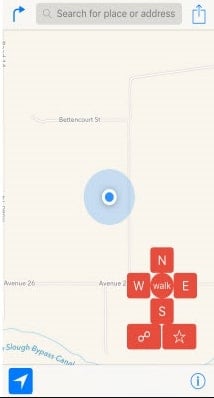
Step 3: Now, the world map will display on the screen and you can clearly see the coordinates and directions as well. On the top right corner, the third icon is called the ‘Teleport Mode’. Click on that and enter the name of the place in the search box. You can even pinpoint it, if you are sure about the place.
 Forex Robotron Gold Package
Step 4: If you are completely sure that you got the address right, click on the ‘Move Here’ option. It moves your Pin from your present location to your new virtual location.

If you are looking for a way to change Nokia C12 Plus Location without Jailbreak, then this is one of the safest options for you. Also, you have other additional features like Phone Transfer, and Whatsapp Transfer along with Location spoofing. The application will never go to waste, won’t occupy much of your computer/PC/Laptop’s space and you can get the fake location iOS within minutes.
Part 2: Change GPS Location on Nokia C12 Plus using External Device
You can achieve the iOS Spoof Location using External devices as well. These devices do not cause any inconvenience to you. They are meant to be small, fit into the lightning port of your iPhone, and act as an external source that will spoof the Nokia C12 Plus location and the same will reflect in every app that uses or detects your iPhone’s geographic location.
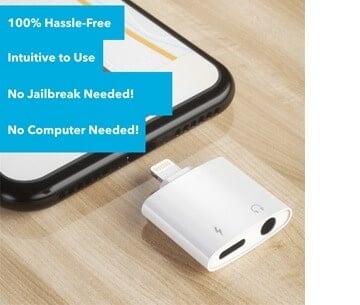
The best external device to change phone location Nokia C12 Plus is Double Location Dongle. This simple device can be utilized by following the steps below -
Step 1: The Double Location Dongle is a very small, white rectangle that connects to your iPhone’s port. But along with it, you also have to install the Companion app for location spoofing. Once you have both of them ready, connect the Nokia C12 Plus device to your iPhone.
Note: The Companion App is not available on the App store. You have to download it from Double Location’s official website.
Step 2: The next step is to open the Double Location iOS companion app and then settle on the Map Tab.
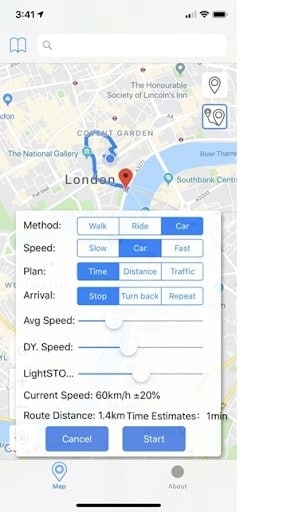
Step 3: Unlike what we had seen in the Dr. Fone step, we cannot enter the location into any search box. You should move the pin to the location that you want to virtually shift to. Double Location provides some very good options that will help you during gaming. You can change all the appropriate settings and proceed.
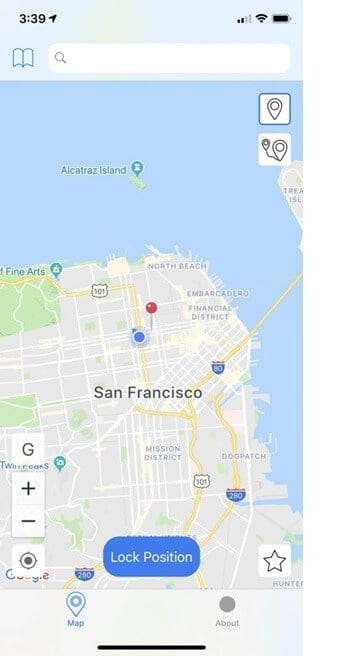
Step 4: On the bottom of the screen, Go for the lock position option. Once you do that, there will be a virtual shift in your geographic position and all your apps will register your new coordinates.


Part 3: Change GPS Location on Nokia C12 Plus using XCode
You can change the geolocation Nokia C12 Plus by using your coding expertise as well. That is why XCode exists. This Computer Program lets you change your Location in Nokia C12 Plus by giving some GIT Commands to the PC while your Nokia C12 Plus stays connected to it. By following these steps, you can understand how to do it. But if you’ve never had a liking for programming and coding languages, then you should probably skip this -
Step 1: Download and install XCode from the AppStore, directly to your Mac device. Launch the application.


Step 2: Once you see the XCode window open, Go for the ‘Single View Application’ to start a new Project and go on by clicking on ‘Next’. You can set up a name and details for this particular project.
 The BootIt Collection covers multi-booting, partitioning, and disk imaging on traditional PC’s using the standard BIOS and newer PC’s using UEFI. The collection includes BootIt Bare Metal (BIBM) for standard BIOS systems and BootIt UEFI (BIU) for UEFI system.
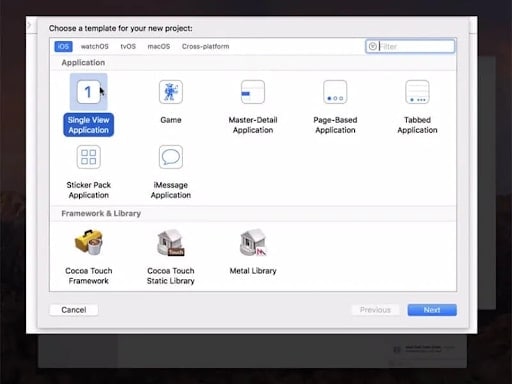
Step 3: A screen display will appear asking you about your identity. This is where the minimal coding part starts. You need to enter some GIT Commands to continue with the project.
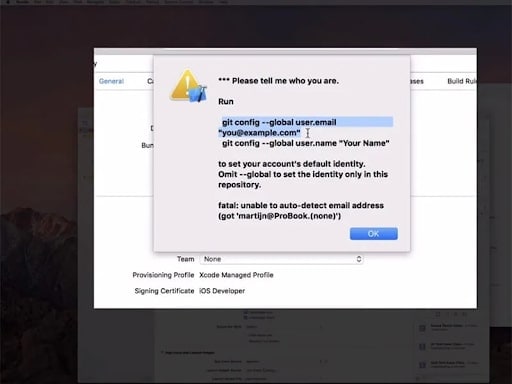
Step 4: Launch and run the terminal on your Mac device and enter these commands - git config –global user.email “[email protected]“ and git config –global user. name “your name”.You need to add your own details in the quoted space and continue to verify your identity.
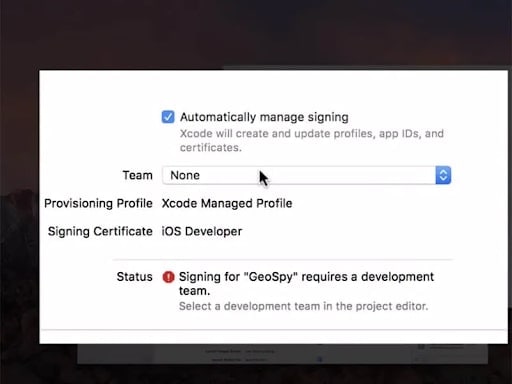
Step 5: Once you enter the commands, go to the next step and establish the Development Team. Then you can proceed to connect your Nokia C12 Plus device to your Mac device. Use the normal cable to do that.
Step 6: To allow the program to process the Symbol Files, you will have to choose the model of your device. Go to the ‘Build Device’ option and continue as per the prompts. However, make sure that you keep your Nokia C12 Plus unlocked for quick detection by the computer software.
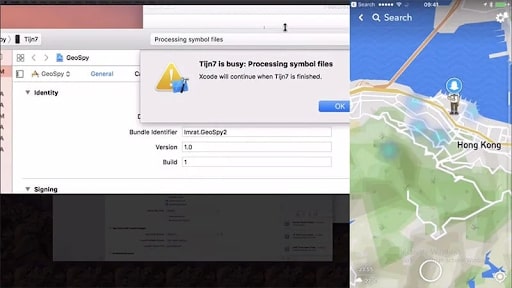
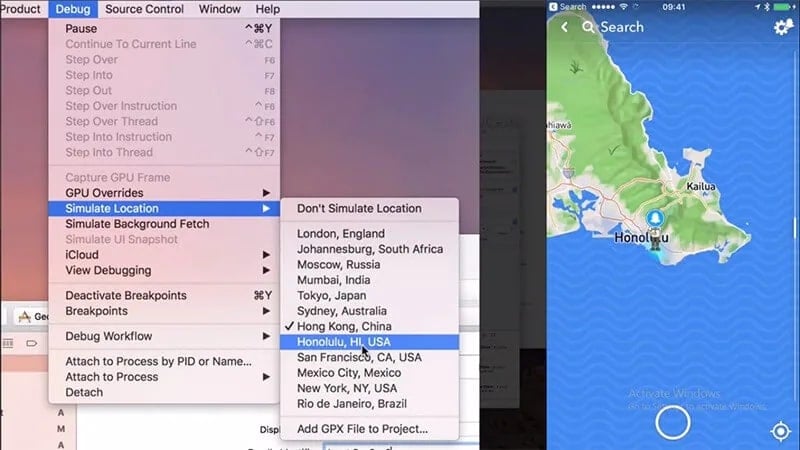
Step 7: Once that is done, you can come back to the actual location spoofing part. Go to the debug Menu > Simulation Location and specify the exact location that you want to virtually shift to. Once you are okay with it, the same will reflect on your Nokia C12 Plus as well.
 Software Update Pro - Check and update software installed on your computer.
Part 4: Change GPS location on Nokia C12 Plus using Cydia Location Faker App
Cydia is also based on software applications and changes location in seconds, However, you need to note that you have to jailbreak your phone. If you don’t know how to do it or do not want to take the risk, Cydia’s LocationFaker app may not be the right fit for you. But if you are a jailbreak expert, this is a very comfortable GPS Changer for iPhone.
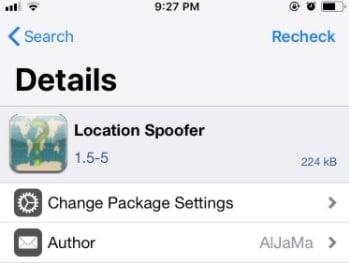
Step 1: Download the Cyndia LocationFaker app from the official website. LocationFaker8 is available for the iOS 8.0 model.

company, user or members of the same household. Action! - screen and game recorder</a>
Step 2: After launching the app, enter the virtual location into the search box.
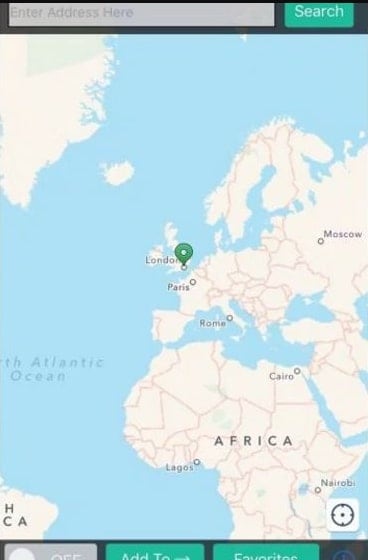
Step 3: If you are done with choosing the new location, shift the toggle from ‘OFF’ to ‘ON’ at the bottom of the page.
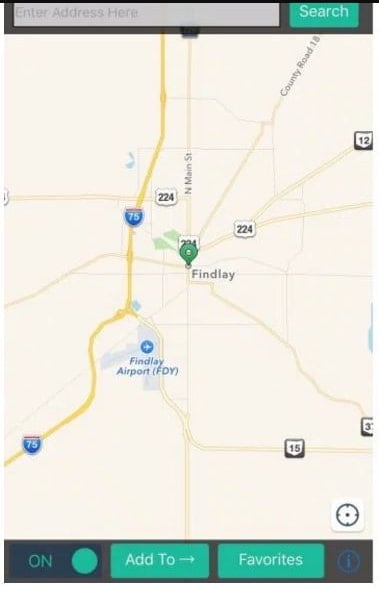
Step 4: Now we can decide which apps can access our new virtual location. At the bottom of the page, you will find an ‘i’ icon. Go click on it and choose the ‘White List’ option. This one will then take you to the app list and you can decide which of them will have access to the phone’s location.
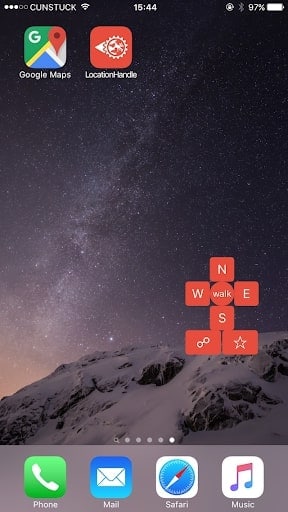
Part 5: Change GPS Location on Nokia C12 Plus using Location Handle
Location Handle is another useful application that you can use to change your location by a few meters or simply go with an automated movement system that changes your location gradually as if you are moving from one place to another. This is how you use it -
Step 1: Download the Location Handle app from the website or App store

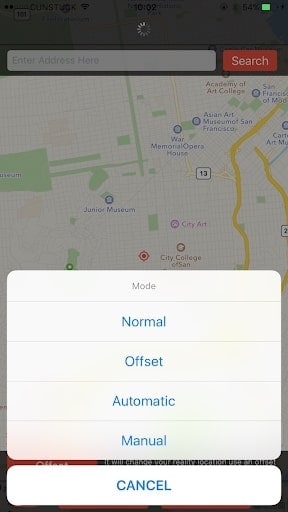
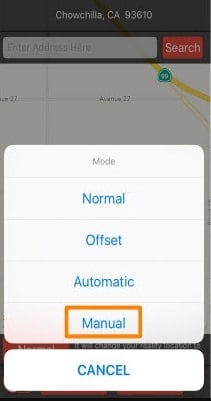
Step 2: There are four different types - Normal Mode - teleport to a new location; Offset Mode - Move a few feet away from the present location ; Automatic Mode - Slowly change your location from one point to another, as if walking ; Manual Mode - Change your location using a joystick.
Step 3: Consider the Manual mode, because we want to change location to a far-off place and not necessarily for gaming.
Step 4: Once the Manual mode is activated, the map will be displayed and you can change the pin location. You can enter the location name in the search box.
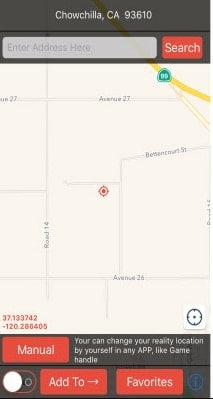
Step 5: The Joystick will appear on the page and you can use it to shift your location to wherever you want. Once you fix on the location, proceed and the new location will be updated.
Conclusion
We hope you are no longer wondering How to change Location services on Nokia C12 Plus. These 6 methods are very effective and you can always opt for the one that is most comfortable for you. If you want a hassle-free PC program, we have that narrowed down for you. If you are a coding enthusiast, then we’ve listed a method that best fits you. Whatever the reason, with an iOS Fake GPS, life becomes much easier and sometimes even safe on the internet. You can explore beyond the boundaries without moving from your couch!
Will the iPogo Get You Banned and How to Solve It On Nokia C12 Plus
Pokemon Go has graced one of the most popular mobile games right from the day it was launched. It requires players to move around one place to the other in reality to capture Pokémon. But if you don’t want to go out of his way and search for Pokémon then iPogo is a tool for you. It is a location spoofer that can change the location of your device. It allows you to move from one place to another with just one-tap. As it is a cheat tool, you might want to know can iPogo get you banned? There are chances of getting an iPogo ban, but they are relatively high depending on how you use the tool.
Part 1: How does the iPogo work for pokemon
iPogo comes with tons of add-on features that can be used to boost your Pokémon collection 10 folds. But it does that by breaking many rules and regulations created by Niantic. Here are some features of iPogo for Pokemon Go that are not by the books:
- Play from anywhere, anytime:
iPogo allows users to play Pokemon go anytime from anywhere in the world. All you will require is a decent internet connection, and you are good to go. And this is something that Niantic strongly opposes.
- Spoofing:
Niantic has arranged several ban waves once a week for players who were found cheating. The humorous thing to note here is that most of such players were caught spoofing. And this app lets you do exactly that. This also had a stimulating effect on the iPogo ban rates.
- It works like a Go-Plus
This app works like a virtual go-plus, enabling your device to change its location via switching servers. But that doesn’t assure any safety from the likes of Niantic.
- Third-party software
This app also works as a third-party software as it runs in the background while you are playing the game. Sometimes Niantic can detect that as well, and you might have to face an iPogo ban.

Part 2: What’s the rate of iPogo ban

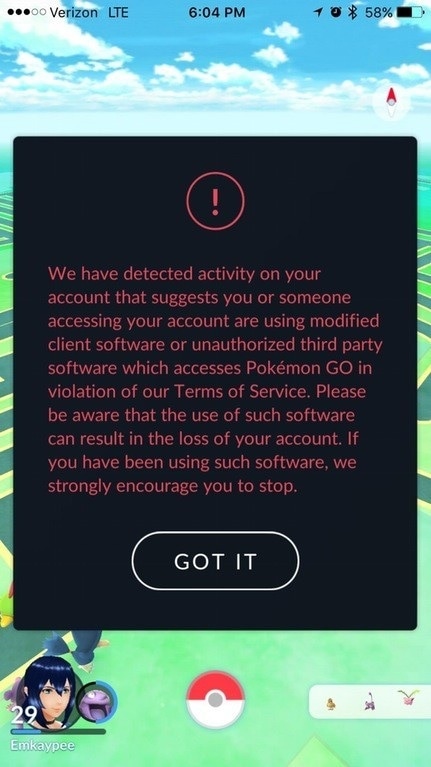
Players mostly use iPogo for location spoofing, which is very common in Pokémon go. Niantic releases various patch notes to stop players from spoofing and catch those who are doing it. In Pokémon Go players, are banned on a 3-Strike basis.
If you are using iPogo as a location spoofer, kindly note that it is perilous to do that. If you receive the 1st strike as an iPogo ban, I strongly suggest you never use iPogo again because Niantic will keep a close watch on you. So if your question is, can iPogo get me banned? Then yes, it definitely can.

Part 3: How to avoid getting banned by Pokemon Go while using a fake GPS tool?
Using a fake GPS tool in Pokemon Go is against the game’s terms of service and can result in a ban. However, if you want to avoid getting banned, here are some tips to help you avoid getting banned while faking Pokemon Go GPS :
Avoid suspicious behavior: Niantic monitors player activities for any unusual or suspicious behavior. Avoid sudden changes in your location, and jumping between distant places within a short period, as these actions can raise red flags and increase the risk of a ban.
Be aware of detection methods: Niantic employs various detection methods to identify players who are using fake GPS tools or engaging in spoofing activities. These methods can include analyzing movement patterns, comparing location data with known landmarks, or detecting inconsistencies in player behavior. It’s important to understand that detection methods can evolve, and it’s difficult to completely avoid detection.
Stay informed: Keep yourself updated with Pokémon Go’s terms of service and any changes or announcements made by Niantic. They may introduce new measures to combat cheating, and being aware of these updates can help you avoid unintentional violations.
Use a trusted tool: When using a fake GPS tool for Pokémon Go, it is crucial to choose a reliable and trusted app. Avoid using any random or unverified GPS spoofing apps. There is a reliable is recommended in the following part. Read on!
Part 4: Better safe tool to iPogo?
We have provided many answers to your question, “Can iPogo get you banned?”. But we know knowing it can get you banned is not enough. Because many players don’t even know which tool they should use, that will not lead to a ban. Don’t grieve, we are here to help with a brilliant virtual location changer for iOS, which is “Dr.Fone - Virtual Location (iOS/Android) .”
Using this tool, you can change the location of your iPhone with just one click. You can use it to trick Niantic or any other location-based app. This app uses a virtual GPS location that makes every location-based app think that you have moved from one place to another. That is not all; you even set the speed of mocking location.
Confusing? Let us clarify, so every location spoofer provides static location change, which means you will instantly pop-up at the place you chose. But, with Dr. Fone, you can choose between walking, cycling, or driving to that particular spot. This is a perfect option to make the game think you are moving at a normal speed.
This app offers many other features like Joystick & keyboard control, easy location changing, etc. This will also save you from avoiding the iPogo ban. You can use this tool with other apps as well. Below are some amazing uses of Dr. Fone Location Changer.
- You can use it to change location on dating apps or other location-based apps.
- WhatsApp location spoofing is also supported.
- Change GPS and play Pokemon Go without going out.
- Easy to use GPS fake, which can teleport you anywhere you want.
- It simulates a more authentic gaming experience with the help of realistic mode, fluctuation mode, and cooldown timer feature, decreasing the risk of detection.
Step-by-step guide for using Wondershare Dr. Fone to Teleport Anywhere
Dr. Fone’s virtual location is the best spoofing tool that you can use for playing Pokemon Go. It can quickly teleport your Pokemon trainer from one place to another. Below is a step-by-step guide you follow to perform that:
Step 1: Get the Program Installed and Launched
Download and install the tool on your computer. Once the installation is successful, run the program. From the option available click on “Virtual Location”.
Step 2: Connect iPhone to PC
Wait for a few seconds; in the meantime, connect your iPhone to the computer using the original lightening cord. Once it’s connected, click on “Get Started.”
Step 3: Check the Location
A new window will pop-up where you will see your current location. If the location is not accurate, click on “Center On” present in the lower-right corner.

Step 4: Activate Teleport Mode
Now click on the 1st icon on the upper right corner, which will enable you to teleport. After that, you will be compelled to enter the name of the location you want to move to.
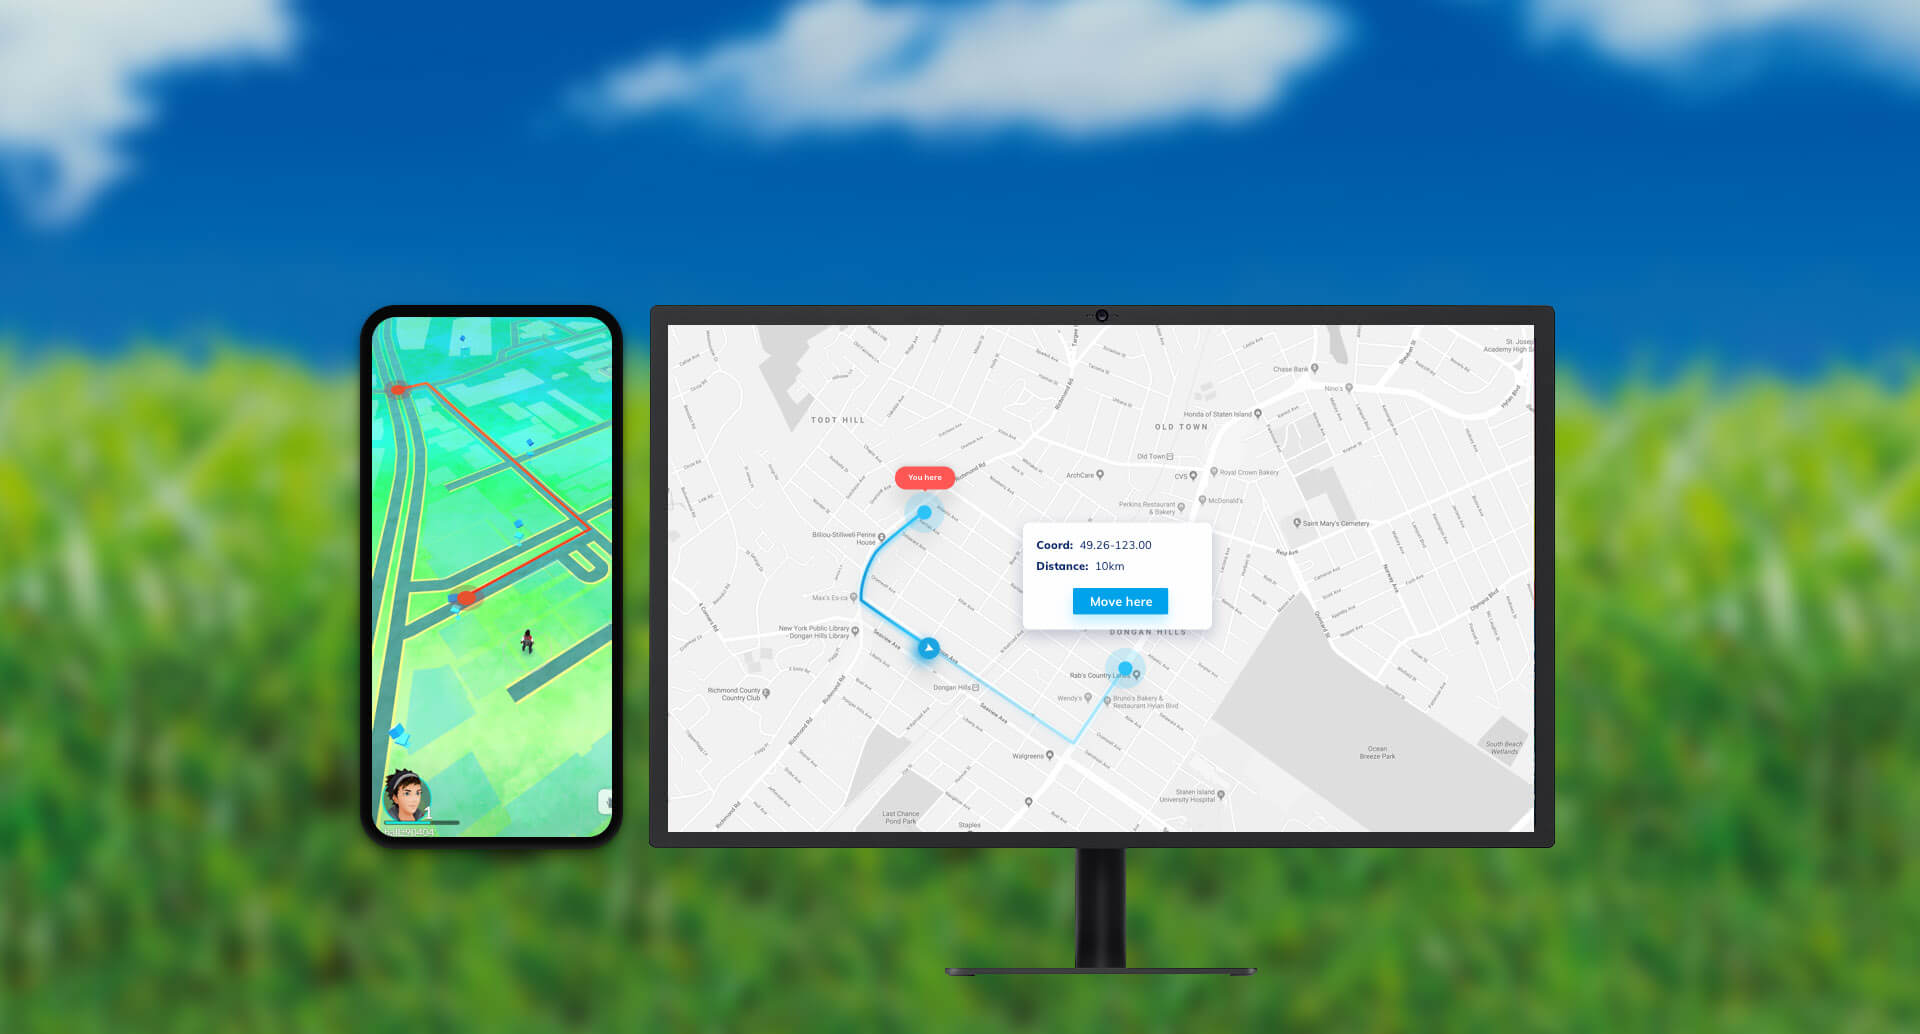
Step 5: Confirm the Location
Confirm the exact location on the pop-up that appears now and click on “Move here.”

Step 6: Check Location on the deivce
After this, you have successfully changed your location. You can cross-check this by pressing the “Center on” icon.

To be certain, you can also check the location on your iPhone. Just open maps on your device, and you will see your selected location.
 OtsAV DJ Pro
Conclusion
Can iPogo get you banned? Yes, it can, and it eventually will. It would help if you understood why can iPogo get you banned and why you should not use that application for location spoofing. We also provided you with a perfect solution to avoid iPogo ban using Wondershare’s Dr.Fone - Virtual Location . We also provided a step-by-step guide to use Dr. Fone for teleporting and changing your iPhone’s GPS location. That was all for this article; if you have any queries related to this article, you can comment below. We will make sure you get the necessary assistance for the same.
## Does Airplane Mode Turn off GPS Location On Nokia C12 Plus?Airplane mode is a feature available on all smartphones and other electronic devices that stops the signal transmissions from the Nokia C12 Plus devices. Also known as flight or airplane mode, this feature will disconnect the wireless functions, including cellular connection, Wi-Fi, and Bluetooth.

The feature’s name says that it was introduced to cut off any radio transmission during the flight to avoid any communication interference. However, the feature must be enabled while taking a flight, and if you need to be disconnected from the signals, you can even use the feature outside the plane.
If you have enabled airplane mode on your Nokia C12 Plus or Android device and think it will also block your GPS location, you are wrong. Know why airplane mode does not turn off GPS location and other ways to avoid getting tracked with or without Airplane Mode.
Part 1: Does Airplane Mode Turn off location?
As we mentioned above, while you put your phone on airplane mode, the cellular radio, Wi-Fi and Bluetooth is disabled, but not the GPS location.
The GPS works on a different technology where the signals are received from the satellite and are not dependent on the network or cellular services. So, when the airplane mode is enabled, the GPS location is not turned off.
Part 2: Can Your Location Be tailed on Airplane Mode?
Yes, if you have not disabled the GPS feature, your location can be tailed on an Airplane mode as the flight mode only disables the cellular connection and Wi-Fi. So, it can be concluded that Airplane Mode is no solution for stopping the GPS tracking on your phone, though there are other workarounds available for this.
Part 3: How to Prevent Phones from Being Tailed?
The GPS feature of your phone, besides assisting you, is also a way any person or third-party app can keep track, which can hamper your privacy and be annoying. So, for privacy or any other reason, if you are looking for ways to prevent your phones from being tailed, check out the solutions for iDevices and Android below.

3.1. How to stop GPS tracking on Nokia C12 Pluss?
To hide the location on your Nokia C12 Plus and iPad, below listed are the steps.
Step 1. Open the Control Center on your iDevice, iPhone 13 for example. (For iPhone X and above models, swipe down from the top-right, while on other devices, swipe from the bottom of the screen)

Step 2. Enable the Airplane Mode or turn off the Wi-Fi and Cellular icon.
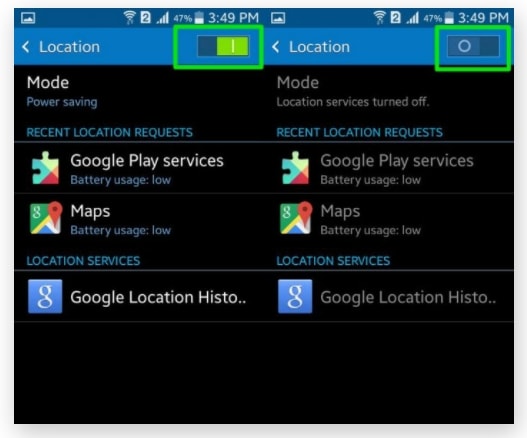
Step 3. Next, you need to disable the GPS radio. On some of the Nokia C12 Plus devices, there is a separate setting for this. Go to Settings > Privacy> Location Services. The list of the apps using the location services will appear. Move the toggle at the Location Services to turn it off.


3.2. How to stop GPS tracking on Android Devices?
The process to turn off GPS location on Android devices may vary from device to device and brand to brand. Still, the commonly used steps for turning off the location are listed below.
Step 1. On your Nokia C12 Plus, swipe down on your screen to open the options list.
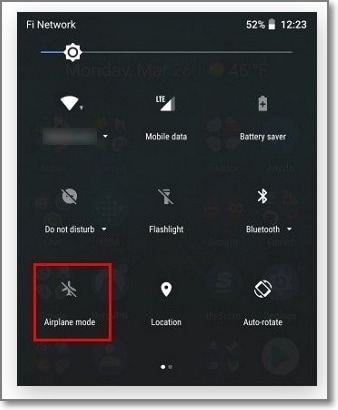
Step 2. Search for the Airplane icon and click on it to turn on the Airplane Mode.
Step 3. Next, open the App Drawer and then choose Settings > Location. Turn off the Location.
Part 4: Spoof Location to prevent GPS Tracing without Turning on Airplane Mode
If you are looking for a method that can prevent GPS tracking without turning on Airplane Mode, spoofing your location is a workable solution. To get this task done, you would need a specialized app or a tool, and here we recommend Dr.Fone - Virtual Location as the best option.
Using this excellent tool, you can set any fake location across the globe for your Android or iOS device, which will prevent you from being hacked. The tool works on almost all models and brands of devices and is quick and hassle-free.
Key features of Dr.Fone Virtual Location
- Teleport to any location of your choice and set a fake GPS location.
- Works with all iOS and Android devices,
- Allows simulating GPS movement with the route.
- Works with all location based-apps like Snapchat , Pokemon Go , Bumble , and others.
- Available for download on Windows and Mac.
You can check out this video for further instruction.
Steps to spoof and set fake location on Android or iPhone using Dr. Fone-Virtual Location
Step 1. Download, install and launch the Dr. Fone software on your Windows or Mac system.
Step 2. On the leading software, tap on the Virtual Location option and then connect your Nokia C12 Plus or Android device to your system using a USB cable.
Step 3. Click on the Get Start button.
Step 4. The software will open a new window, and your connected device’s actual location will be shown. If the location is not coming correctly, tap on the Center On icon present in the lower-right of the interface.
Step 5. Next, in the upper-right corner, click on the teleport mode icon. Next, enter the desired location at the upper left-hand side that you wish to teleport to. Finally, click on the Go button after entering the site.
Step 6. A pop-up box will appear to click on the Move Here button to set the selected location for the connected device. The place will appear on the app interface and the phone.

Part 5: People Also ask about Airplane Mode
Q1: Can An iPhone Be Traced While off?
No, it cannot be traced when an iPhone or any other phone is switched off. For example, when an iPhone is switched off, its GPS is not activated, and thus it cannot be traced.
Q2: Does Find My iPhone Work on Airplane Mode?
No, the Find My iPhone feature does not work in Airplane mode because the location services need a network connection, and thus in Airplane mode, the Nokia C12 Plus device is offline, and it isn’t easy to track the Nokia C12 Plus device.
Q3: Does airplane mode turn off life360
Life360 is a helpful app for tracking your friends, family, and other people. This app tracks your GPS location and displays it to all the selected members in a circle. When the airplane mode on your device is enabled, the network will be disconnected, and thus Life360 will not be able to update your location to the members in the circle. Therefore, during airplane mode, Life360 will not update your site.
Wrap it up
So, it can be concluded that Airplane Mode disconnects you from the cellular network and Wi-Fi. Therefore, to stop getting traced, you need to disable your location services along with the airplane mode. Using Dr.Fone - Virtual Location is an excellent alternative to stop the GPS location as the software will help you set a fake location, and your actual location will remain hidden from all.
 safe & secure
- Title: Methods to Change GPS Location On Nokia C12 Plus | Dr.fone
- Author: Ava
- Created at : 2024-08-01 20:30:28
- Updated at : 2024-08-02 20:30:28
- Link: https://fake-location.techidaily.com/methods-to-change-gps-location-on-nokia-c12-plus-drfone-by-drfone-virtual-android/
- License: This work is licensed under CC BY-NC-SA 4.0.