
The Best 8 VPN Hardware Devices Reviewed On Apple iPhone 11 Pro | Dr.fone
The Best 8 VPN Hardware Devices Reviewed On Apple iPhone 11 Pro
In today’s world, it is highly recommended to use a VPN while using the internet. Although it helps us access geo-restricted content, it can also strengthen our security. Besides using a VPN software, you can also use a VPN hardware as well. For instance, a hardware VPN for home use can be connected to your network and let all the Apple iPhone 11 Pro devices enjoy its benefit. To help you pick an ideal hardware VPN, we have come up with this guide. In this post, we have compared various Amazon hardware VPN options and have handpicked the top 8 of them for you.
If you want to use a hardware VPN for your home or business needs, then you can certainly meet your requirements with these options.

1. Cisco Systems Gigabit Dual WAN VPN
If you have already used Cisco products in the past, then you won’t face any trouble using this Amazon hardware VPN as well. It provides a wired connection with its 14 different LAN ports.
- Load balancing is supported by its dual gigabit Ethernet WAN ports
- Has an inbuilt SSL (Secure Socket Layer) and SPI (Stateful Packet Inspection) firewall.
- It is quite easy to perform its setup, as it comes with an intuitive GUI setup wizard.
- You can analyze employee productivity as it can manage different users at once.
- It is an advanced IP Security VPN hardware.
- The data transfer rate is 100 Mbps
- Warranty: 90 days
Price: $172

2. Zyxel Next Generation VPN Firewall
This VPN hardware by Zyxel will help you meet your business needs for sure. It is one of the most secure devices that you can try to get an access to around 100 VPNs.
- The hardware VPN supports up to 60 thousand sessions at the same time
- Provides an SHA-3 encryption
- It supports a speed of 300 Mbps VPN and 1 Gbps firewall
- Provides a dual-WAN fallback and failover support
- Besides IPSec, it includes SSL tunnels as well (IPv6 is also supported)
- Layer 2 Tunneling Protocol for mobiles (Android, iOS, and Windows phones)
- Warranty: 2 years
Price: $450 (for 100 VPNs), $950 (for 300 VPNs), and $1350 (for 1000 VPNs)


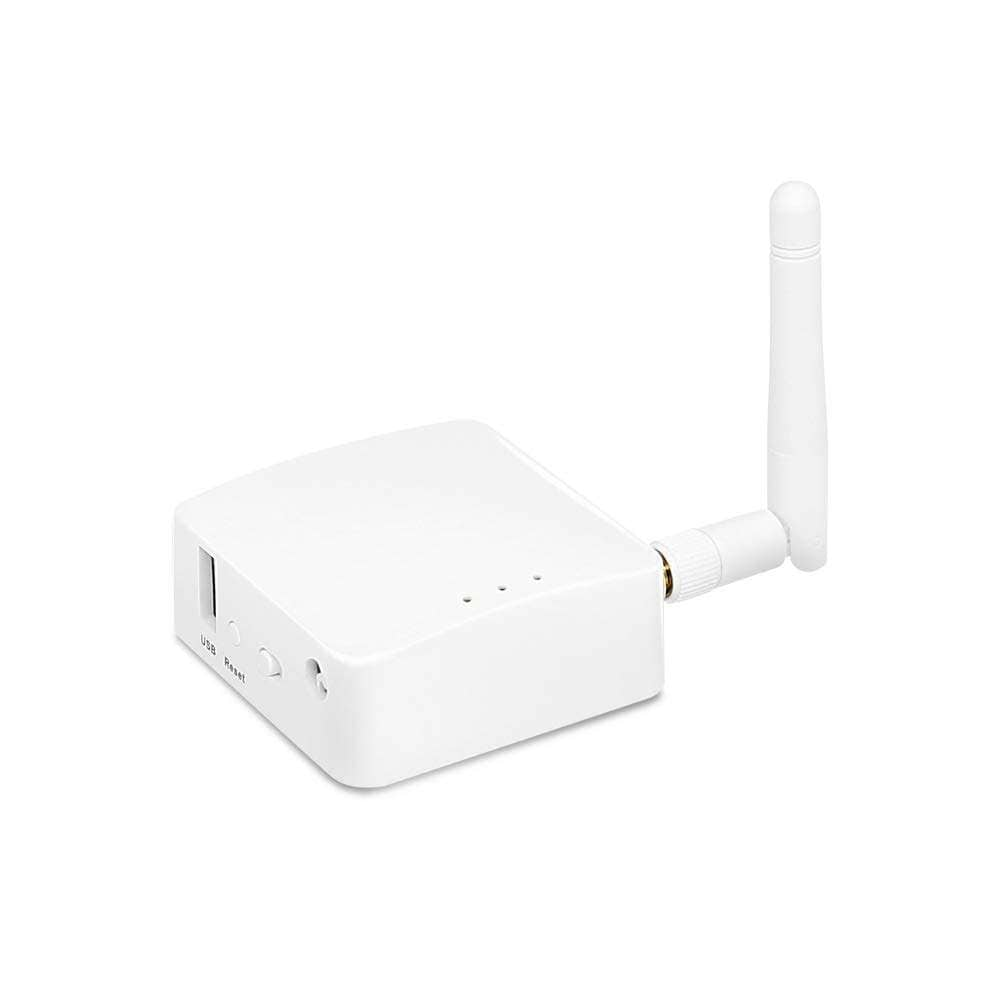
3. GL.iNet GL-AR150 Mini Travel Router & VPN
If you are looking for an affordable hardware VPN for home use, then you should check this portable VPN router by GL.iNet. Since it is lightweight and portable, you can carry it anywhere and use it as per your needs.
- It has an inbuilt OpenVPN and TOR client.
- This mini router provides an access to over 20 different VPN services.
- You can either use its adapter or any laptop/power bank to use it.
- Weight: 1.41 oz
- Dual Ethernet ports
- 64 MB RAM and 16 MB flash ROM
Price: $22
4. UTT HiPER 518 VPN
It doesn’t matter if you like to use VPN for your home network or small business, this Amazon hardware VPN will come handy to you on numerous occasions. It comes with a quick setup wizard as well to assist you.
- The hardware VPN supports real-time backup
- Inbuilt load balancing feature
- Several advanced features like native firewall, access control, IP binding, NAT, and more
- 5 VPN tunnels can be used
- Has an auto negotiation and auto MDIX property
- It has 2 10/100M WAN ports and 10/100 LAN ports
- Ethernet connectivity with 100 Mbps data transfer rate
- Warranty: 1 year
Price: $40


5. Dell Sonicwall TZ300 VPN
Another secure Amazon hardware VPN that you can try is from the house of Dell. Even though it is a high-performance router, you might need to walk an extra mile to setup its VPN compared to other products.
- The VPN hardware is optimized for Windows, Mac, and Android users
- It has an inbuilt SSL encryption.
- Comes with an anti-virus, anti-spyware, and intrusion prevention technology
- Supports IPSec and USB connectivity
Price: $554

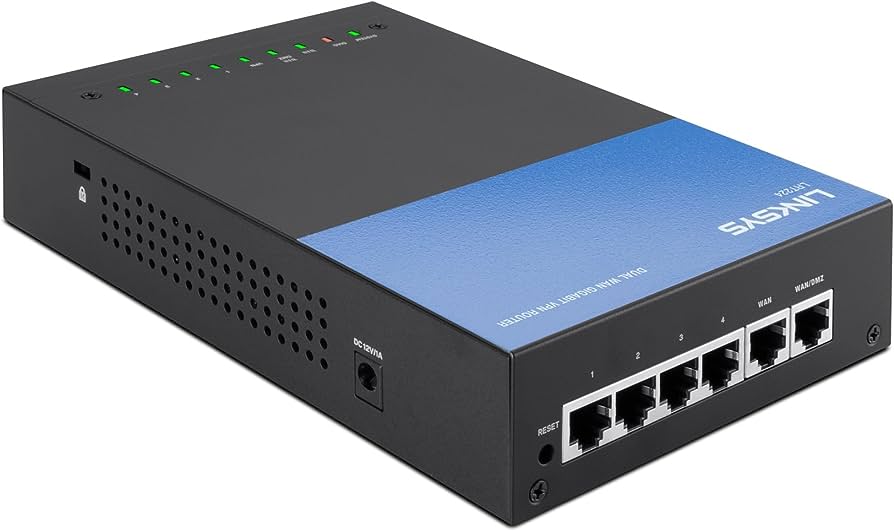
6. Linksys Business Dual WAN VPN Router
This hardware VPN router by Linksys is majorly designed for small and medium-sized offices. This site-to-site VPN supports Ethernet connectivity and has a remarkable data transfer rate of 1000 Mbps.
- It provides 110 Mbps IPSec and 900 Mbps firewall
- There are 5 OpenVPN tunnels dedicated to iOS and Android devices
- Besides that, it has 50 site-to-site IPSec tunnels
- Inbuilt features like WAN failover and load balancing
Price: $165
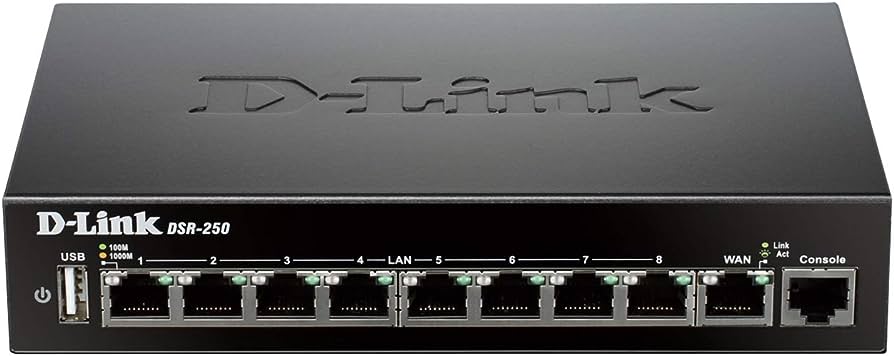
7. D-link 8-port Gigabit VPN Router
This router by D-link is an ideal pick for hardware VPN for home use and small offices. It supports Green Ethernet to optimize its power needs as well.
- VPN tunnel integration – 25 IPSec and 25 PPTP/L2TP tunnels
- It has 8 LAN (Gigabit) ports and 1 WAN (Gigabit) port
- Additionally, it has 5 SSL tunnels and 10 GRE tunnels
- Easy to configure, the VPN firewall comes with its GUI interface
- Administrations can also block websites with its dynamic web content filtering feature
- Limited lifetime warranty
Price: $130
 Project Manager - Asset Browser for 3Ds Max
8. TP-Link SafeStream VPN Router
This Amazon hardware VPN by TP-Link is one of the most popular Gigabit VPN routers out there. It comes in numerous versions as well and can be upgraded as per your requirements for a hardware VPN for home use.
- Supports 20 IPSec and 16 PPTP VPN tunnels
- Also has 4 Gigabit LAN and 1 Gigabit WAN port for high connectivity
- Advanced encryption techniques including AES128, AES192, AES256, DES, and 3DES with MD5 and SHA1 Authentication
- Also provides Manual and IKE Key Management
- DoS defense protection (with SPI firewall)
- Warranty: 1 year
Price: $57

Alternative: Set Up VPN on Common Hardware Devices
With any of the above VPN hardware devices, you can set up reliable VPN services in your home or office.
But many of them come with a high price, and may prove to be expensive for some individual users.
So, for a common PC, phone, router, Android TV, etc., how to set up VPN in a more affordable manner?
Many users choose NordVPN to do it for the following reasons:
- Supports 6 devices at the same time.
- VPN service can be set up on Windows, Mac, Android, iOS, Linux, and a wide range of routers.
- 24 / 7 customer service available.
- VPN service provider for large companies like CNN and BuzzFeed.
- As low as roughly 3 USD per month.
Now when you know about the various options for hardware VPN for home use and business purposes, you can easily pick a VPN hardware of your choice. We have listed different kinds of options in this post, helping you make up your mind. You can always visit their Amazon page and get more information about them. Go ahead and pick the hardware VPN of your choice and let us know about it as well.

Dr.Fone - Virtual Location
1-Click Location Changer for both iOS and Android
- Teleport from one location to another across the world from the comfort of your home.
- With just a few selections on your computer, you can make members of your circle believe you’re anywhere you want.
- Stimulate and imitate movement and set the speed and stops you take along the way.
- Compatible with both iOS and Android systems.
- Work with location-based apps, like Pokemon Go , Snapchat , Instagram , Facebook , etc.
3981454 people have downloaded it
How to share/fake gps on Uber for Apple iPhone 11 Pro
For both the iPhone and the android users faking GPS has many advantages. If you are an Uber driver then this faking becomes more important. To fake GPS on Uber, it is important to make sure that you are using the correct application. Uber drivers use this technique to make sure that quicker rides come and they get more passengers often. Many applications are used to get the work done with ease and perfection. For the iOS find my friend is something that will make sure that you get the exact location of the friends that are added on the map.
 Easy GIF Animator is a powerful animated GIF editor and the top tool for creating animated pictures, banners, buttons and GIF videos. You get extensive animation editing features, animation effects, unmatched image quality and optimization for the web. No other GIF animation software matches our features and ease of use, that’s why Easy GIF Animator is so popular.
Part 1: What GPS does Uber use and how to change it?
There are 5 apps in total that are used by Uber to make sure they get the exact location. Many of you are unaware of the fact that Uber has its navigation application called Uber Nav. Apart from this, the other 4 apps which Uber uses are Google Maps, Waze, Sygig, and Navmii.

How to Change GPS on iPhone?
The Process
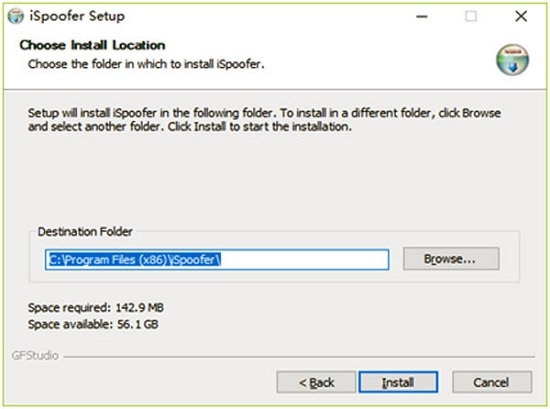
Step 1. Download the exe file on your system for this program and run it to install the program and begin the process:
 HD Video Converter Factory Pro
Step 2. Connect the iDevice with the computer and tap trust on it. Launch the program and it will detect the iDevice with ease and perfection.

Step 3. Use the single simulation mode to make sure that you get to the desired location as expected. Click on the move and the GPS location will be faked and the iDevice will also show the same location as on the iSpoofer. This completes the process in full.

How to change GPS on Android?
Faking GPS on android is also super easy and it allows the users to spoof the location with ease and perfection. It is not only easy to do but it also makes sure that you get 100% results. The process which you need to follow is mentioned as under.
Step 1. Download the fake GPS application on the android phone, to begin with, the process.

WPS Office Premium ( File Recovery, Photo Scanning, Convert PDF)–Yearly

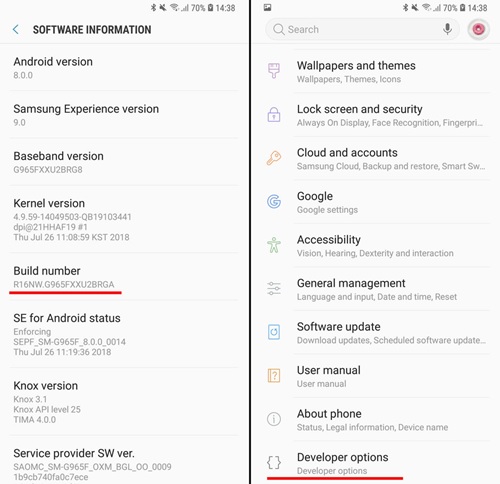
Step 2. Within the software information of the phone tap the build number 7 times to enable the developer’s options.
Step 3. Enable the mock locations on android and select the fake GPS application to get the results.

Step 4. Select the location where you want to spoof and then press the play button. Your location will be changed and your phone will also show and lock your spoofed location.
 SwifDoo PDF Perpetual (2-PC) Free upgrade. No monthly fees ever.


Part 2: How to share a fake GPS on Uber for iPhone
For fake GPS Uber, many applications can be used to get the work done on the iPhone. It is however advised to make sure that the best application is chosen for the results.

2.1 How to select a Good Location Application for iPhone?
To select the best application for iPhone it is advised to keep in mind the following points:
i. The application that is used should be compatible with all the versions. It is also important that whatever version of the iPhone you are using the app should be compatible.
ii. The application must be easy to use and must not involve complex steps. This will make sure that the application becomes user friendly and is easy to use.
iii. The application in question should have the versions for both desktop and mobile for better control.
2.2 App and desktop which is better
For Uber GPS spoofing the desktop application is awesome. It allows more control and therefore it also lets the users get the best results. The desktop application will also let the users know about the exact location as compared to the mobile application.
 dotConnect for Oracle is an ADO.NET data provider for Oracle with Entity Framework Support.
The Best Desktop Location Spoofer for iPhone
Dr. Fone Virtual Location is the best and the most advanced program that can be used to make sure that the location on iPhone is spoofed. From the interface to using the program is too simple to use and it also allows the users to GPS spoofing Uber and therefore as a driver you can get more rides and it is a guarantee.
Dr.Fone - Virtual Location
1-Click Location Changer for both iOS and Android
- Teleport from one location to another across the world from the comfort of your home.
- With just a few selections on your computer, you can make members of your circle believe you’re anywhere you want.
- Stimulate and imitate movement and set the speed and stops you take along the way.
- Compatible with both iOS and Android systems.
- Work with location-based apps, like Pokemon Go , Snapchat , Instagram , Facebook , etc.
3981454 people have downloaded it
The Process
Step 1: Download and Install the Program
First of all download and install the program to begin the process.

Step 2: Go for Virtual Location
Connect the iPhone with the system and click the get started on the computer to make sure that you begin the process.
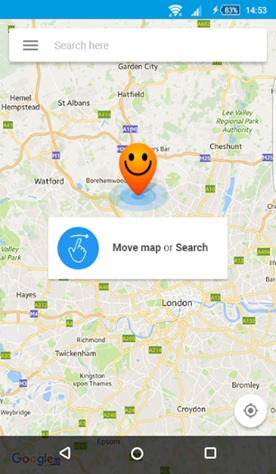
Step 3: Locate your Phone
To make sure that you get yourself located make sure that you press the “center on” button. The program will get you located with ease and perfection.

Step 4: Teleportation
From the upper right corner click on the icon on the third and this will make sure that the process of teleportation begins.

Step 5: Start the movement
Click move here and you will get to the teleported location. It will also make sure that the program is working correctly.

Step 6: Complete the Process
The iDevice of your will also show the same location as on the program and this completes the process in full.

Part 3: How to share a fake GPS on Uber for Android
 NeoDownloader - Fast and fully automatic image/video/music downloader.
Method 1: Hola Fake Location
For Uber fake GPS 2019 this is the best and the easiest method that you can perform. Simply download and install the Hola fake GPS application and get going with the process. Select the location to GPS only > select the position > click the play button to finish.

Method 2: Use Fake GPS Go
This is another important method that can be used to make sure to easily fake GPS Uber 2019. Just select the settings to GPS only > choose the location > press the Go button and fake GPS will be inserted into your device.

Method 3: Use Location Changer
It is also one of the easiest ways to make sure that the location is changed. You need to enable mock location on your android and select this application to get the work done. It is a 100% practical method to get the work done.

Conclusion
No matter whatever the process you use for the location spoofing it is the Dr.Fone - Virtual Location that surpasses all with ease and perfection. It is one of the easiest and the most used programs that will make sure that the location spoofing is performed with 100% accuracy. With Dr. Fone changing location has been too easy to perform. The application is backed by a highly technical team and it will get you the results that you have always been longing for.
 Lyric Video Creator Professional Version
How To Use Special Features - Virtual Location On Apple iPhone 11 Pro?
Wondershare Dr.Fone - Virtual Location comes with multiple unique features that can be used to enhance the flow of spoofing location. With all these amazing features, you can easily change your iOS location without blinking an eye. Rather than making things complicated, Dr.Fone makes it easy for you to manage operations when you perform actions like changing Android locations.
Part 1: Circle Route (For Multi-Stop Route)
The circle route feature is under the multi-stop route mode. When your starting point is close to the ending point, a pop-up asks if you want to set up a circle route. Click Yes to create a circular path on the map.


Part 2: Realistic Mode (For One-Stop Route and Multi-Stop Route)
This particular feature makes the simulation look realistic with the ability to fluctuate the speed of the simulation. If you wish to turn on realistic mode for the one-stop or multi-stop route, look for the respective checkmark option in the panel on the left.

Part 3: Fluctuation Mode (For Teleport Mode)
Whenever you are teleporting your smartphone device to another location, you can try using the fluctuation mode feature offered against it. As you activate Teleport Mode from the top-right section and search for a location, you will discover the Fluctuation Mode toggle in the confirmation tab. Turn on the toggle to slightly switch the location from the selected point to show realistic motion.

Part 4: Cooldown Timer (For Teleport Mode and Jump Teleport Mode)
While teleporting the location of your smartphone to different places for playing games like Pokemon Go, you are bound to activate a cooldown timer within your location-changing app to show realistic movement. By locating the Cooldown Timer on the right pane of icons, activate it, and this feature will automatically calculate the cooling time by measuring the distance between your destination and the starting point.

It is recommended not to start the movement until the cooldown time is completed to avoid unnecessary bans. Moreover, you can also activate the Auto jump after cooldown in the Jump teleport mode after turning on the Cooldown Timer.
This option will automatically jump you to the next destination once the timer ends. It is helpful for games like Pokemon Go, where the game servers can detect frequent jumps with no cooldown time.
 WonderFox DVD Ripper Pro
Part 5: Import/Export GPX File
You can also import and export specific navigated locations from Dr.Fone in the form of GPX files. While you can export GPX files for keeping a record of your location, you can also import such files for inserting specific locations to simulate or teleport to. Find out how you can import and export GPX files with this location-changing application:
Step 1Export the GPX File
If you have defined a proper location to simulate at a particular instant using Dr.Fone - Virtual Location, you can have this location exported by clicking the Export icon on the top of the left panel. This will open a window where you can set the location for saving the GPX file.

Step 2Import a GPX File
For importing a GPX file on the platform, click the Import button on the right pane. As this opens a window, select the GPX file you wish to import to the platform.

Step 3Wait for the File to be Read
Wait for a moment until Dr.Fone - Virtual Location recognizes the specific locations within the GPX file and displays them on the map.

Part 6: Historical Records
If you want to use a similar track record on your smartphone again, you can access the historical records saved on the platform for easy access.
Step 1Open Historical Records
Click the Historical Records button on the right pane to access the entire history involving the connected smartphone and the location spoofing platform.

Step 2Access Any Location from the History
Select the Go button adjacent to any particular historical record to re-launch a similar simulation for the Apple iPhone 11 Pro device. You can also click Clear All to delete all historical records.

![]() FX PRO (Gold Robot + Silver Robot(Basic Package))
FX PRO (Gold Robot + Silver Robot(Basic Package))
Part 7: Favorite List
You can also set up favorite locations within the platform to define quick accessibility to your favorite locations. To do that, you have to follow the guidelines shown next:
Step 1Favorite Specific Locations
While setting up locations in Jump Teleport Mode, One-Stop Route, or Multi-Stop Route, you can tap on the Favorite icon adjacent to every marked location or favorite an entire route with the Favorite icon on the top of the left panel.

Step 2Access your Favorite Section
To look for your favorite locations, look for the Favorite icon on the right pane to open a list containing all locations you have marked. You can choose the Move option to automatically move into a particular location in no time.

- Title: The Best 8 VPN Hardware Devices Reviewed On Apple iPhone 11 Pro | Dr.fone
- Author: Ava
- Created at : 2024-08-01 21:06:47
- Updated at : 2024-08-02 21:06:47
- Link: https://fake-location.techidaily.com/the-best-8-vpn-hardware-devices-reviewed-on-apple-iphone-11-pro-drfone-by-drfone-virtual-ios/
- License: This work is licensed under CC BY-NC-SA 4.0.