
What are Location Permissions Life360 On Nokia G310? | Dr.fone
What are Location Permissions Life360 On Nokia G310?
Sometimes you need to decide whether you can share certain personal information or data about yourself with others, which may involve location permissions.
Location permissions Life360 allows you to share the location of your device with other apps, even if those apps aren’t in your app library. It’s usually a good idea to use location permissions sparingly, but sometimes you’ll need to use them.
Life360 uses location permissions for a few different reasons. For example, Life360 uses location permissions to show nearby friends when they check in to places so that you can see who is nearby and what they’re up to.
Part 1:What Does “Location Permissions Off” Mean on Life360?
There are two ways to prevent GPS tracking on the phone: switch off the phone’s GPS or take off Life360 rights to track your whereabouts using GPS.
It’s possible that Life360 won’t work properly if you don’t accept the permissions it requests during the installation process. When it comes to authorizing access to Life360, you have the following choices available to you:
If you choose the ‘never option’, the application will not be granted the required rights. As a result, the software may fail to perform as it is meant to. Whether you’re unclear if you want to offer the program complete access or not, this is the ideal ‘Ask any time’ decision to bring.
Your location may be granted every time the app is used if you wish. ‘While the App’ setting permits accessibility to Location Services only when the app itself or one of its functionalities is currently displayed on the screen.
Your device’s status bar may glow blue and display a message notifying you that an application is currently using your location data if the While Using the App setting is enabled for one of your apps.
“Always” grants the software all the permissions it needs. So, for example, allowing location permission will be done – every time the app launches. As a result, the software can track your location even if the application is closed.
Part 2:Can My Nokia G310 Be Tracked If Location Services Are Off?
If you misplace your phone or want to run an application that requires to access your location, you may use the already developed location settings on your smartphone. Suppose, on the other hand; you don’t want anybody to track your phone?
Is it possible to track a phone even if the location services are disabled? Mobile phones can be tracked even when location services are off, and the answer to that question is, “Yes.”
Disabling your phone’s location services might help you hide your current whereabouts. This is critical if you don’t want others to be able to follow your movements or activities. However, other methods may still find a smartphone’s overall geolocation using different ways.
1. Cell-Site Simulators
A cell-site simulator is a device that can imitate a mobile phone tower and force a nearby mobile phone to connect to it. Cell site simulators can be purchased online or at a local electronics store. Law enforcement agencies use them to locate a phone without a warrant.

2. Malware or Spyware
Malware and spyware can use various techniques to track your phone’s location. For example, a malware program may be able to detect your location based on Your Nokia G310’s hardware.
Some mobile malware or spyware can detect and track your location without the need for the user’s consent.
3. Cell Towers
Cell towers can provide a rough estimate of a phone’s location. A cell tower is a network access point that connects a mobile phone to the Internet. A smartphone’s location can be found by triangulating the position of cell towers near your device. This method works best when the cell towers are close together.

4. Wi-Fi Snooping
When a Wi-Fi hotspot is nearby, your phone can connect to it without needing to connect to a cell tower. Your phone can then transmit the signal back to the hotspot, which will record the Nokia G310 device’s IP address.
Part 3:How Do I Pause Life360 without My Parents Knowing?
There are many ways to ensure your parents do not know where you are and what you are doing. Some of these methods are:
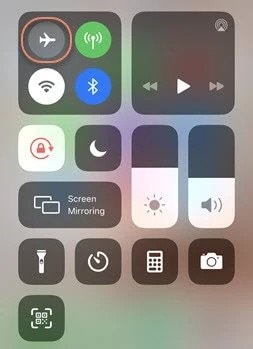
1. Switch to the Airplane Mode
Turning on Airplane Mode on your smartphone is another fast approach to preventing Life360 from broadcasting your whereabouts without your parents being aware. Unfortunately, you’ll be unable to use your phone’s internet connection after setting off Airplane Mode, so you’ll lose your GPS position.
2. Make Sure to Turn Off Circle’s Location Sharing
It’s your choice whether or not you want to share your location information with others in a particular circle or detach from a circle.
- Access the Life360 app’s settings by tapping Settings in the upper right-hand corner.
- When you’re done monitoring your position, choose a circle on the UI to do so.
To disable the function, choose the Location Sharing menu item and then drag the flip to the off setting.
- Go to your phone’s settings and look for “Location Sharing Paused.”

 LYRX is an easy-to-use karaoke software with the professional features karaoke hosts need to perform with precision. LYRX is karaoke show hosting software that supports all standard karaoke file types as well as HD video formats, and it’s truly fun to use.
3. Stop Using the GPS on Your Device
Stopping location sharing on Life360 may also be accomplished by turning off the GPS service, another viable alternative.
* For Android Users
- Launch the Settings app on your Nokia G310, then scroll down until you find “Privacy” and tap it.
- To prevent applications from monitoring your location, uncheck the “Location” option.


* For iPhone Users
- Navigate to the Settings menu on your iPhone.
- To disable this feature, enter the “Location Services” menu by selecting the “Personal” tab and selecting the appropriate option.

4. Take use of a Burner Phone
Burner phones make it very easy to disable location tracking on Life360. In addition, disposing of a burner phone keeps your personal information private and secure.
- Install Life360 on the burner phone, and then login in using the same account you used on your primary device.
- Establish a connection between your phone and the free Wi-Fi that is accessible.
- If you delete this application from your smartphone, your parents will no longer be able to monitor your phone use.
5. Trust Dr.fone
Smartphones have taken over the globe, and almost everyone has one. In addition, apps for smartphones, such as those for monitoring children, have been developed as a result of advances in technology. Using programs like Life360, parents can keep tabs on their children and teens. However, for some children and teenagers, Life360 disturbs their privacy, and they don’t enjoy being tracked around the clock by the program.
It may be difficult to trick the iPhone’s GPS, and doing so needs dependable and secure solutions, such as Dr.Fone - Virtual Location (iOS/Android) . Users of iOS devices will appreciate this app’s ability to quickly and safely fake their current location without compromising their personal information. The most excellent part is that it’s simple to use and set up. Additionally, with Dr.Fone - Virtual Location (iOS/Android), you may relocate to any location and choose your own pace. Life360 and other location-based applications may be spoofed with a mouse click.
Dr.Fone - Virtual Location
1-Click Location Changer for both iOS and Android
- Teleport from one location to another across the world from the comfort of your home.
- With just a few selections on your computer, you can make members of your circle believe you’re anywhere you want.
- Stimulate and imitate movement and set the speed and stops you take along the way.
- Compatible with both iOS and Android systems.
- Work with location-based apps, like Pokemon Go , Snapchat , Instagram , Facebook , etc.
3981454 people have downloaded it
It’s pretty simple to use Dr.Fone, and here are the instructions.
- Step 1: Once you’ve downloaded Dr.fone from the official site, you’ll need to install it on your computer or system.
- Step 2: Install it and then run it. As soon as you’ve plugged in your iOS device, press the “start” icon.

- Step 3: You’ll now be able to view your present position on a map. Use the map’s teleport feature in the upper right corner to look for a particular spot.

- Step 4: To relocate to a new place, do a scan and then hit the “move here” option.

- Step 5: Finally, Your spoofing skills have been fully unlocked!

Conclusion
Life360 is a handy app, but it can be frustrating when a child or teen doesn’t want to use it. It’s easy to fool the app and trick it into thinking that you’re at home or school, but you’re not. Hence, Dr.Fone - Virtual Location (iOS/Android) is an excellent app for faking your location and keeping your personal information safe.
How to Stop Google Chrome from Tracking Your Location On Nokia G310?
Do you know your web browser is continually sharing your actual location online? You might not have noticed, but the number of websites using your location has increased. As you are well aware of the dangers of the internet, it doesn’t make sense to turn your Chrome into a beacon for ill-intentioned people. Luckily, it is possible to fake a location on Chrome with the right tool.
Are you wondering how to fake the browser location or which tool to use? You can get all your answers by reading this article till the end.

Part 1: How Does Chrome Know Your Location?
Before discussing Google Chrome’s fake location, it is important to know how Chrome detects your physical location. Google Chrome uses many ways to pinpoint your exact location, like your IP address, GPS, Wi-Fi, Bluetooth, and Cell Tower data. Every internet connection has an IP address bound to a location that enables Chrome to identify your location.
Similarly, GPS location can easily be tracked if your phone device has it enabled. All the Wi-Fi and Bluetooth connections around you also have location information embedded in them. They can help Chrome track you as long as your device can detect them. If you use cell data, Google Chrome can also track you through cell towers.
Part 2: How to Hide Location Services in Chrome?
If you are worried about Google Chrome detecting your physical location and sharing it with websites and apps, you can hide it easily. The process of hiding your location on Google Chrome is simple, even if you are using multiple devices. Below is the step-by-step process of hiding location services in Google Chrome on computer, Android, and iOS devices.
Method 1: For Laptop and Desktop PCs
Step 1: Launch Google Chrome on your computer and click the “Three Dots” icon to open the Google Chrome Settings. Here, tap “Privacy and Security” from the left sidebar and select “Site Settings.”

Step 2: Navigate to “Permissions” and click on “Location.” To hide the location on Google Chrome, select the “Don’t allow sites to see your location” option.

Method 2: For iPhone or iPad
Step 1: Navigate to “Settings” on your iPhone and open it. Scroll down until you find the “Chrome” app option and select it.

Step 2: Press “Location” on the next screen to open the location options for Google Chrome. Here, choose “Never” to stop Google Chrome from detecting your location.

Method 3: For Android
Step 1: Open Google Chrome on your Nokia G310, press the “Three-Dots” icon, and tap “Settings” from the options.
 PDF application, powered by AI-based OCR, for unified workflows with both digital and scanned documents.
Step 2: In Chrome Settings, press “Site Settings.” Now select “Location” and hide your location by toggling off the “Location” option.

One way to protect your privacy and stop websites from tracking your location is to turn off the location, but it has many disadvantages. If you have turned off your location, you can’t use any location base service like food delivery, e-shopping, ride-sharing, etc. That’s why it is better to use a fake location on your browser. Below we have explained four methods for Chrome fake location.
Method 1. Best Tool to Fake Chrome Location On iOS and Android Phones
The easiest and quickest way to fake your location on Google Chrome is to use Dr.Fone - Virtual Location . Since smartphones contain a wide range of apps that require location access, it provides a stable way to fake Chrome locations on Android and iOS phones. No website or app will be able to detect that you are using a fake location when using Dr.Fone - Virtual Location for faking GPS location.
Key Features
- Dr.Fone - Virtual Location can be used for any social media app like Facebook, Twitter, or Instagram with a fake location.
- With the help of this tool, you can also spoof real-time tracking apps like Life360 to protect your privacy.
- If you are an iPhone user, you don’t have to jailbreak your iPhone to spoof your device’s location.
How to Fake Chrome Location On iOS/Android Phones via Dr.Fone - Virtual Location
Faking your Chrome location with Dr.Fone - Virtual Location is very straightforward. You only need the Dr.Fone mobile toolkit and a USB cable to connect your Nokia G310. Follow these steps to spoof Chrome location on Android and iOS phones:
Step 1: Connect Your Android/iOS Device to Your Computer
Connect your Android or iOS phone to your computer using a USB cable. Launch the Dr.Fone robust toolkit on your computer and select “Virtual Location.”

Step 2: Activate the Teleport Mode
Press “Get Started” on the next page to open the map window. First, select your actual location by pressing the “Center On” icon from the right sidebar. Afterward, click on the “Teleport” icon from the top right corner to activate the Teleport Mode.
Step 3: Add the Desired Fake Location
Once the Teleport Mode is activated, add your desired location and press “Go.” Your desired location will open on the map. Select it, and a pop-up window will appear where you need to press “Move Here.” With that, your Android or iPhone’s Chrome location has been changed.

Method 2. Manually Change Your Location Using Google Chrome DevTools
It is also possible to fake browser location on Chrome using the Google Chrome Developer Tools. It is a built-in feature of Chrome and can be used to manually change or turn off your browser’s location. Follow these steps for changing location on Chrome with DevTools:
Step 1: After opening Google Chrome, click the three-dots icon from the top right corner. It will open the Chrome menu where you need to select “Developer Tools” after clicking “More Tools.”

Step 2: A window will open on the right side with all the developing tools you can use in Chrome. Click on the three-dots icon located near “Console” in the bottom left corner of the window. Choose “Sensors” from the pop-up menu.

Step 3: Access the newly selected “Sensor” option, and here you can change the browser’s location by either selecting a Google’s pre-set location or adding your desired location manually. Once the location is selected or added, your browser’s location will change.

Limitations
- The interface of the Google Chrome DevTools can be very confusing and overwhelming for non-technical users.
- Apart from pre-added locations, it can be hard to add a specific location as your fake location.
Method 3. Fake Your Location Using Chrome Extension
Many fake location Chrome extensions are available on Google Chrome which can be used to alter your location on Chrome. You can find these extensions on Google Chrome Web Store and add them directly to your browser. Below we have explained the steps for using such an extension “Location Guard “ to fake your location on Google Chrome:
Step 1: Open the “Location Guard” on Chrome Web Store and click “Add to Chrome” to add it to your browser. Once the “Location Guard” extension is added, open it and press “Options.”

Step 2: In the options, you can choose different options like Privacy Levels, Protection Area, and Time for Location Cache. It is recommended you choose a higher level for more protection.


Step 3: You can also use the “Fixed Location” feature to set up a fake location as a permanent location for your browser. The fixed location can be added by using the market or clicking on the desired place on the map.

Limitations
- Location Guard doesn’t protect your IP address. It means some websites can still detect your real location using the IP address.
- The app is not updated for quite a while, that’s why the map of the fixed location feature is quite restricted.
Method 4. Spoof Your IP Using a VPN Server
Another way you can fool websites and your browser by displaying a fake location online is to use a VPN server. VPNs fake your IP address to fool websites and apps into detecting your location. NordVPN is a VPN that can be used to spoof your IP by following these steps:
Step 1: Download and install NordVPN on your computer or phone and log in using your account. If you don’t have a NordVPN account, you must create one first.
Step 2: If you want to just change the location of your device, you can select “Quick Connect.” Using it will enable the program to automatically find the most suited fake location for you.

Step 3: You can also choose the desired location as your fake Chrome location in NordVPN. To do that, scroll down the list of countries and locations and choose your desired locations to connect to.
Limitations
- NordVPN can only spoof your IP address and will not work for geo-restricted applications.
- Using a VPN usually affects your internet speed and can make browsing slower and more difficult.
Part 4: FAQs

1.What is Geolocation?
Geolocation is a term used for the process of pinpointing the location of a device connected to the internet. The location can be determined using methods like IP address, GPS, and mobile tower data. Apps and websites commonly use it to provide location-based services.
2.What is the HTML5 Geolocation API?
The HTML5 Geolocation API is a browser API used to determine a user’s geographical location. Developers use it to build location-aware websites and apps that use users’ locations as the basis for providing their services. It can detect location through GPS, Wi-Fi, Bluetooth, IP addresses, etc.
3.Why should you hide or spoof your Location?
Hiding or spoofing your location protects your privacy and stop application and websites from tracking you. It also allows you to access geo-restricted apps and play location-based games. You can also fake your location to get the latest updates of your favorite apps.
Conclusion
The fact that Google Chrome in your devices can track your location with an accuracy of up to 20 meters is very unsettling for users. Even when you try to be careful in granting location permissions to apps and websites, many can still bypass this by adding location access requirements in terms and conditions.
That’s why having a tool like Dr.Fone - Virtual Location to fake GPS online is essential nowadays. It can ensure your privacy and helps in protecting you from the dangers of the internet.

Full Guide to Fix iToolab AnyGO Not Working On Nokia G310
If you want to go anywhere in the world without moving an inch from your home and wondering how to change location on your iPhone, then iToolab AnyGO is the app for you. Not literally, but it allows you to teleport your current location anywhere around the globe. It is considered the most famous and widely used GPS spoofing locator, which offers various options than merely faking your current location.
It also allows you to simulate GPS movement, which helps you play games after importing GPX route files. You can use a joystick or keyboard to simulate easily anywhere. But users of this app are experiencing some technical problems and improper functionality and hence can not seem to get on with it. And if you are among those unlucky guys and wondering if iToolab AnyGO not working, how to fix it? Then you’re at the right place.
In this article, you will get to know exactly how to fake location on iPhone and fix iToolab AnyGO when it is not working. Though there are numerous problems that users are complaining about, here you will know the most common problems faced by many users. So stay tuned.
Part 1. What is iToolab AnyGo?
 SwifDoo PDF 2-Year Plan
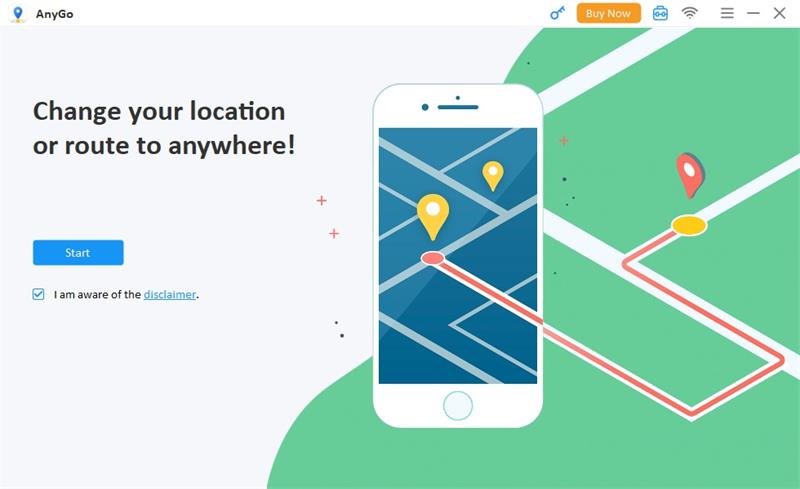
This app is a GPS spoofing app that changes location on iPhone anywhere around the globe. But the fun part with this app is that now you can gain access to the location-based games and apps that you normally could not access. This opens gates to endless possibilities where you can watch any TV show, download any location-based app, and play games. In short, this app removes any geo-based restrictions on you without jailbreaking your phone.
Here are some prominent pros of the app in a nutshell:
- Spoof GPS location on your iPad/iPhone with jump mode.
- Change locations multiple times.
- Works perfectly with geo-based games like Pokemon GO.
- Play AR games naturally.
- Enable 2-spot or multi-spot movement or follow the GPX route.
And here are some of the drawbacks:
- It is difficult to change locations multiple times and your account may also suspend.

Part 2. How to fix the iToolab AnyGo not working issue?
Issue 1: The map does not appear in the program
First, check your network connection if iToolab AnyGO doesn’t show on the map. Then, if the internet is available, download the latest iToolab AnyGO. You can check it out by clicking the menu and hitting the “Check for updates” button. Alternatively, you can uninstall and re-install AnyGO to acquire the latest version.

Issue 2: iPhone/iPad unable connecting AnyGO
Follow these step-by-step guides if your iPhone/iPad cannot connect with iToolab AnyGO.
- Try to re-plug and unplug your device, and connect again after restarting the program.
- Also, try different USB ports and original USB cables, as maybe there’s an issue with the USB connection.
- Also, make sure that your computer and your device are correctly connected. If not, then iTunes cannot detect your device.
Note: Make sure that your iOS version should be compatible with AnyGO. iOS 8 or the latest versions ensure compatibility.
 Power Tools add-on for Google Sheets, Lifetime subscription
Issue 3: AnyGO repeatedly crashes
If this issue still exists, try to re-open the program again and again. If crashing continues, send program log files to the support team.
For Mac:
Head to the top menu of Mac and click Go, then click the Options button over the keyboard. A drop-down menu will appear with library options. Go to library>logs>Diagnostic reports and find log file”iToolab AnyGO” for mac crash.
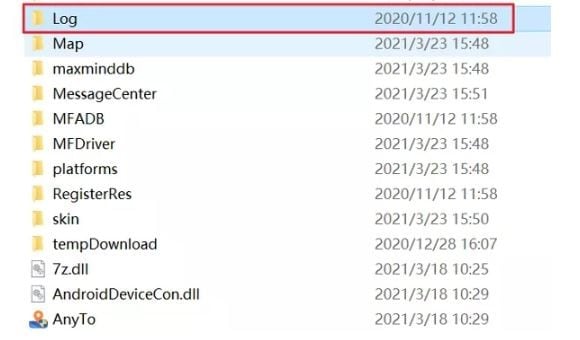
For Windows:
On AnyGO, Go to the installation path. Locate the log folder and compress it before sending it to the support team.

Tips: iToolab AnyGo still not working? Switch to Dr.Fone - Virtual Location for seamless and reliable location simulation. Say goodbye to issues and enjoy hassle-free location control. Try It now!
 WinUtilities Pro
Part 3. Best iToolab AnyGo Alternative Program You Can Use in 2024
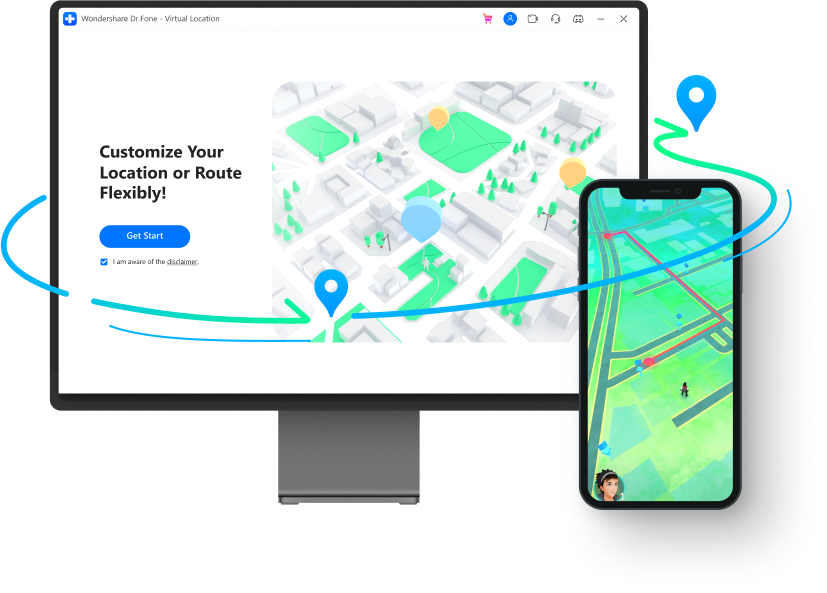
If you are searching for an alternative app to the iToolab AnyGo, look no further and check out the Dr.Fone - Virtual Location . It is similar to other GPS spoofing apps but promises a smooth, natural, and realistic simulation of any GPS location.
Games are always fun playing with joysticks. And if you play games like Pokemon GO with it, you will experience better and seamless control over your Pokemon character in the simulation.
The app has a low detection rate which prevents you from jailbreaking and avoids getting your account banned. The developers are always alert and constantly updating the app, so you get the most benefit from Dr. Fone Virtual Location. In addition, it is highly compatible with devices running the latest version, so you do not have to worry if the app will work on your device if you are running iOS 17 or Android 12 or later versions.
One great feature that Dr. Fone Virtual Location consists of is sharing your fake location with your family. So you can play pranks with them and have a great time. You can also connect with new friends and get to know their whereabouts.
So much of the talk. If you are wondering how to use Dr.Fone - Virtual Location app? Here’s what you should know. Follow the below step-by-step guide:
How to use the joystick for flexible and smooth GPS control
- The joystick feature is located in the teleport option at the upper-right corner in the 5th location.
How to simulate movement along the route using 2 spot location
- Go to “One-Stop mode” at the corner on top.
- Select the spot on the map you wish to go. The pop-up will tell you how far it is.
- Drag the slider to select how fast you wish to move. Choose between cycling, walking, and driving. Let’s take cycling for example.
- Enter a number to decide how many times you want to cycle between the two locations. Now click “Move Here”. Your character will start moving.
How to export and import GPX location
- Click the export button to store the path as a GPX file
- Import the shared GPX file to your Dr. Fone Virtual Location.
- Download it from another website. Now click the “Open” button.
- Wait some time to complete the import process. Once done, it is now ready for use.
How to teleport anywhere around the globe
Firstly download the Dr. Fone Virtual Location app. Though the app’s current version has an old interface, the functionality is cleared from any glitches. The latest interface will soon be available. Now click on the “Virtual Location” from the options and connect your Android/ iPhone to your computer, and hit “Get Started”.
Now in the window, find your existing location on your map with the help of the “center on” icon, which is located on the right sidebar. You will go to your current location upon clicking.
Now hit “teleport mode” at the top right. Enter your desired teleport located and hit the “Go” icon. Let’s visit Rome for this example.
You have successfully teleported to Rome. Click “Move Here”
Now your location is fixed to Rome.
How to add your route as a favorite
- On your virtual location screen, click on the five-star beside the route and add it to your favorite.
- Once you have added, hit the five-star icon again at the right-sidebar and locate the route you wish to use. Now hit the “Move” button and start walking along your favorite route again.

How to simulate movement along the route using multi-spot
- Choose multi-spot mode at the top right corner.
- The left sidebar tells how far it will travel to reach the location. Now set the moving speed and specify the number of times to cycle between the locations. Now click “Start Moving”.
You can watch the video below to fix iToolab AnyGo not working
Conclusion
If you are experiencing issues in the app and thinking iToolab AnyGo not working how to fix it? This is the answer. But if you are looking for an alternative, look no other than Dr.Fone - Virtual Location (iOS/Android). The app is very easy to use, teleports you in one click, and lets you use any location-based apps and games that are otherwise impossible to play.
 safe & secure
- Title: What are Location Permissions Life360 On Nokia G310? | Dr.fone
- Author: Ava
- Created at : 2024-08-01 21:33:49
- Updated at : 2024-08-02 21:33:49
- Link: https://fake-location.techidaily.com/what-are-location-permissions-life360-on-nokia-g310-drfone-by-drfone-virtual-android/
- License: This work is licensed under CC BY-NC-SA 4.0.