
Will iSpoofer update On Asus ROG Phone 7 | Dr.fone
Will iSpoofer update On Asus ROG Phone 7
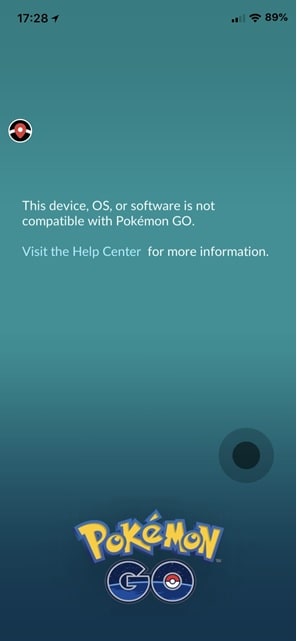
iSpoofer has been one of the most in-demand applications for changing your location while playing Pokemon Go. For all the right reasons, people wanted to stick to it to make sure that they catch the splendid Pokemon no matter where they are stationed. But the problems started when iSpoofer stopped working and there was no way anyone could continue to use or initiate iSpoofer update. When you open the application, you’d either see an error message, a subtle hint at an apology, or a pop-up that says that the app is under maintenance.


All of them are the alternative ways of saying - ‘We are not available anymore’. But will iSpoofer be back in the year 2021? Can we expect to revive our Pokemon catching abilities with the iSpoofer update? Even if it comes back, will it be available for Android and iPhone users? If not - then do we have any other application that we can use for this purpose? To get answers to all these questions, you have to continue to read this space.
Part 1: Why Can’t I update iSpoofer?

To put it very simple and upfront - The reason why you are unable to update iSpoofer is that it has been shut down. You can no longer use the existing application on the phone or download it from their website. Initially, when the app was down, people thought it could have been a Pogo update that is causing the error. So, they uninstalled the app and tried to download it again from the official website of the iSpoofer app. To their disappointment, the error message showed up even then. It took a while for everyone to accept that the application was no longer available and their desperate attempts to get it to work went in vain.
Undoubtedly, iSpoofer was a ‘game’ changer in the literal sense. You didn’t have to move from your place, you can catch some rare Pokemon and you get additional points for being the active wanderer. It’s of course a ‘cheat route’ to play the game and it has finally come to the notice of Niantic that a third-party app is being used to play the game.
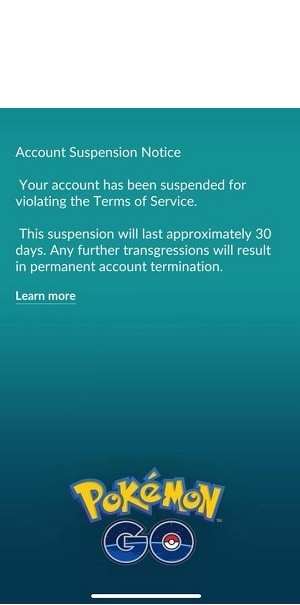
Now that didn’t go down well with the makers. The whole essence of Pokemon Go is to ‘Go Out’ from the house to explore the presence of Pokemons in the surroundings. So, having a third-party application is going to change a lot of things. Pokemon blacklisted the app.

The main target users for iSpoofer were the Pokemon Go players. With them gone, the revenue and usage of the app have reduced to a great extent and the creators have decided to pull the app out. And that is why you will no longer find a new version of iSpoofer that will be compatible with the game. The older version has anyway been blacklisted and won’t be of any use for the players and no iSpoofer update information so far
Even in 2021, there is no guarantee that the app will be back so it’s better to not keep the hopes up. The major business for the app could have been in 2020 when the world stayed home. However, if everyone was unable to download and update the app in the year 2020, there are very bleak chances of having it back in 2021.
Part 2: Is there a good alternative for iSpoofer?
There are quite a few ways to spoof your location in the Pokemon Go Game but then they narrow down to even smaller numbers when we start searching for the ‘reliable’ options. So, here are a few ways you can find a good alternative for iSpoofer.
VPNs - There are certain VPNs that offer in-built location spoofing features that might come in handy for playing games like Pokemon Go. They change your location on the rest of the internet so it might be a little tricky for the makers to catch the foul play.

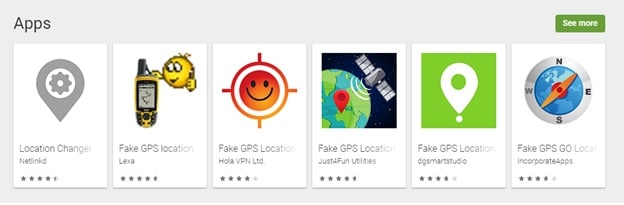
Google Play Store Apps - There are certain applications you will find on Google Play Store or even the App store that offer ‘Fake GPS’ changes. You simply have to search for ‘Fake GPS Location Changers’ and you get some options. Find the one with the best rating and this can work for a while. However, there is no guarantee of when they’ll abandon you.
 Power Tools add-on for Google Sheets, 12-month subscription
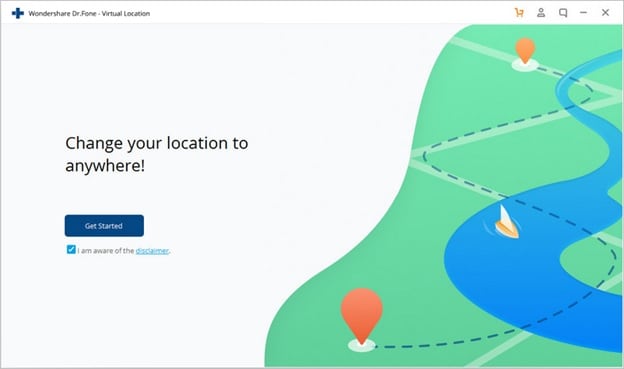
The most reliable option that you can go for is using - Dr. Fone. It is Wondershare’s master app that changes your location on the world map, the very same will reflect on all your devices, social media accounts, and internet searches. It’s very hard to detect that you’ve used a spoofer. This is how to use it -
Step 1 - You can use the Dr.Fone Location Spoofer for both Android and iPhones. So, starting off, you need to connect your Asus ROG Phone 7 (the phone) to your system - be it a laptop or a computer. You will be prompted to accept the ‘Terms and Conditions and then click on ‘Get Started’.
Step 2 - Once you are in, then the page will display a map and your location will be clearly mentioned. You need to go to the Teleport Mode you will find on the top right corner of the page. Enter your new location on the map.
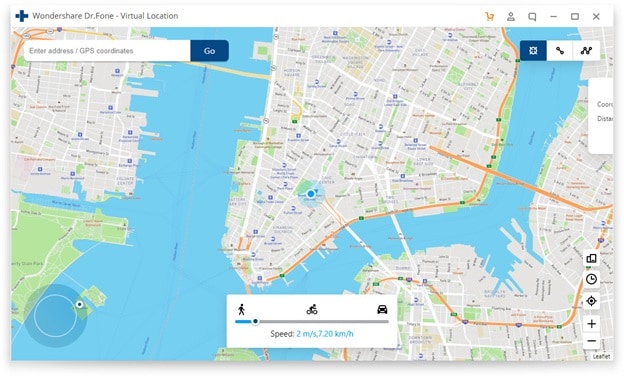
Step 3 - You can use the coordinates to get to the location or once the map displays, you can zoom in and move the pointer from one place to another and then click on ‘Move Here’ so that the location will be shifted from the previous one to new.

Step 4 - Now it’s easier to launch Pokemon Go but give it a few minutes before your changed location is completely registered and keep the new location realistic.
As in, you can’t jump from Russia to America in 2 hours, can you?
It’s quite easy to spoof your location for games like Pokemon Go using Dr. Fone and it will even stay undetected if you do it the right way. Also, the whole process to change the location hardly takes a few minutes, so you don’t have to spend time understanding how it all works. While you wait for the iSpoofer update (which may or may not come) you can use this in the meantime.
How to Use Life360 on Windows PC For Asus ROG Phone 7?
Life360 is an online platform that utilizes geo-location services to help users share their real-time location with friends and family. The app allows people to create a family group and stay connected to each other through features like chatting, sharing location, sending safety alerts, etc.
As of now, you cannot run Life360 on computer as it is only available for Android and iOS. Why? Because as opposed to a PC, one can easily carry their device everywhere! It means whether your kid is stuck in traffic and needs your help or your parents have lost their way back home, Life360 will instantly send you an alert on your device.
However, that doesn’t mean you cannot use Life360 on a PC. While it may seem a bit odd, there are a couple of methods that’ll allow you to get the Life360 app for Windows. In today’s guide, we are going to share some of these methods that’ll help you run the Life360 app on Windows.
So, without wasting another second, let’s dive straight into the guide.
Part 1: Why people seek to use Life360 on PC?
First things first; why would anyone want to use a family locator app like Life360 on their PC? Well, the truth is everyone has their own reason to get Life360 for PC. For instance, let’s say you are in the middle of an important project and don’t want to be bothered by alerts on your smartphone. However, you still don’t want to compromise with the safety of your family members.
In this situation, you can simply run the Life360 app on PC. This will allow you to directly keep track of the whereabouts of family members on your Windows system and you won’t have to constantly check your phone.
Life360 can also be used on a computer when your phone’s battery has completely drained and there’s no power outlet nearby. In this case, you can simply power-on your laptop, start the Life360 app and send your current whereabouts to family members.
Part 2: Is it possible to use Life360 on Windows PC?
Life360 is an extremely useful app for people who are always concerned about their closed ones. The app is basically designed with a vision to keep family members connected and safe. In addition to location sharing, the app also provides exclusive features like crash detection, place alerts, speed alerts, battery monitoring, etc.
The app also makes it easier for parents to monitor their child’s movement. Using the app, you can always know that your kids have safely reached school and back home. For any parent, knowing whether the kids are safe, is one less thing to worry about.
However, as we mentioned earlier, Life360 hasn’t been released for Windows yet. So, there’s no direct way to install and run the app on a Windows PC. While Life360 may release a dedicated Windows software in the future, as of now, you can only run it using the alternative methods.
These methods include:
Part 3: Use Life360 on Windows PC with Android emulator
The first and the most convenient way to run Life360 on computer is to use an Android Emulator. An emulator is basically a software that creates a virtual Android system on your computer. As a result, you’ll be able to run Android apps on your computer.
While there are dozens of Android emulators, Bluestacks seems to be the most popular and user-friendly option among all. Unlike other emulators, Bluestacks is easy to set up and use.
Here’s how you can run Life360 on a computer using Bluestacks Android emulator./
Step 1: Head over to Bluestacks official website and tap the download button.
Step 2: Open the installer and tap the “download” button. This will initiate the download process on your System.
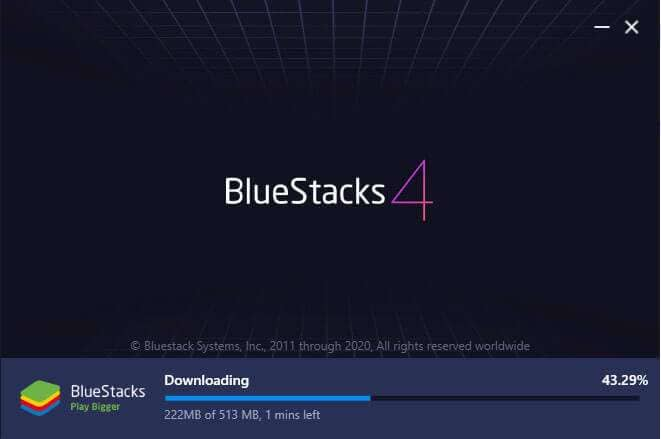
Step 3: Once the installation process completes, Bluestacks will start to boot. Keep in mind that the first boot may take some time, depending on your system configurations.
 Software Update Pro - Check and update software installed on your computer.

Step 4: In the home screen, tap the “Google Play Store” icon. You’ll be asked to sign-in with your Google account. Enter the right credentials and log-in to the Google Play Store.

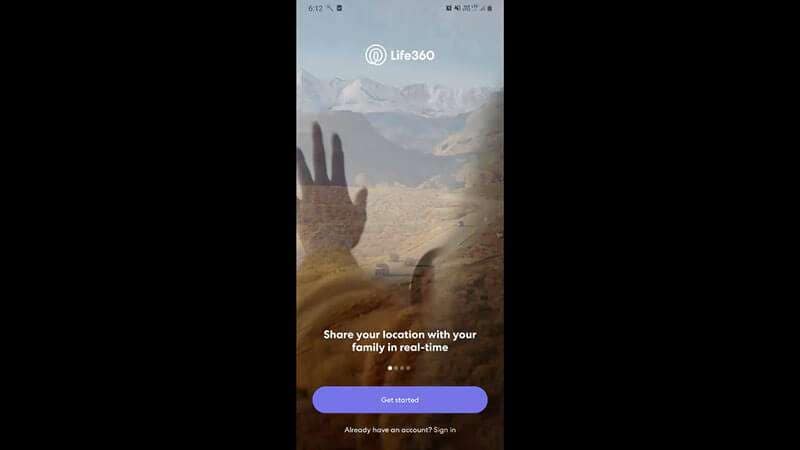
Step 5: In the top search bar, type-in Life360 and tap the “install” button to download the app.

WPS Office Premium ( File Recovery, Photo Scanning, Convert PDF)–Yearly

Step 6: Life360 is now installed on your computer. Open the app and enter your login details. You’ll now be able to run Life360 on your PC.

Part 4: Use Life360 by mirroring Android to Windows PC
While running an emulator is a great way to get Life360 on PC, it has its own set of challenges. For instance, running an Android emulator is not easy when you have a low-configuration PC. Emulators like Bluestacks requires high system configuration otherwise they take forever to load.
In this situation, we have another alternative for you to run Life360 on PC. You can simply mirror your Android to your Windows system. Mirroring the Android device will allow you to see its content on the PC itself.
Here’s how you can mirror the Android device on your PC.
Step 1: Make sure that Bluetooth is activated on both devices.
Step 2: On your Windows PC, open “Settings” and select the “Systems” tab.

Step 3: Choose the “Projecting to this PC” option in the left menu-bar and make sure that “Available Everywhere” is selected.

Step 4: If you’re running Android Pie or above on your device, scroll down to open notification drawer and select “Smart View” (or “Cast” in some devices). You’ll see your PC listed here. Tap the button to start Android mirroring.

Step 5: It may take some while for the connection to establish. Once it does, you’ll be able to cast your device screen onto your computer and you’ll be able to run life360 on your system.
Keep in mind that you’ll still require your device to navigate through the content on your computer. Any action that you perform on your device will be replicated on your computer screen as well.
Final Verdict
Life360 is probably among the top family locators for Android users. Apart from its extensive range of features, the app provides a user-friendly interface, which allows it easier for even elders to use the app without any issues. Even though there isn’t a dedicated Life360 software for Windows, you can follow the above-mentioned methods to run the Life360 on PC.
You Might Also Like
 Video Converter Factory Pro
Location-based apps
GPS spoof for dating apps
GPS spoof for social apps
Pokemon Go on PC
AR game tricks
Change Phone GPS Location Easily
- ● Teleport GPS location to anywhere
- ● Play AR games without moving
- ● Spoof Location on the popular Apps
Prevent Cross-Site Tracking on Asus ROG Phone 7 and Browser
Have you ever wondered why you get the advertisements of the websites you visited a few minutes ago on your social media sites? Here comes to Cross-Site Tracking, also termed CST, and it is a process where third-party cookies and sites track your browser history.
![]()
The CST process is like invading your privacy by collecting your browser history and personal information. So, to prevent these services, there are several ways by which you can cross-site tracking on your system as well as Asus ROG Phone 7 phone browsers. Keep reading to learn how to stop cross-site tracking on both Asus ROG Phone 7 and browser.
Part 1: Why Do We Need to Stop Cross-site Tracking?
Cross-site Tracking is all about collecting your browsing data and other information for advertising purposes. Though the process can prove convenient for many as it provides additional information about the products and services you have searched for and offers tailor-made content, it is intrusive and about breaching your privacy.
Cross-site tracking collects information about your browsing history. The third-party cookies also monitor the content type you have visited and your personal information, which is risky.
Besides invading privacy, the CST also poses several other issues. Based on your browsing history, additional content you have not asked for is loaded on your visited sites, slows down the page loading process, and puts an extra burden on your battery. Moreover, too much-unwanted content can interfere with the basic information you are looking for.
So, it is always better to prevent cross-site tracking for all the above and more reasons.
Further reading: A detailed guide on faking location in Mozilla Firefox . Don’t worry about your location privacy anymore!
Part 2: Can Private Browsing be traced?
Yes, private browsing can be traced. When you work in private browsing mode, the web browser does not save the browsing history, which means that anyone who uses your system will not check your online activities. But websites and cookies can track your browsing history as well as other information.
 HD Video Converter Factory Pro
Part 3: How to Disable Cross-website Tracking on Safari for iOS Devices?
Safari is the most commonly used platform by iOS users. So, to prevent CST for Safari on your iOS devices and Mac systems, below is a complete guide.
Deactivate Safari cross-website tracking for iPhone & iPad
Safari cross-site tracking can be prevented using the below steps on your iPhone and iPad.
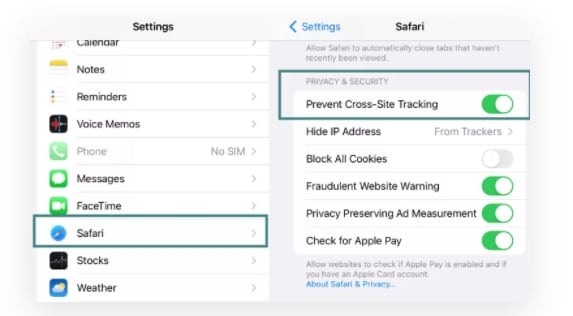
- Step 1. Launch the Settings app on your iOS device.
- Step 2. Find the Safari option by scrolling down the menu.
- Step 3. Move the slider to turn on “Prevent Cross-Site Tracking” under the PRIVACY & SECURITY option.
Deactivate Safari cross-website tracking for Mac
Use the steps below to turn off cross-site tracking on Safari on your Mac systems.
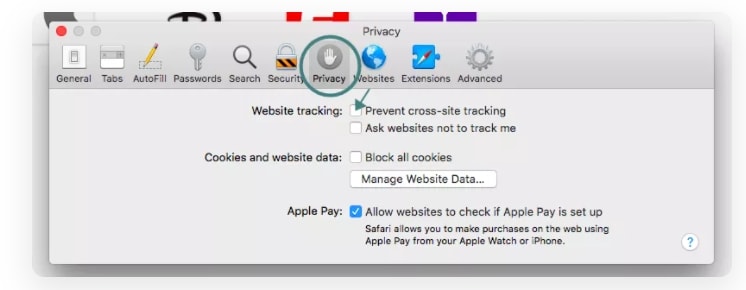
- Step 1. On your Mac system, open the Safari app.
- Step 2. Move to Safari > Preferences > Privacy
- Step 3. Enable the “Prevent cross tracking” option by clicking on the box next to it.
Part 4: How to Disable Cross-site Tracking on Google Chrome
Chrome is used widely on Windows systems and Android devices, and to prevent the CST from your browser, a detailed guide is given below.
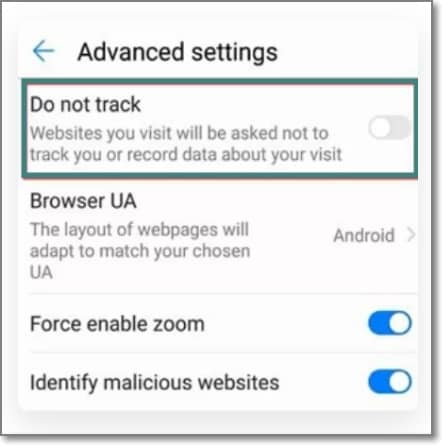
Enable “Do Not Track” on Google Chrome for Android
- Step 1. On your Asus ROG Phone 7, open the Chrome app.
- Step 2. At the right side of the address bar, click on the More option and choose Settings.
- Step 3. Choose the Privacy option from the Advanced tab.
- Step 4. Click on the “Do Not Track” option to turn on the feature.
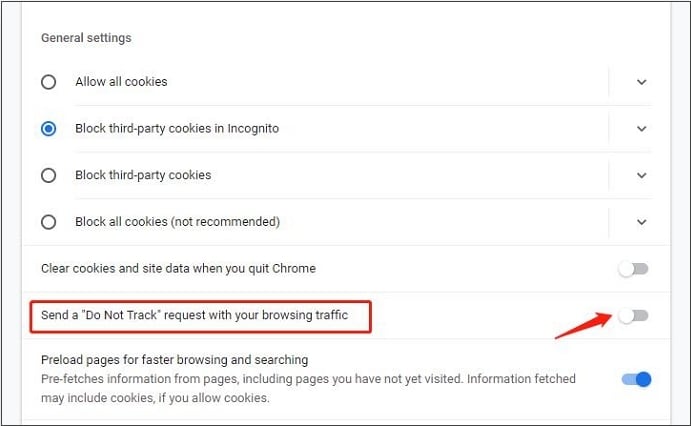
Enable “Do Not Track” on Google Chrome for Computer
- Step 1. Launch Chrome on your system, and from the menu at the upper-right corner, click on the Settings option.
- Step 2. From the “Privacy and Security” tab, choose the “Cookies and other site data” option.
- Step 3. Tap and enable the slider next to “Send a “Do not track” request with your browsing traffic.”
 Nero Burning ROM:
The ultimate burning program for all your needs!
Part 5: Recommended Solution: Fake a Location to Stop Cross-Site Location Tracking Using Dr. Fone
What if you let the sites and cookies track your phone location without worrying about your privacy? Yes, it can be done by spoofing your location. So, if you set a fake location while browsing the internet, you will not have to worry about cross-site tracking, as anyways, the sites and cookies will get misled browsing information that cannot harm you in any manner.
Setting a fake location on your iOS devices, a professional tool is needed, for we recommend Wondershare Dr.Fone - Virtual Location as the best tool. Using this Android and iOS-based software, you can set any fake GPS location on your device. The tool is simple to use and does not require any mastery of technical know-how.
Key features
- Simple tool to teleport to any GPS location in a single click.
- Allows simulating GPS movement along the route.
- All popular models of Android and iOS devices are compatible.
- Compatible with all location-based apps on your phone.
- Compatible with Windows and Mac systems.
Here is a video tutorial for you to take an overview of how to use Dr.Fone - Virtual Location to fake location on your Android and iOS devices.
 safe & secure
Steps to set fake location on your Android and iOS devices using DrFone-Virtual Location
Step 1. Download, install and launch the software on your Windows or Mac systems. On the main software interface, choose the Virtual Location option.

Step 2. Connect your iPhone or Android device to your system using a USB cable and then tap on the Get Started option on your software interface.

Step 3. A new window on the software interface will open, showing your connected phone’s real and actual location. If the detected location is incorrect, click on the “Center On” icon to display the right device location.

Step 4. Next, you need to activate the “teleport mode” and click o the 3rd icon at the upper-right corner.
Step 5. Next, you have to enter now the fake location to which you wish to teleport to at the upper-left corner. Click on Go.


Step 6. Finally, tap on the Move Here button and the new fake location for your connected Android or iOS device at the pop-up box.

Check the new location of your phone from the app.

Preventing Cross-site tracking can be done on different browsers and devices using the guides listed in the above parts of the article. Settings a fake location for your device using Dr. Fone-Virtual Location is another interesting way to prevent tracking your browsing history by spoofing the sites and cookies. Setting a fake place will not only avoid monitoring your browsing history but will also work with all location-based apps on your phone.
safe & secure
- Title: Will iSpoofer update On Asus ROG Phone 7 | Dr.fone
- Author: Ava
- Created at : 2024-08-01 22:03:06
- Updated at : 2024-08-02 22:03:06
- Link: https://fake-location.techidaily.com/will-ispoofer-update-on-asus-rog-phone-7-drfone-by-drfone-virtual-android/
- License: This work is licensed under CC BY-NC-SA 4.0.