
Will iSpoofer update On Itel P55+ | Dr.fone
Will iSpoofer update On Itel P55+
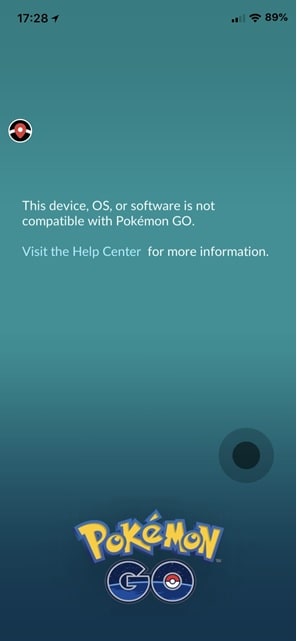
iSpoofer has been one of the most in-demand applications for changing your location while playing Pokemon Go. For all the right reasons, people wanted to stick to it to make sure that they catch the splendid Pokemon no matter where they are stationed. But the problems started when iSpoofer stopped working and there was no way anyone could continue to use or initiate iSpoofer update. When you open the application, you’d either see an error message, a subtle hint at an apology, or a pop-up that says that the app is under maintenance.

All of them are the alternative ways of saying - ‘We are not available anymore’. But will iSpoofer be back in the year 2021? Can we expect to revive our Pokemon catching abilities with the iSpoofer update? Even if it comes back, will it be available for Android and iPhone users? If not - then do we have any other application that we can use for this purpose? To get answers to all these questions, you have to continue to read this space.
Part 1: Why Can’t I update iSpoofer?
 Power Tools add-on for Google Sheets, Lifetime subscription

To put it very simple and upfront - The reason why you are unable to update iSpoofer is that it has been shut down. You can no longer use the existing application on the phone or download it from their website. Initially, when the app was down, people thought it could have been a Pogo update that is causing the error. So, they uninstalled the app and tried to download it again from the official website of the iSpoofer app. To their disappointment, the error message showed up even then. It took a while for everyone to accept that the application was no longer available and their desperate attempts to get it to work went in vain.

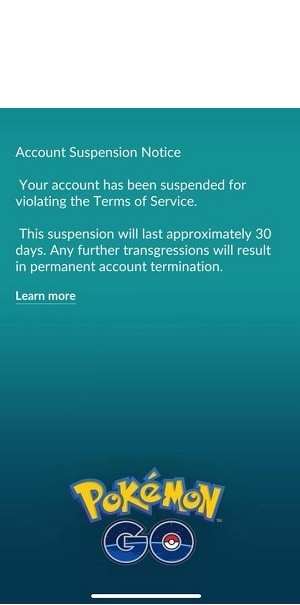
Undoubtedly, iSpoofer was a ‘game’ changer in the literal sense. You didn’t have to move from your place, you can catch some rare Pokemon and you get additional points for being the active wanderer. It’s of course a ‘cheat route’ to play the game and it has finally come to the notice of Niantic that a third-party app is being used to play the game.
Now that didn’t go down well with the makers. The whole essence of Pokemon Go is to ‘Go Out’ from the house to explore the presence of Pokemons in the surroundings. So, having a third-party application is going to change a lot of things. Pokemon blacklisted the app.
The main target users for iSpoofer were the Pokemon Go players. With them gone, the revenue and usage of the app have reduced to a great extent and the creators have decided to pull the app out. And that is why you will no longer find a new version of iSpoofer that will be compatible with the game. The older version has anyway been blacklisted and won’t be of any use for the players and no iSpoofer update information so far
Even in 2021, there is no guarantee that the app will be back so it’s better to not keep the hopes up. The major business for the app could have been in 2020 when the world stayed home. However, if everyone was unable to download and update the app in the year 2020, there are very bleak chances of having it back in 2021.
Part 2: Is there a good alternative for iSpoofer?
There are quite a few ways to spoof your location in the Pokemon Go Game but then they narrow down to even smaller numbers when we start searching for the ‘reliable’ options. So, here are a few ways you can find a good alternative for iSpoofer.
VPNs - There are certain VPNs that offer in-built location spoofing features that might come in handy for playing games like Pokemon Go. They change your location on the rest of the internet so it might be a little tricky for the makers to catch the foul play.
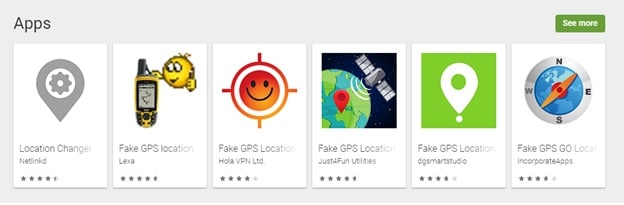
Google Play Store Apps - There are certain applications you will find on Google Play Store or even the App store that offer ‘Fake GPS’ changes. You simply have to search for ‘Fake GPS Location Changers’ and you get some options. Find the one with the best rating and this can work for a while. However, there is no guarantee of when they’ll abandon you.
The most reliable option that you can go for is using - Dr. Fone. It is Wondershare’s master app that changes your location on the world map, the very same will reflect on all your devices, social media accounts, and internet searches. It’s very hard to detect that you’ve used a spoofer. This is how to use it -
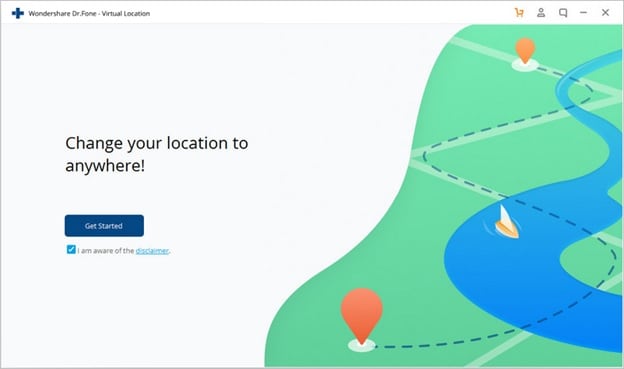
Step 1 - You can use the Dr.Fone Location Spoofer for both Android and iPhones. So, starting off, you need to connect your Itel P55+ (the phone) to your system - be it a laptop or a computer. You will be prompted to accept the ‘Terms and Conditions and then click on ‘Get Started’.
Step 2 - Once you are in, then the page will display a map and your location will be clearly mentioned. You need to go to the Teleport Mode you will find on the top right corner of the page. Enter your new location on the map.
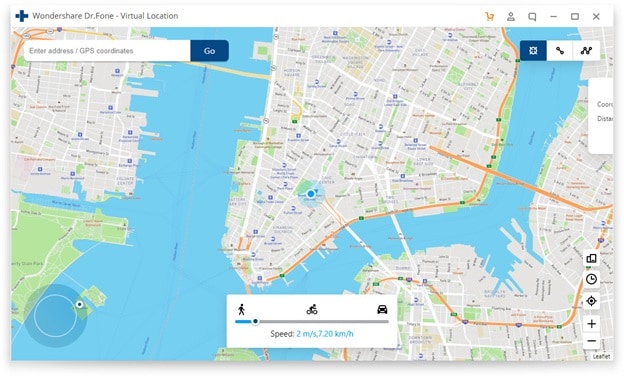
Step 3 - You can use the coordinates to get to the location or once the map displays, you can zoom in and move the pointer from one place to another and then click on ‘Move Here’ so that the location will be shifted from the previous one to new.


Step 4 - Now it’s easier to launch Pokemon Go but give it a few minutes before your changed location is completely registered and keep the new location realistic.
As in, you can’t jump from Russia to America in 2 hours, can you?
It’s quite easy to spoof your location for games like Pokemon Go using Dr. Fone and it will even stay undetected if you do it the right way. Also, the whole process to change the location hardly takes a few minutes, so you don’t have to spend time understanding how it all works. While you wait for the iSpoofer update (which may or may not come) you can use this in the meantime.
Fake the Location to Get Around the MLB Blackouts on Itel P55+
MLB games are the most awaited event for game enthusiasts. The good news is that MLB has started on Thursday, April 7. Moreover, the final MLB match will be played on Sunday, October 2. Therefore, there will be around 162 games in the MLB season which is very exciting for the fans worldwide. Additionally, 30 MLB teams are playing this season.
However, unfortunately, there will be MLB TV blackouts during the games. It is frustrating for the fans that adore baseball a lot. Does it mean we should stay here and do nothing? Of course not. We are here to give you the solution to bypass MLB blackouts. In this article, we are about to recognize the following topics:
Part 1: Bypass MLB Blackouts Restrictions from Anywhere
The reason for the MLB blackout is not a complicated one. First, the cable providers want to broadcast MLB on their local networks exclusively, and the other reason for the blackout is MLB’s desire to have a maximum number of fans in the stadium to attend the match. However, not all fans want to come out of their homes to watch a match.
Use Dr.Fone Virtual Location to Bypass MLB Blackouts on Itel P55+
Luckily, Dr.Fone provides a virtual location feature that encourages users to teleport the GPS location to anywhere they want with a single click. You can travel to any place without leaving your home. This will enable you to bypass MLB blackouts and assist you in watching the match easily.
With Dr.Fone - Virtual Location, you can now spoof your location on major applications, including Twitter, WhatsApp, Google Map, and Bumble.

Teleport Anywhere with Dr.Fone - Virtual Location:
To bypass the MLB blackout restrictions from your location, you can follow the given steps proposed by Dr.Fone - Virtual Location solution:
Step 1: Use Virtual Location Feature
The first step requires downloading and installing Dr.Fone – Virtual Location on your computer. After that, launch the program. Now, select the feature of “Virtual Location” from Dr.Fone’s main window.

Step 2: Connect your Device
Then connect your phone to the PC. If you are an iPhone user, you can connect it with Wi-Fi without a USB cable after being connected once. After that, tap on the “Get Started” button.
 PCDJ Karaoki is the complete professional karaoke software designed for KJs and karaoke venues. Karaoki includes an advanced automatic singer rotation list with singer history, key control, news ticker, next singers screen, a song book exporter and printer, a jukebox background music player and many other features designed so you can host karaoke shows faster and easier!
Step 3: Activate the Teleport Mode
You will now be able to see your current location on the map. If you cannot find it, tap on the “Center On” icon on the right side of the screen. Now, enable the “Teleport Mode” through the first icon on the upper right side.


Step 4: Set your Location
Enter the place you want to convert to, and press the “Go” button. Next, click on the “Move Here” icon in the popup dialogue. Your location is now changed to your desired place. Now, you can access MLB despite the blackouts at your original location.

Part 2: Use VPN to get Around MLB TV Blackouts
Another way to turn around the TV blackouts on MLB is to use VPN services. With a VPN, you can extend your private network across the public network and create privacy and anonymity. Here, we have introduced 3 top-notch VPN services that will bypass MLB blackouts:

1. ExpressVPN
ExpressVPN has a blazing-fast speed in providing a secure and private connection on your Windows and Mac devices. It has been rated the #1 VPN on TechRadar, TechTimes, and CNN. It enables people to break all the barriers and watch MLB peacefully while protecting their data and keeping a private activity.
With ExpressVPN, you can keep your IP address and location private while enjoying the broadcasting of MLB in another region.

Pros of ExpressVPN
- ExpressVPN has the fastest speed on all server locations. In addition, you will not face connectivity issues while using this VPN to watch the MLB match.
- The VPN has high-security standards, which creates a safe and secure space for users. Moreover, it also has an inspected zero-logs policy.
- It has an easy-to-use and stylish interface. Anyone can understand the functioning of the application and use it.
Cons of ExpressVPN
- It is not free of cost. ExpressVPN is more expensive than other premium VPNs available.
| Pricing | |
1 Month | $12.95 |
12 Months | $8.32/Month |
6 Months | $9.99/Month |
2. NordVPN
You can now enjoy a private and secure connection and watch MLB baseball matches without any restrictions with NordVPN. Because of NordVPN, we no longer have to choose between security and speed. There is no hassle in using NordVPN. You just need to download the application on your PC, log in, and connect to any network.
Moreover, NordVPN is equipped with Threat Protection Lite Technology, which saves users from visiting malicious websites and cyber threats.


Advantages of NordVPN
- NordVPN provides a Kill Switch feature. So, if your NordVPN server goes down, Kill Switch will help you stop all the internet activities and communications.
- NordVPN has excellent encryption standards providing 256-bit Advanced Encryption. It further uses PGP keys to protect customers’ account details.
- The Customer Service of NordVPN is beneficial. You can ask any queries or inform us about your problems, and the Support team will quickly help you.
Disadvantage of NordVPN
- The application of NordVPN is a little slow, and users face poor connection problems. It may bother customers who want to watch live MLB matches.
| Pricing | |
1 Month | $11.99 |
1 Year | $4.99/Month |
2 Year | $3.99/Month |
3 Year + 3 Months | $2.29/Month |
3. CyberGhost VPN
With CyberGhost VPN, you can enjoy the live broadcast of MLB on your Windows or Mac device. CyberGhost VPN relieves people who want to hide their identity and surf securely on the internet. Moreover, you can watch MLB matches from any location worldwide. CyberGhost VPN does not keep traces of any user activity.
You don’t have to instantly subscribe to their services, as you can avail of the free 7-day trial and experience the features.

Plus-Points of CyberGhost VPN
- It has a stable speed, and some servers comprehend potential. Of course, VPNs shave off some bandwidth, but CyberGhost VPN still works with a decent speed.
- It is very suitable for people that want to connect with CyberGhost VPN for a long time.
- With CyberGhost VPN, you also get the guarantee of receiving back your money in 45 days. After that, you can try the service and make a refund if you don’t want the service anymore.
Drawback of CyberGhost VPN
- The servers of CyberGhost VPN are overloaded, resulting in poor speed for all the users.
| Pricing | |
1 Month | $12.99 |
1 Year | $4.29/Month |
2 Year | $3.25/Month |
3 Year + 3 Months | $2.29/Month |

Part 3: FAQs
1. Is it legal to use VPN to stream MLB TV?
If you use a VPN to watch sports content, it is not an unlawful action, and you will not go to jail for this. However, you should consider avoiding doing this because it’s against the MLB rules, and you will be disobeying them if you do this.
2. Are there any alternatives to MLB TV?
You can watch the baseball matches on different streaming websites, including Peacock, YouTube TV, Hulu + Live TV, Sling TV, etc.
 Any DRM Removal for Mac: Remove DRM from Adobe, Kindle, Sony eReader, Kobo, etc, read your ebooks anywhere.
3. Can MLB TV detect VPN?
No, the MLB TV will not be able to detect the VPN because VPN masks your location and hides your real identity from everyone on the internet. The only condition is that the IP address provided by the VPN service should not be included in the MaxMind database.
4. Are regional blackouts grounded on billing address or the location?
Regional blackouts are based on the physical location of the user. Therefore, if you want to see the teams that are subjected to the blackout at your location, you should enter the ZIP code of your area on MLB.com.
Conclusion
The article concludes about great assistance in dealing with regional blackouts on MLB TV. If this is frustrating you, then don’t worry anymore. With the assistance of Dr.Fone Virtual Location, you can teleport your location to any region to bypass the baseball blackouts on your phone. With MLB TV VPN, you can also create a private connection and hide your IP address to bypass the MLB Tv blackouts on PC.

A Detailed Guide on Faking Your Location in Mozilla Firefox On Itel P55+
Mozilla Firefox is one of the most famous browsers known for its security. Like other browsers, it also tracks your location and shares it with websites. Although Firefox asks for your permission before sharing your location, it can still be a privacy concern for many people. For many reasons, disabling your location is disadvantageous, so Firefox spoof location can resolve your concerns.
It is not hard to change or spoof your location in Mozilla Firefox. Stick with this article to learn different ways to fake a location in Firefox on devices.


Part 1: Preparations Before Spoofing Your Location in Firefox
Before starting with Firefox location spoof, you must be aware of how the platform and websites determine your location. There are many ways a browser can detect your location. It includes services like IP addresses, GPS tracking, Wi-Fi, and Bluetooth. The main tool browsers and websites use to determine your location is HTML5 Geolocation API.
1. Basic Understanding of the HTML5 Geolocation API
Basically, a browser API called HTML5 Geolocation API is used by websites and browsers to detect a user’s location using longitude and latitude coordinates. It is strictly based on user permissions for detecting location. That means you will receive a permission prompt whenever a website or browser uses it to detect your location. If you refuse the permission, they can’t use this API for location determination.
2. How Does HTML5 Geolocation Work?
HTML5 Geolocation determines your location using the longitude and latitude coordinates with the help of GPS. If your device doesn’t have GPS tracking, it uses Wi-Fi and cell tower signals to detect the Itel P55+ device’s location. The location detected by HTML5 Geolocation is highly accurate with accuracy up to street level. Due to its high precision in locating users, it can create privacy issues for users.
Part 2: How to Fake Your Location in Mozilla Firefox on Computers
Many ways are available for you to fake or disable your desktop location in Mozilla Firefox to address your privacy concerns. You can either disable or change the location in the browser or use a third-party app or extension. Below, we have explained the three most common ways to fake or disable your location in Firefox.

Method 1: Disable Geolocation in Firefox
If you want to stop websites from accessing your location from Mozilla Firefox, you can disable the geolocation feature using Firefox Settings. The process to disable your location in Mozilla Firefox is covered using these steps:
Step 1: Open Mozilla Firefox on your computer to disable its location. Click the “Three Vertical Bars” icon to select “Settings.” Now, tap “Privacy & Security” from the left sidebar and navigate to “Permissions.”

Step 2: Click “Settings” in front of “Location” to manage the location settings. It will open a window with a list of all the websites that can access your location. Depending on your needs, you can choose between “Remove Web Site” or “Remove All Web Sites” to remove their location access.


Step 3: If you want to block the websites from accessing your location indefinitely, you can select the “Block new requests asking to access your location” option. Once selected, click “Save Changes” to disable your geolocation on Firefox.


Method 2: Manually Change Your Firefox Location
Disabling your location on Mozilla Firefox can stop websites from accessing your location. It also means websites with location-based services will no longer work. That’s why it is better to spoof the location on Firefox rather than disabling it. Firefox allows you to manually change your location using its advanced settings. The steps required for this process are given below:
Step 1: Once Mozilla Firefox is open, type “about:config” and press Enter. You will see a warning screen as you modify advanced settings. You have to click on the “Accept the Risk and Continue” button to proceed further.


Step 2: First search for “Geo.enabled,” and when it appears, toggle its value from “True” to “False” to disable geolocation. To spoof your location, search for “geo.provider.network.url” and press the “Pen” icon to edit it.

Step 3: You can enter your desired location using its latitude and longitude coordinates. The format to enter your location coordinates should be:
“data:application/json,{“location”: {“lat”: LATITUDE VALUE, “lng”: LONGITUDE VALUE}, “accuracy”: 27000.0}.”
Once done, your geolocation will be changed to your desired location.

Method 3: Use The Location Guard Firefox Extension
Another way you can protect your location from websites is to use the “Location Guard “ add-on in Mozilla Firefox. It is generally recognized as an extension, also available in the Add-Ons Store of Firefox. The steps to add “Location Guard” and use it to alter your location are following:
Step 1: Click on the “Three Vertical Bars” icon from the top left corner of your Firefox and select “Add-ons and themes.” Tap “Extensions” from the left sidebar and search for “Location Guard” in the Add-Ons Store. Once located, click “Add to Firefox” to add it to your browser.
 Greeting Card Builder
Step 2: You can choose between two options to protect your location’s privacy. Using the “Privacy Levels” option, you can select a privacy level and location range to add noise when a website tries to locate you. It stops websites from detecting your accurate location, though they can still locate the general area.

Step 3: Using its “Fixed Location” feature from the left sidebar, you can change your location. Here, select any location from the map by placing the “Marker” on it to change your browser’s location.

Part 3: How to Fake Your Location in Mozilla Firefox on Phones
It is not only on computers where you can use Firefox fake location but also on smartphones. You can easily disable or change your Firefox location on your iOS or Android device. Three different methods to disable or change the location in Mozilla Firefox are summarized below:
 DLNow Video Downloader
Method 1: Disable Geolocation Sharing on the Firefox Browser
If you use the Firefox browser on your phone, it allows you to disable your location using a couple of simple steps. Disabling location services for the Firefox browser differs on Android and iOS devices. A detailed step-by-step process for disabling location is given below for both platforms:
On Android
Step 1: Open the Firefox browser on your phone and press the “Three Dots” icon from the bottom right corner. Select “Settings” from the menu and navigate to the “Privacy and Security” section.
 PearlMountain Image Converter
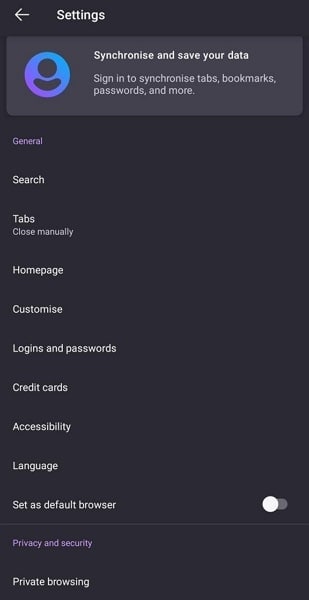
Step 2: Now, tap “Site Permissions” and select “Location.” In the “Location” option, select “Blocked” to disable the location access on the Firefox browser.

On iPhone
Step 1: On your iPhone, open “Settings” and scroll down to “Firefox.” After locating the app, select it and press “Location” on the next screen.
 PDF application, powered by AI-based OCR, for unified workflows with both digital and scanned documents.
Step 2: In the “Location” menu, you can select “Never” to completely disable the location access for the Firefox browser. To only stop Firefox from detecting your accurate location, turn off the toggle of the “Precise Location” option.


Method 2: Spoof Your Location in Firefox Using Dr.Fone - Virtual Location
Nowadays, many websites work with the help of location-based services. Disabling geolocation from the Firefox browser means they won’t work. It means you need a tool that can change your Firefox location without affecting your favorite platforms.
Wondershare Dr.Fone - Virtual Location provides you with an excellent way to do Firefox location spoofing. You will not have to worry about websites or apps detecting your location as fake when using this tool.

Dr.Fone - Virtual Location
1-Click Location Changer for both iOS and Android
- Teleport from one location to another across the world from the comfort of your home.
- With just a few selections on your computer, you can make members of your circle believe you’re anywhere you want.
- Stimulate and imitate movement and set the speed and stops you take along the way.
- Compatible with both iOS and Android systems.
- Work with location-based apps, like Pokemon Go , Snapchat , Instagram , Facebook , etc.
3981454 people have downloaded it
Main Features of Dr.Fone - Virtual Location
- Dr.Fone - Virtual Location allows you to play location-based games. It includes games like Pokémon Go, Minecraft Earth, and Jurassic World Alive, all from the comfort of your bed.
- If you use a dating app like Tinder or Bumble, you can increase your likes and matches using this tool.
- You can bypass the geo-restriction of apps and enjoy their content with the tool’s help.
Steps Required for Spoofing Location in Firefox via Dr.Fone - Virtual Location
Using Dr.Fone- Virtual Location to spoof your location in Mozilla Firefox is simple and quick. You will need to install Dr.Fone on your computer and follow these steps for location spoofing:
Step 1: Install Dr.Fone on Your System
Download and install Dr.Fone on your computer and connect your phone to it. Access Dr.Fone, select “Virtual Location,” and click “Get Started” on the next screen to begin the process.
Step 2: Activate the Teleport Mode on Dr.Fone
After clicking “Get Started, “ a map will open where you must select your original location. It can be done using the “Center On” icon from the right sidebar. To choose your fake location, you will need to activate “Teleport Mode” from the top right corner.
Step 3: Spoof Your Location in Firefox
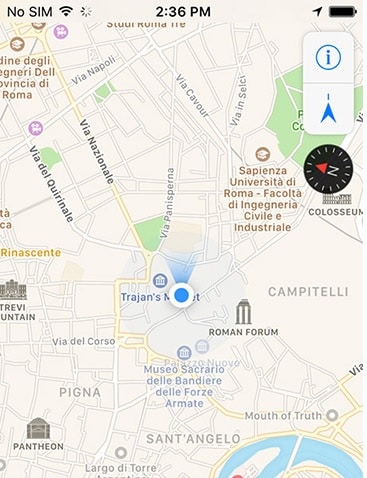
Enter your desired fake location in the provided space and press “Go” once the mode is activated. It will take you to the entered location, where you need to select “Move Here” to complete the process. You can confirm the location spoof by opening any location-based app on your phone.
Method 3: Change Your Location in Firefox Using ExpressVPN
Browsers like Mozilla Firefox tracks your location by using your IP address. You can use a VPN to spoof your IP location to protect your actual location from websites. ExpressVPN is a VPN that is available for both Android and iOS devices. You can use these steps to change your location using ExpressVPN:
Step 1: Install ExpressVPN on your phone and create an account for it. If you are already a user of ExpressVPN, then log in with your account.
Step 2: Select your desired fake location from the “Smart Location” tab after logging in. Once a location is selected, press “Connect” to change to the desired fake location.

Conclusion
In today’s digital world, you have to compromise your privacy to some extent. However, it doesn’t mean that you should not try to use tools available to you to protect your privacy to the limit. Dr.Fone - Virtual Location solves your concerns regarding location sharing with ease. With this tool, you can fake location in Firefox and still enjoy all the features and services offered by location-based websites and apps.
- Title: Will iSpoofer update On Itel P55+ | Dr.fone
- Author: Ava
- Created at : 2024-08-01 22:04:30
- Updated at : 2024-08-02 22:04:30
- Link: https://fake-location.techidaily.com/will-ispoofer-update-on-itel-p55plus-drfone-by-drfone-virtual-android/
- License: This work is licensed under CC BY-NC-SA 4.0.